|
|
|
|
|
Point Up |
|
This part of the tutorial will present the steps for weaving the “point up” arrowhead pattern when the warp strand that is to the right of the middle of the work-piece is in the top layer of the shed.
[NOTE] Before starting be sure that you are proficient in the configuration used to produce the pattern with out beads. [NOTE] The weaving for each row will start at the edge of the work-piece. [NOTE] The interlocks on the right side of the work-piece are made with warp strands from the bottom layer of the shed. [NOTE] The interlocks on the left side of the work-piece are made with warp strands from the top layer of the shed. |
| Start Tutorial |
|
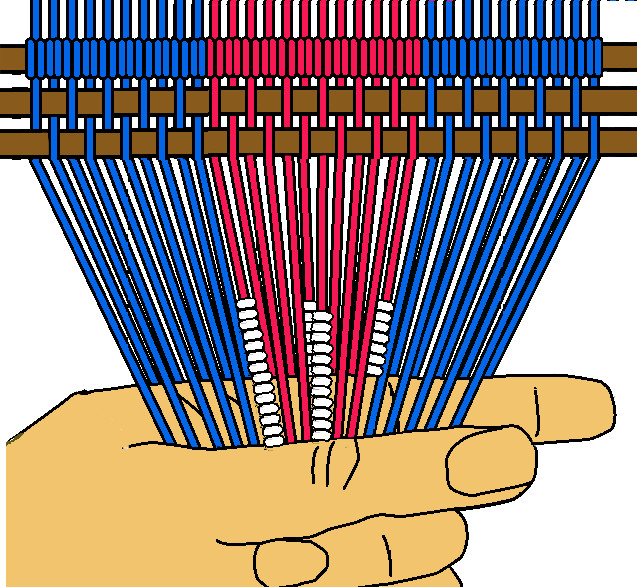
Headstick Setup Configuration
The warp strand that is to the right of the middle of the work-piece is in the top layer of the shed. There are foure arrowhead colored warp strands that are bead carrier strands.
and the two side warp strands. |
[figure-1]
|
| Previous | Next |
|
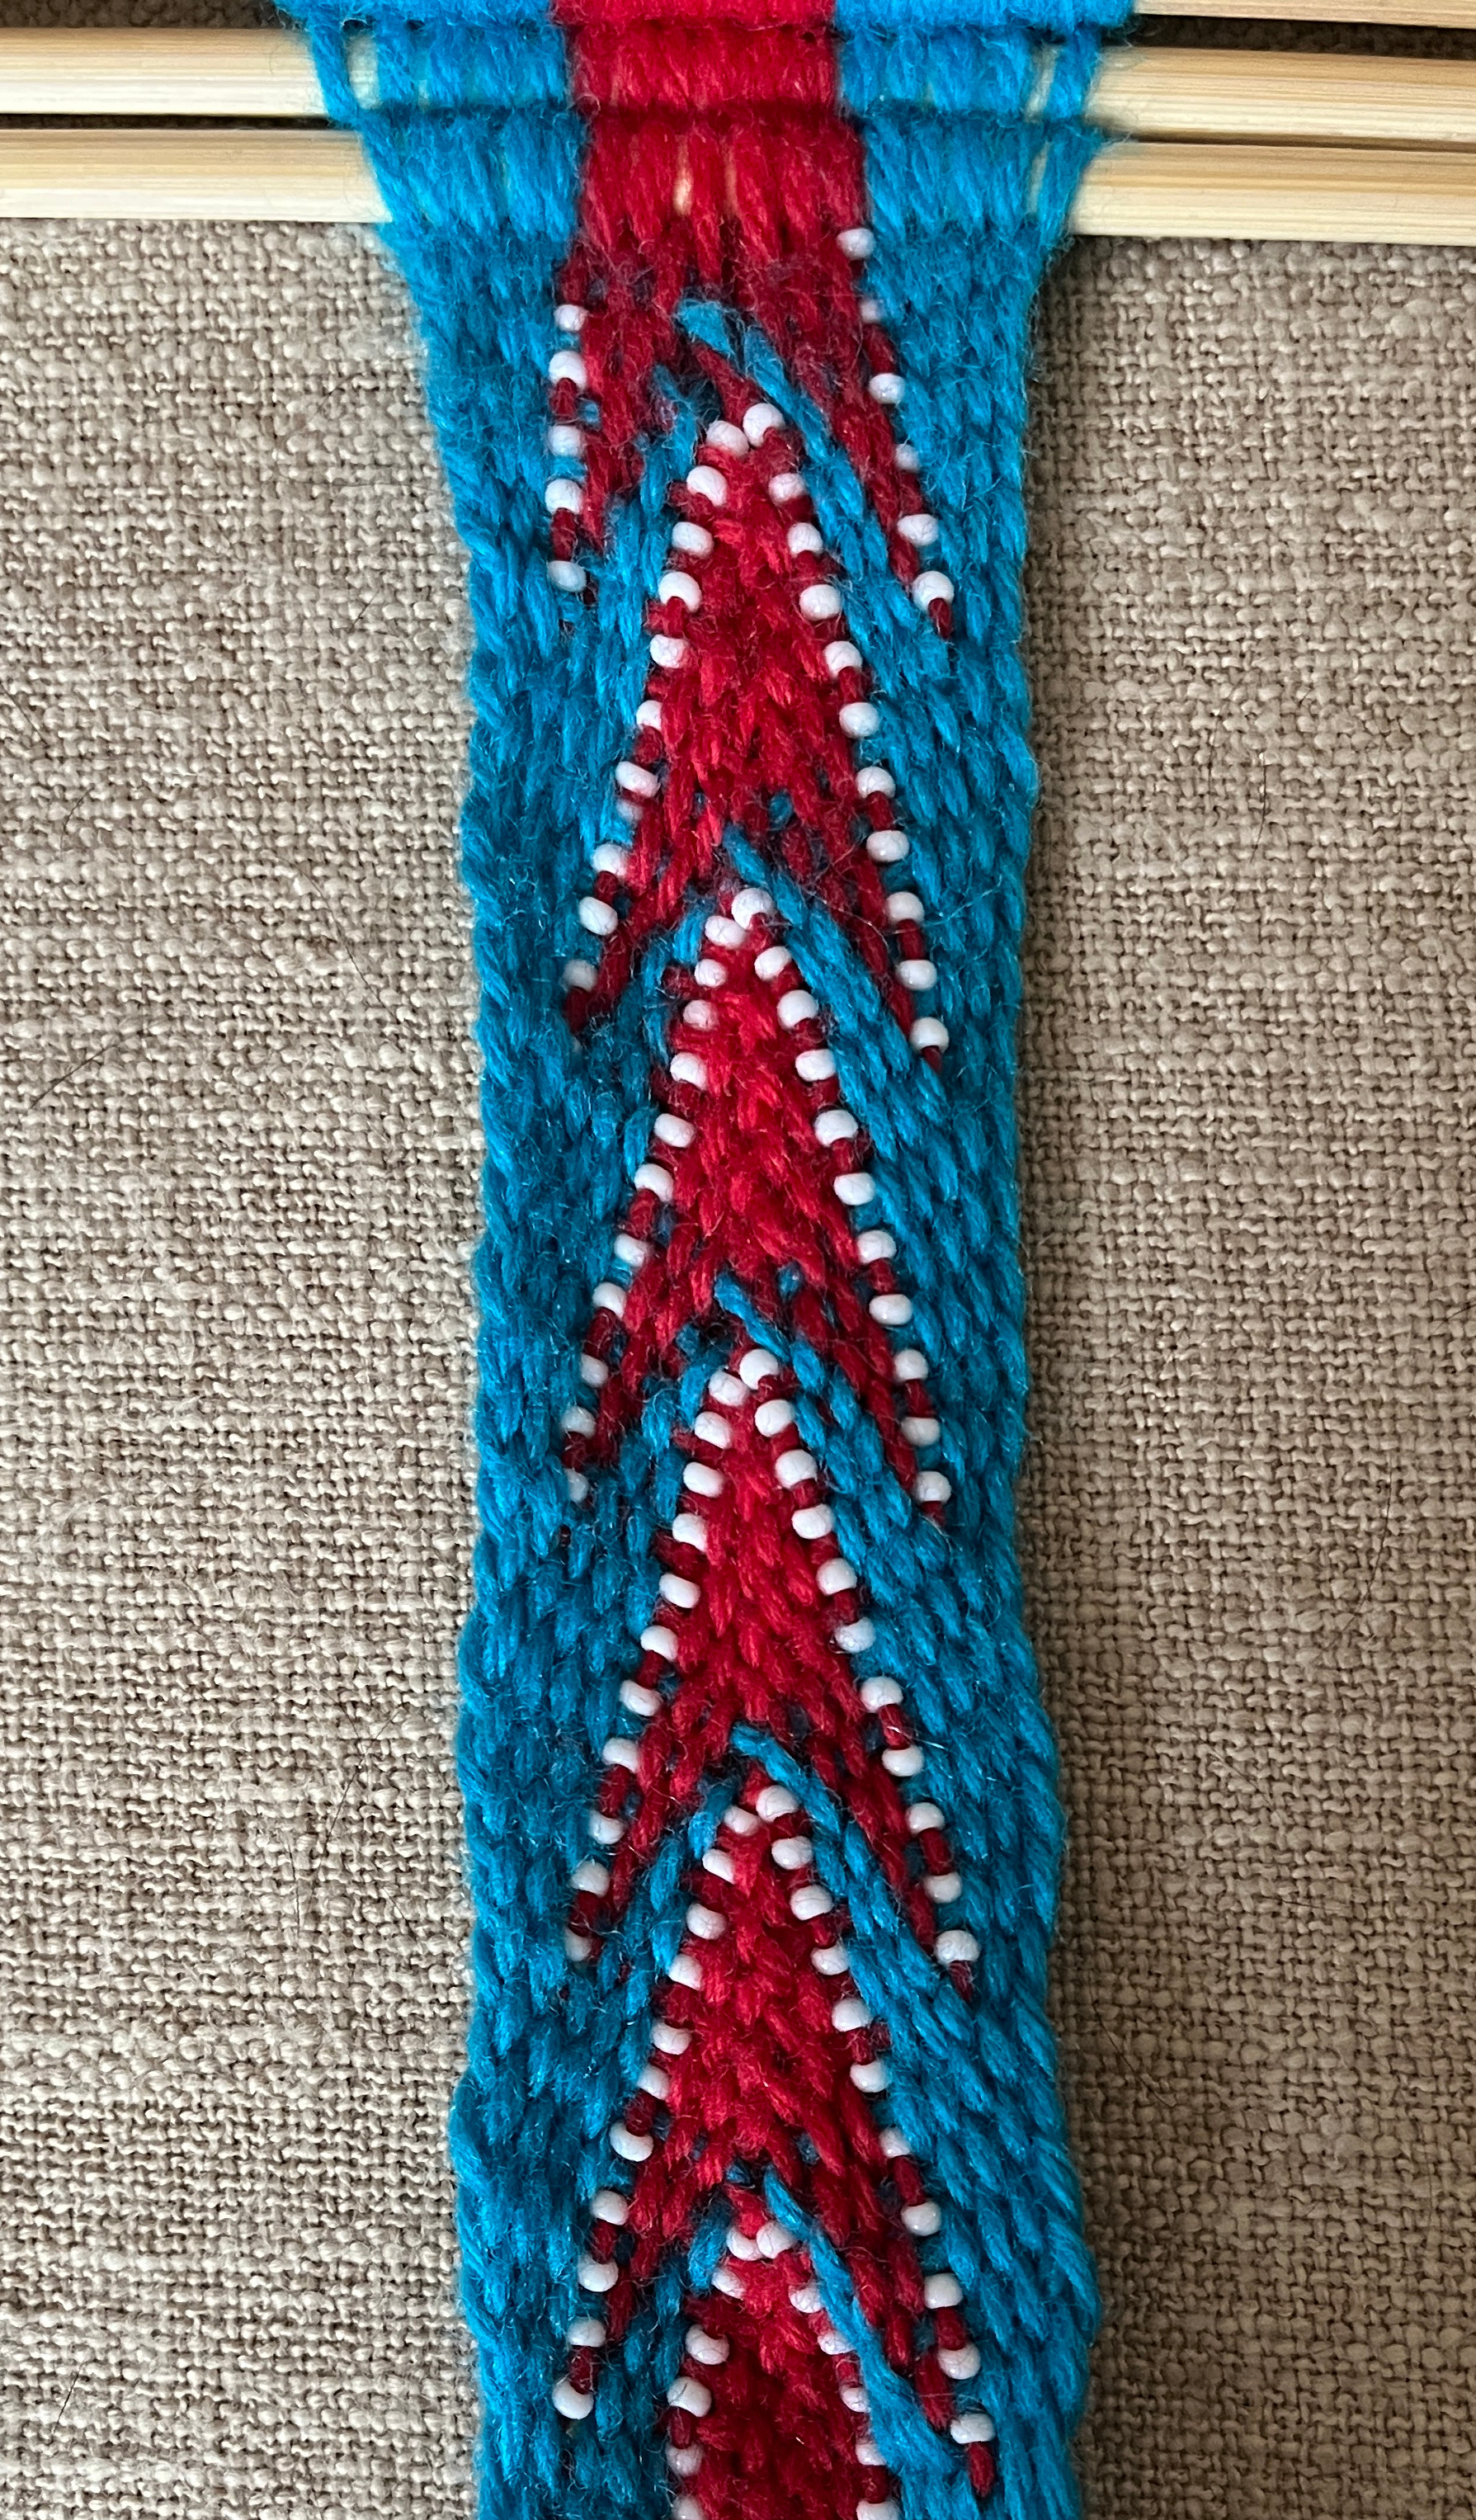
[OBSERVE] When the project is completed, there is an equal number of beads on each side of the arrow point.
This is because there is one bead for each time the warp bead carrier strand crosses a weft strand. The beads are visiable on both sides of the workpiece. |
[figure-2]
|
| Previous | Next |
|
[NOTE] The weaving is based on the procedure for weaving with the warp strand to right of middle of the work-piece in the top layer of the shed.
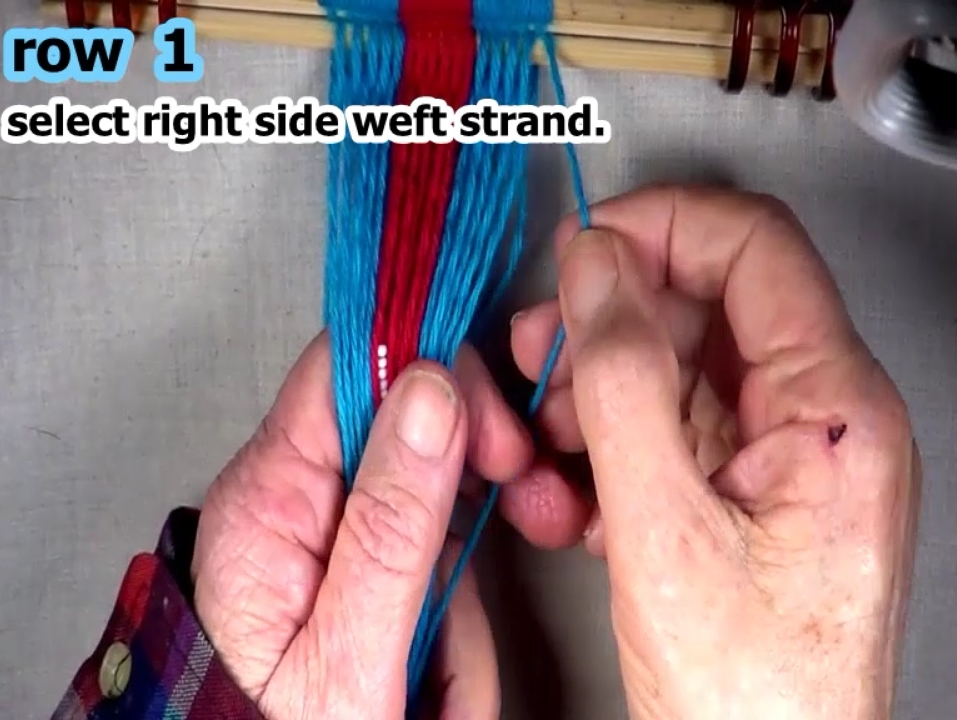
Select the row 1 right side weft strand.
[NOTE] When starting a row of weaving, each row's right side weft strand is the first warp strand on the right hand edge of the work piece. |
|
| Previous | Next |
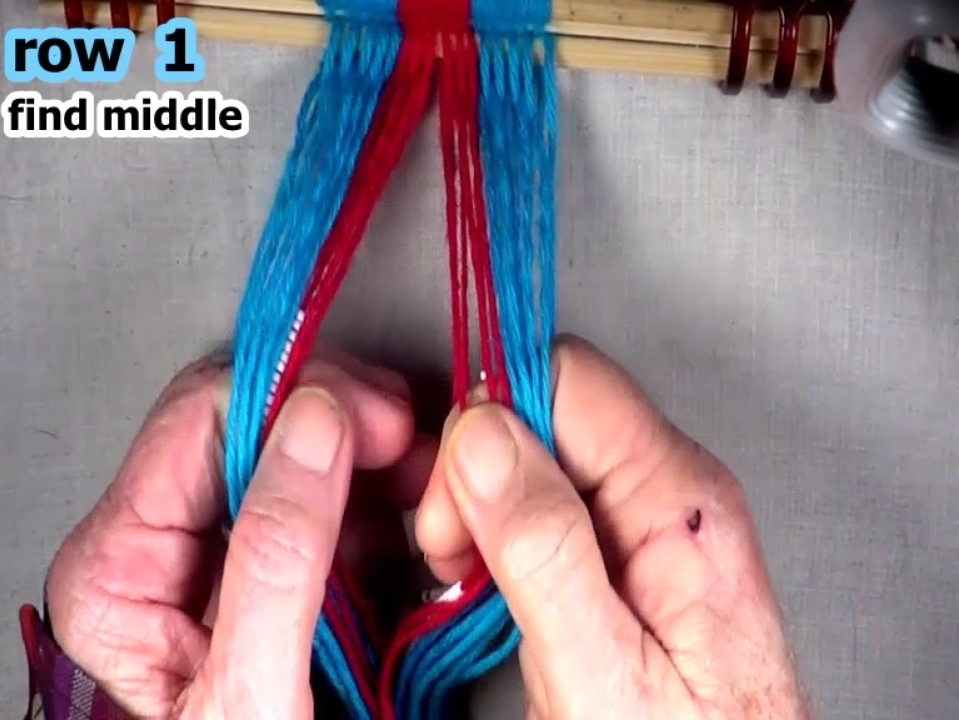
Find the middle of the work piece.
|
|
| Previous | Next |
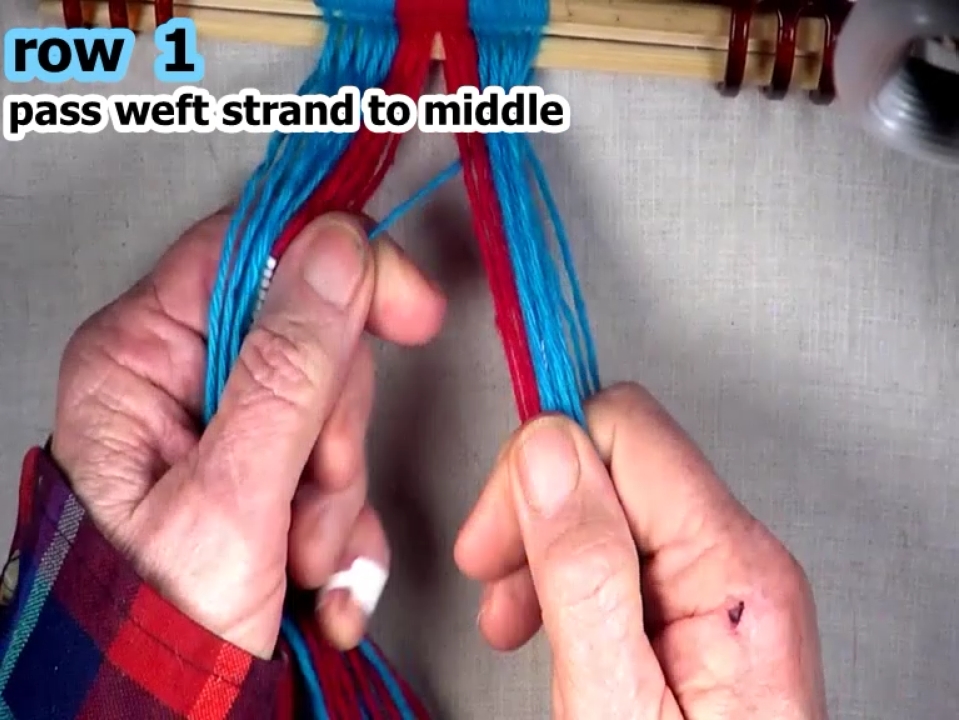
| Pass the weft strand through the right hand side open shed to middle of the work piece. |
|
| Previous | Next |
|
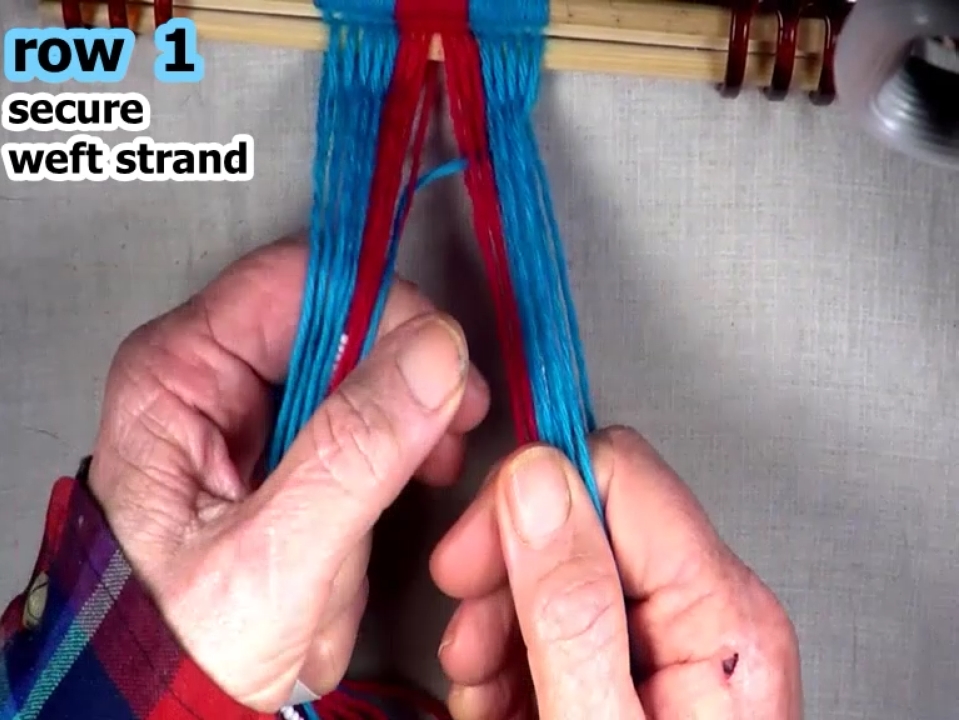
Secures the weft strand.
Fold the weft strand up over the carrier strand that is to the right hand side of the middle of the work-piece. Place the weft strand in the top layer of the shed. Place the bead carrier strand in the bottom layer of the shed. |
|
| Previous | Next |
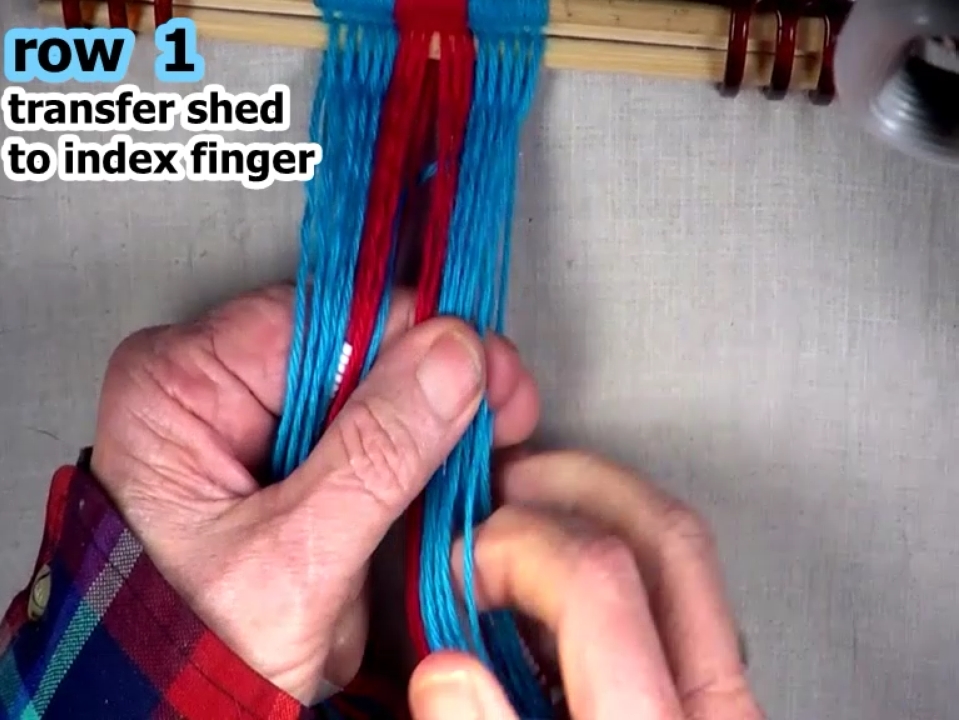
| Transfer the right hand side shed to the left hand index finger. |
|
| Previous | Next |
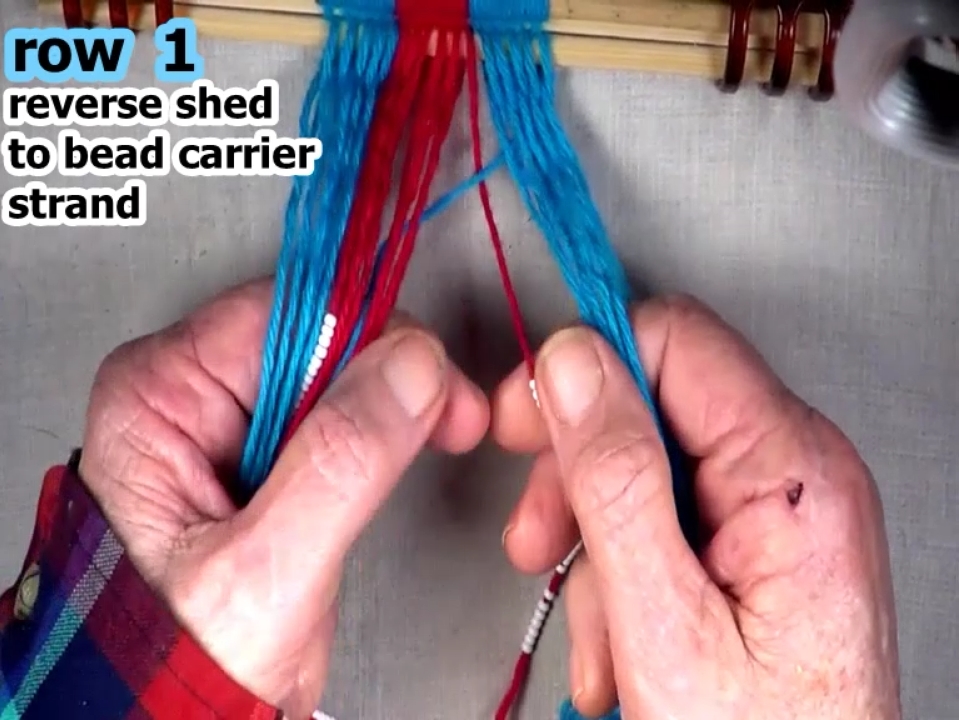
| Reverse the right hand side shed to the bead carrier strand. |
|
| Previous | Next |
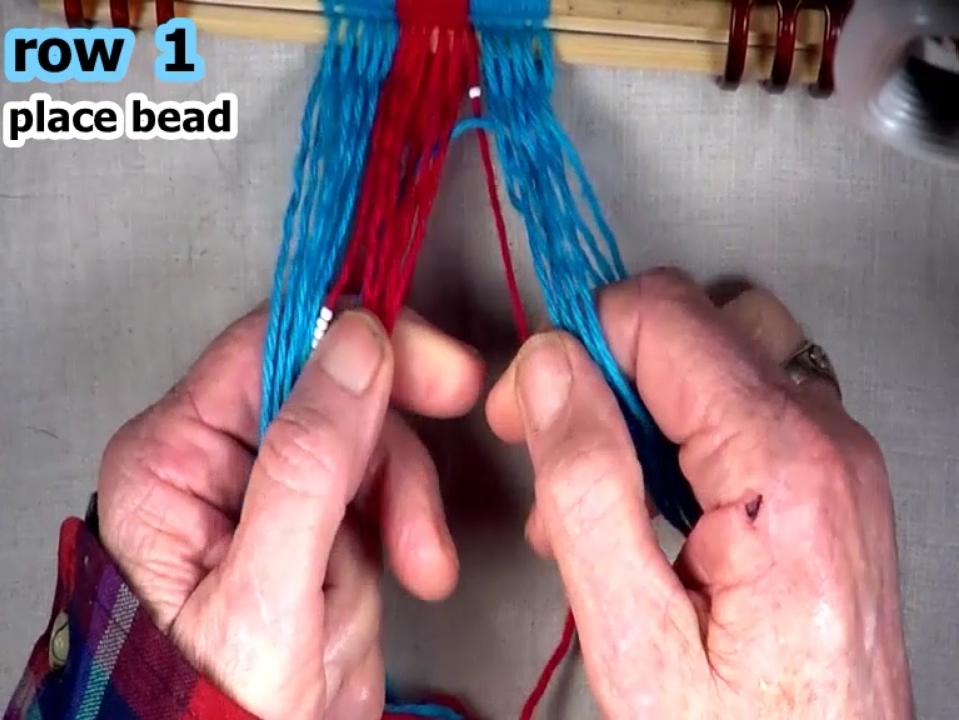
Place a bead by sliding it along the carrier strand to its proper position.
|
|
| Previous | Next |
|
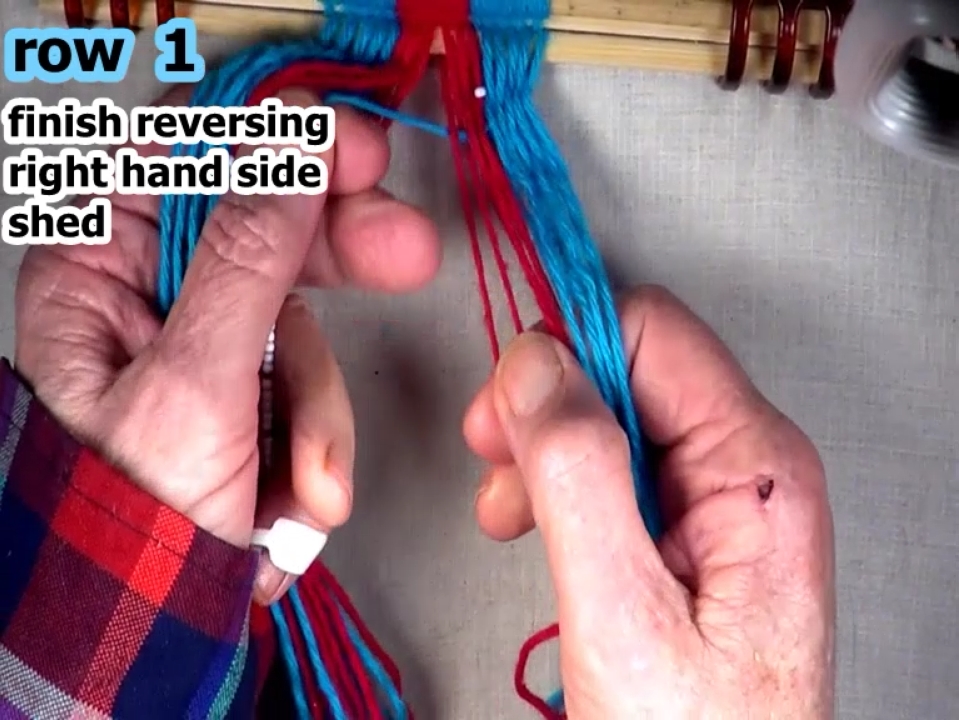
Finish reversing the right hand side shed.
|
|
| Previous | Next |
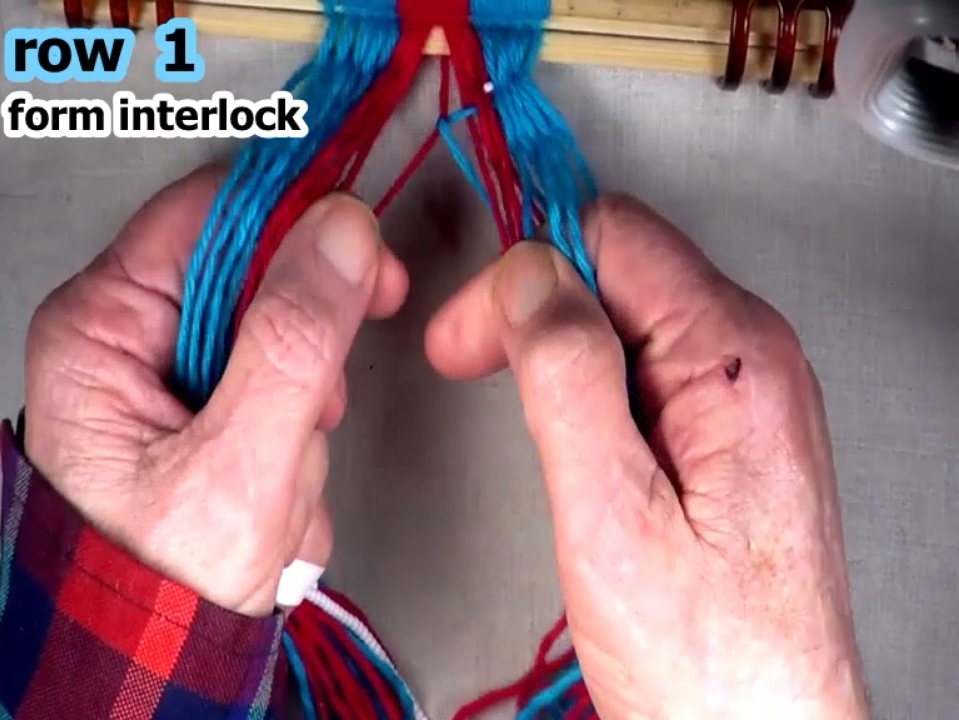
The interlock was formed by folding weft strand up over the bead carrier strand.
|
|
| Previous | Next |
|
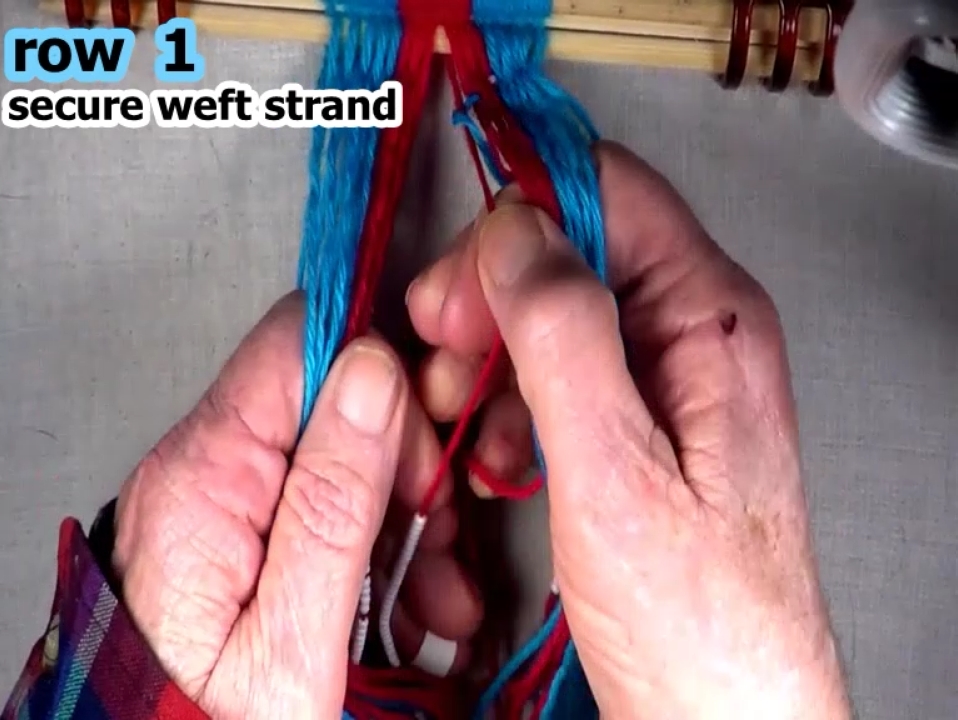
Secure the weft strand by placing it over the right hand index finger.
[NOTE] The weft strand is also the middle bead carried strand and when it is secured it becomes a warp strand. |
|
| Previous | Next |
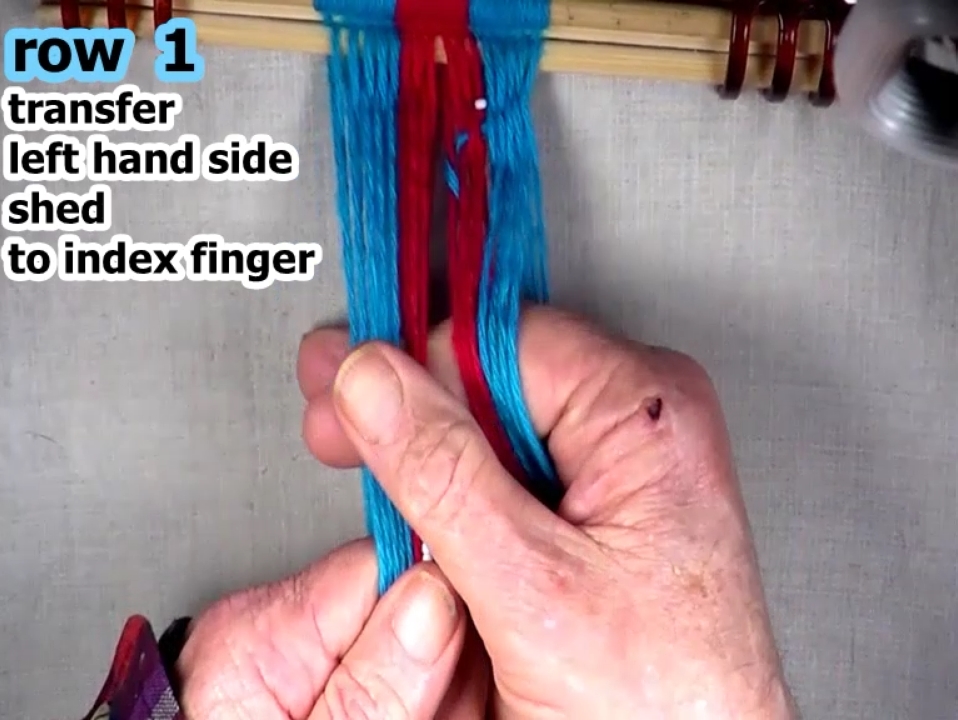
| Transfer the left hand side shed to the right hand index finger. |
|
| Previous | Next |
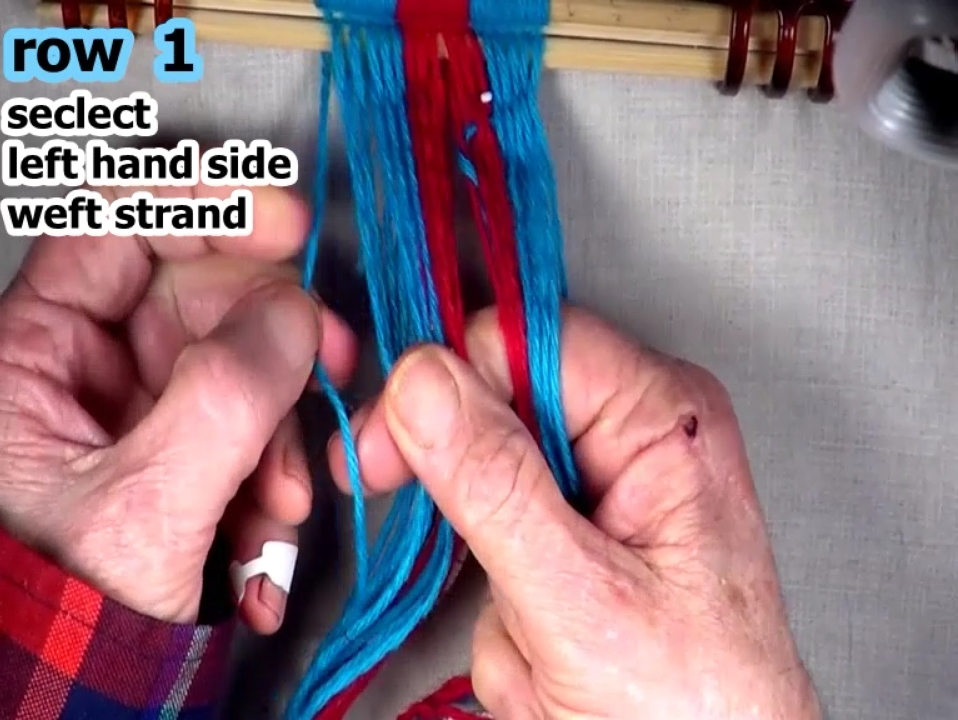
Select the row 1 left hand side weft strand.
[NOTE] When starting a row of weaving, each row's left side weft strand is the first warp strand on the left hand edge of the work piece. |
|
| Previous | Next |
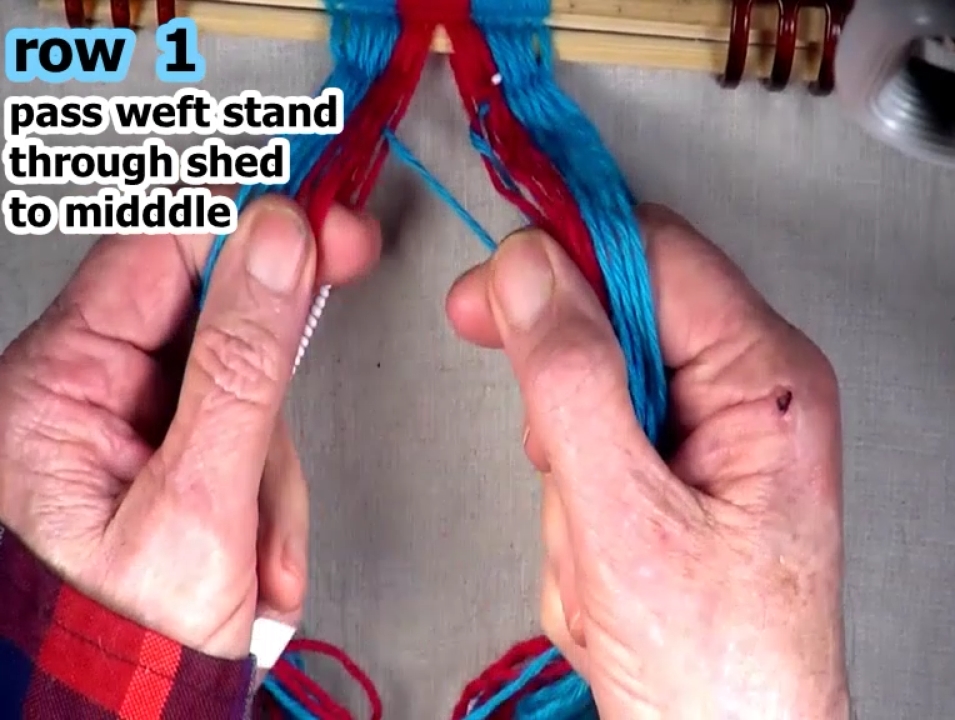
| Pass the weft strand through the left hand side shed to the midddle of the work piece. |
|
| Previous | Next |
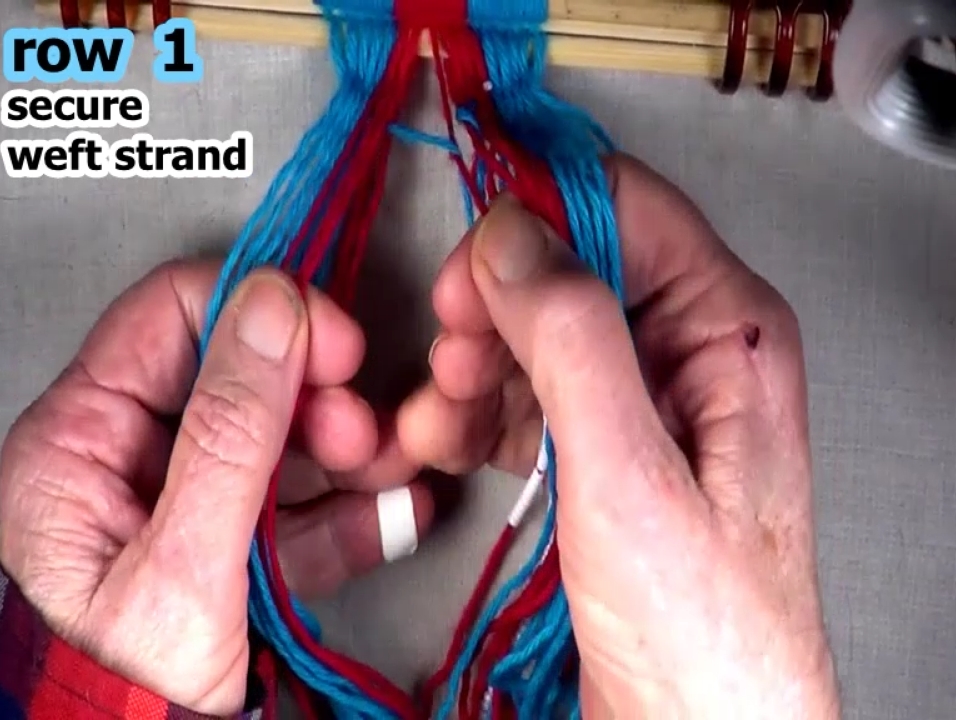
Secure the weft strand by folding it down over the left hand side middle bead carrier strand.
Place the bead carrier strand in the top layer of the shed.
|
|
| Previous | Next |
| Transfer the left hand side shed to the index finger of the right hand. |
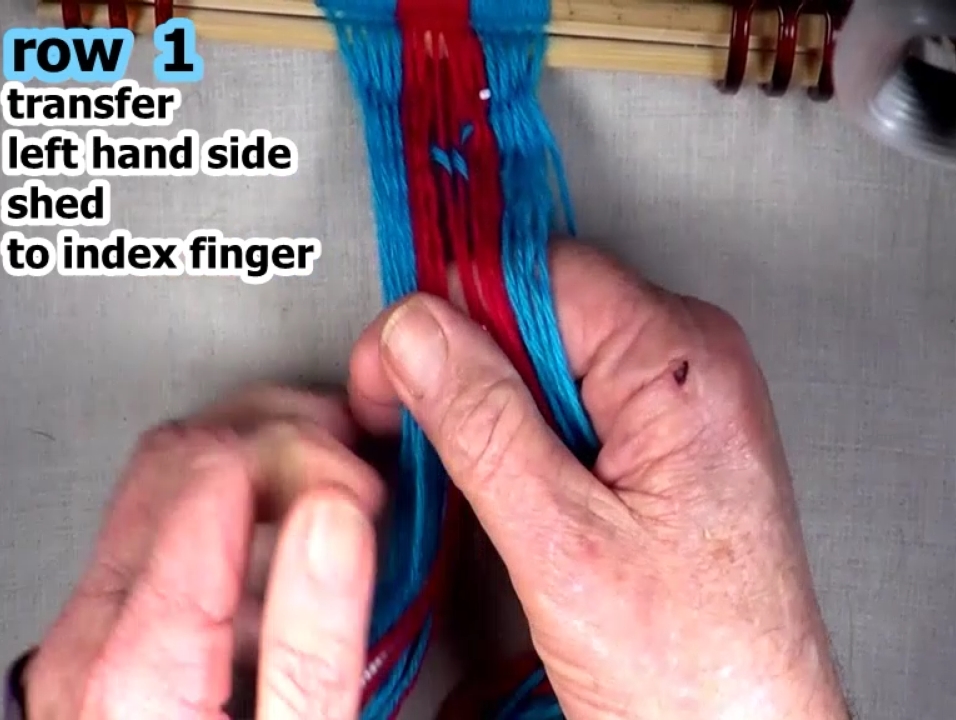
|
| Previous | Next |
| Reverse the left hand side shed to the bead carrier strand. |
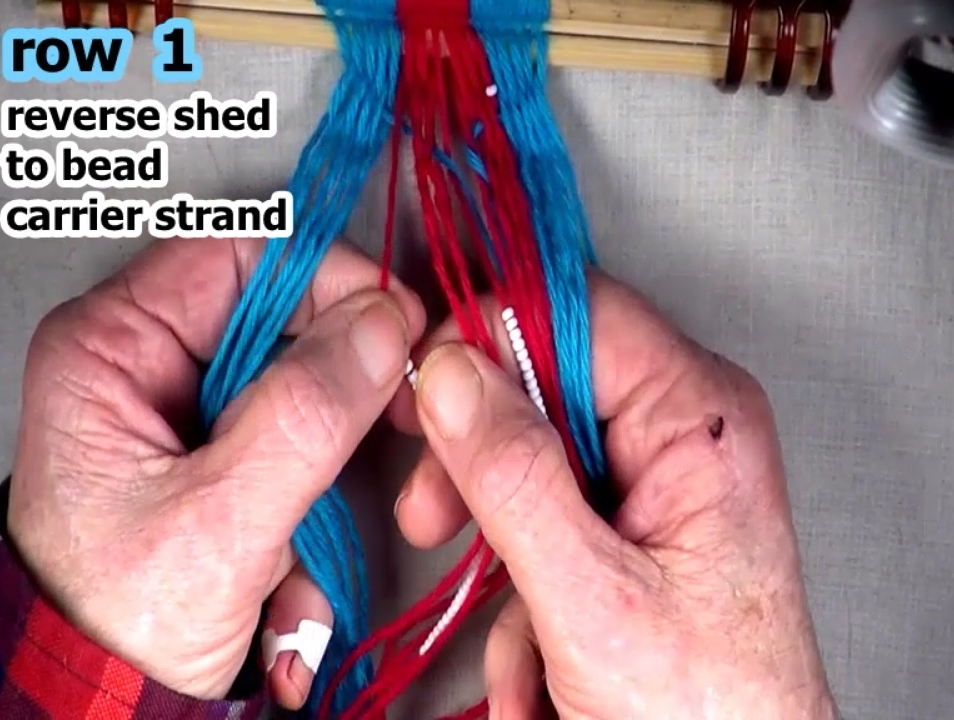
|
| Previous | Next |
Place a bead by sliding it along the carrier strand to its proper position.
|
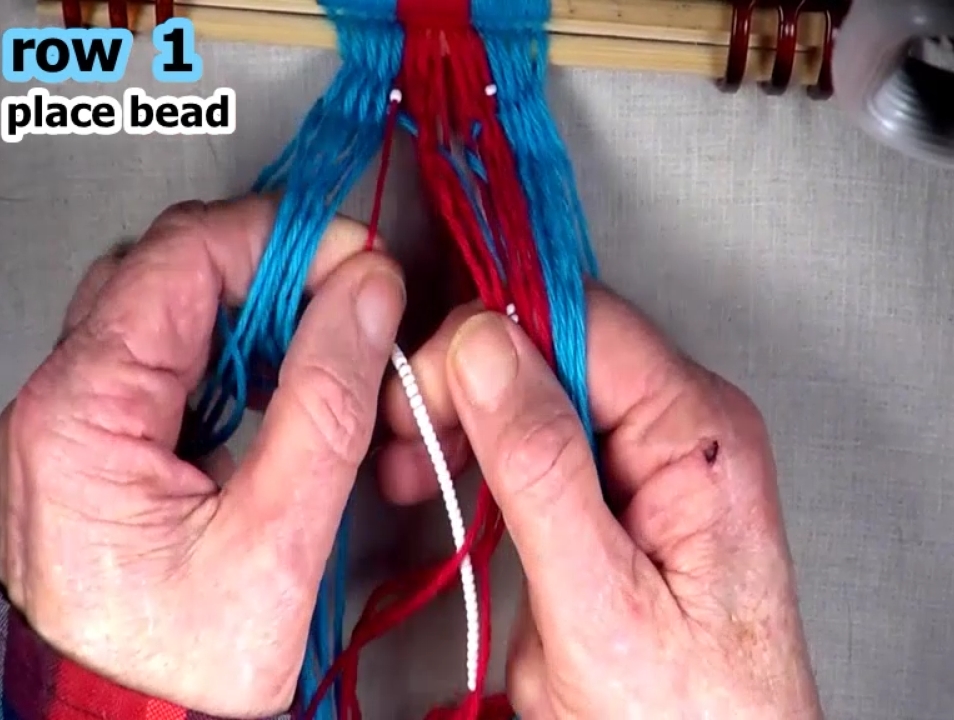
|
| Previous | Next |
|
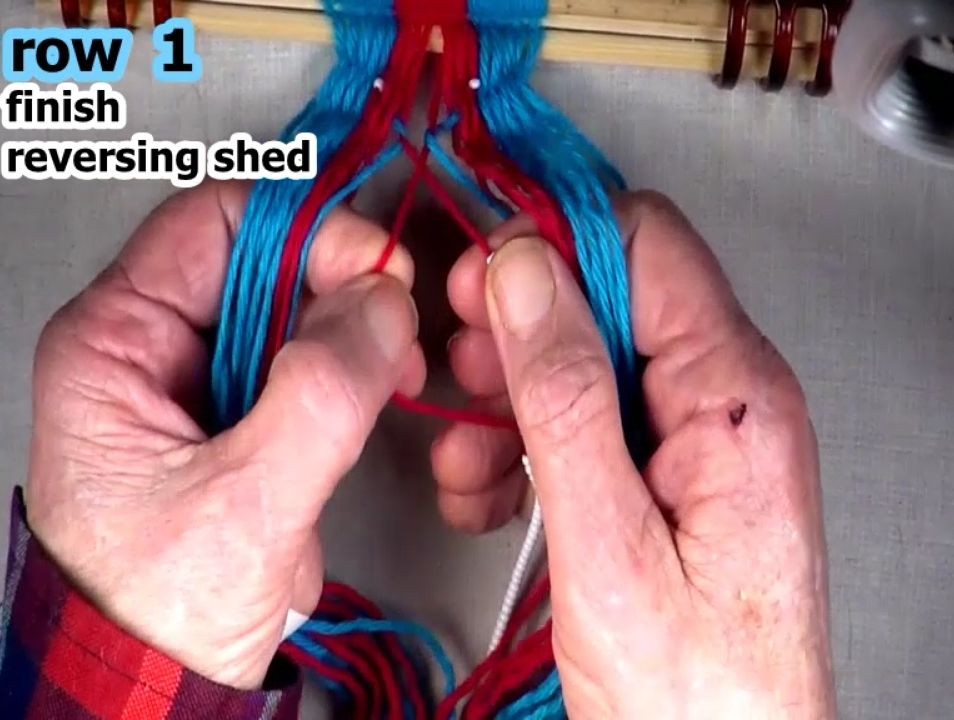
Finish reversing the left hand side shed.
The weft strands are now warp strands. [OBSERVE]-----
The left hand warp strands follow a left to right diagonal. The left and right diagonals meet at the middle of the work piece. |
|
| Previous | Next |
|
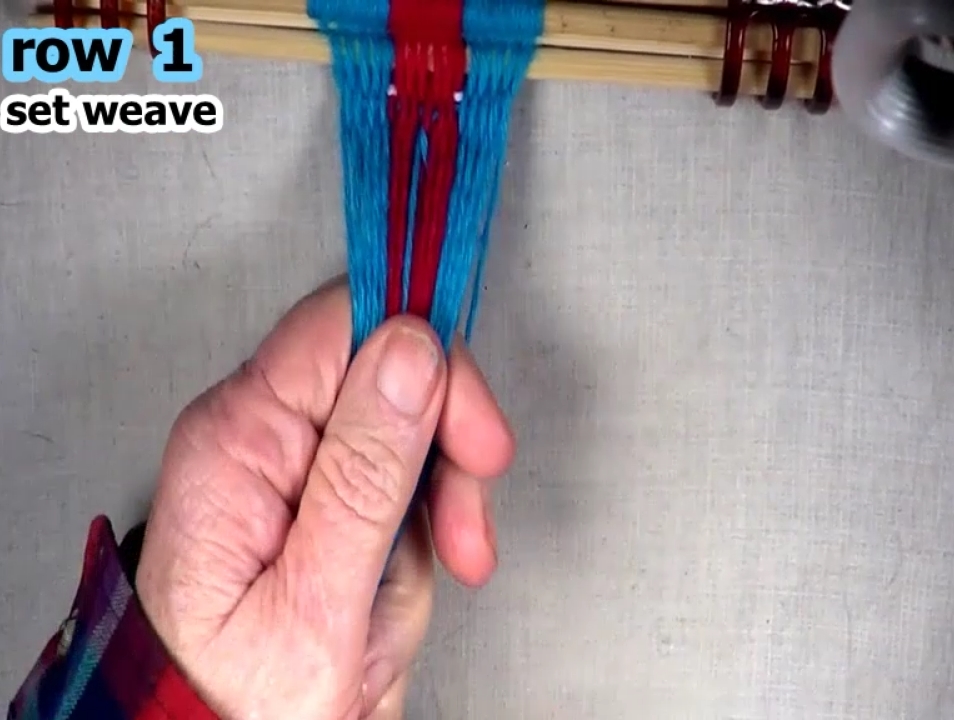
Set the row 1 weave by pulling the two layers of the shed in opposite directions.
Check individual warp strands to make sure they are snug and even. Check bead placement. |
|
| Previous | Next |
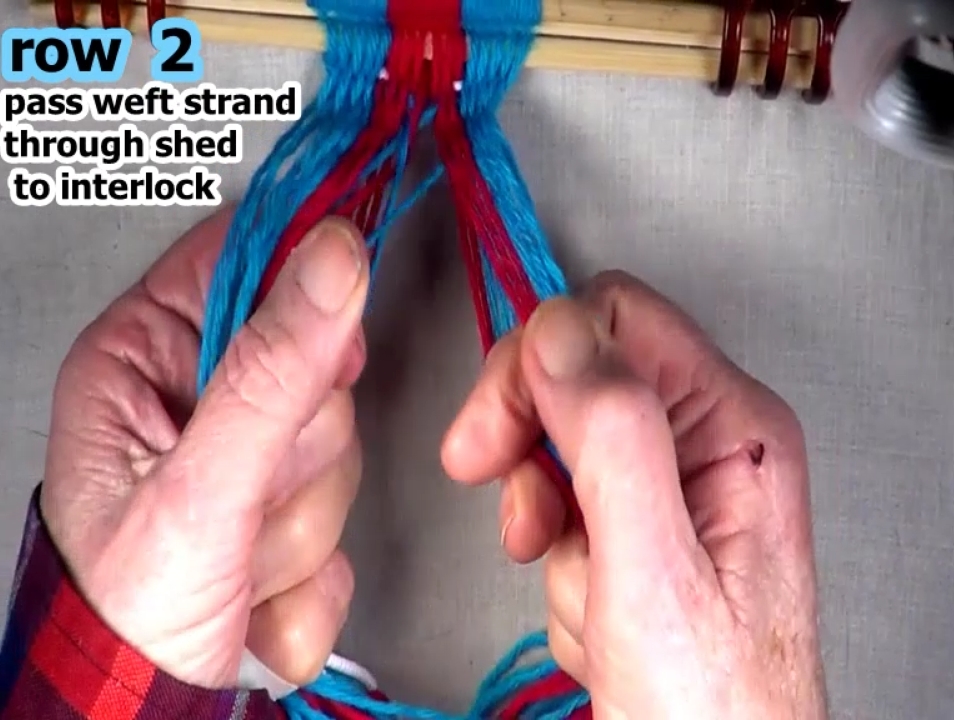
Select the row 2 right hand side weft strand.
|
|
| Previous | Next |
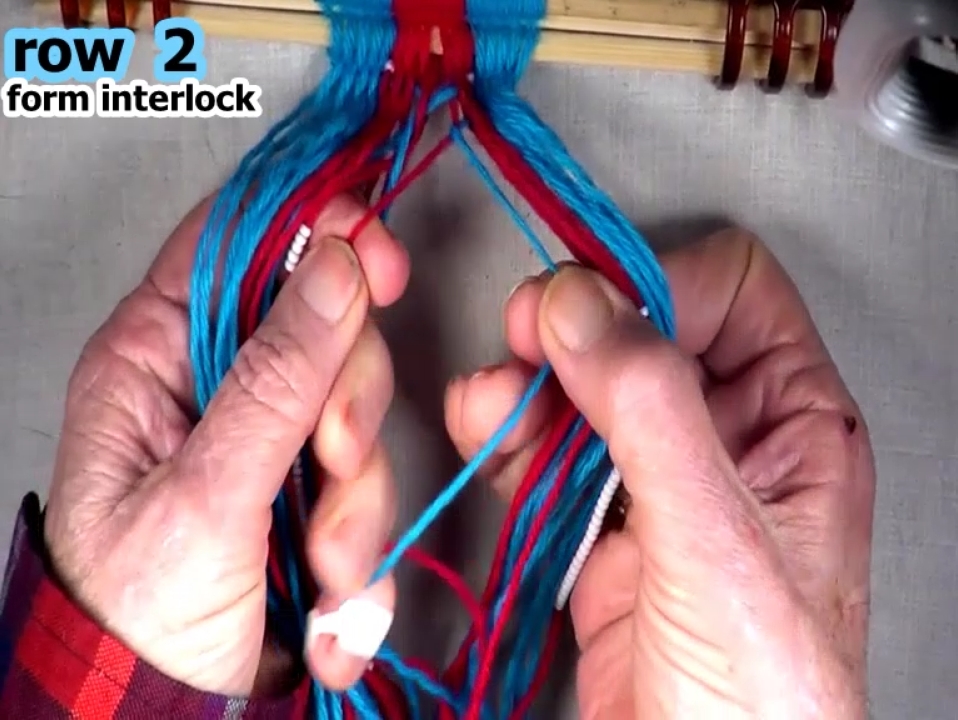
Form the row 2 interlock.
The weft strand becomes a warp strand and the warp strand becomes the next segment of the weft strand. |
|
| Previous | Next |
|
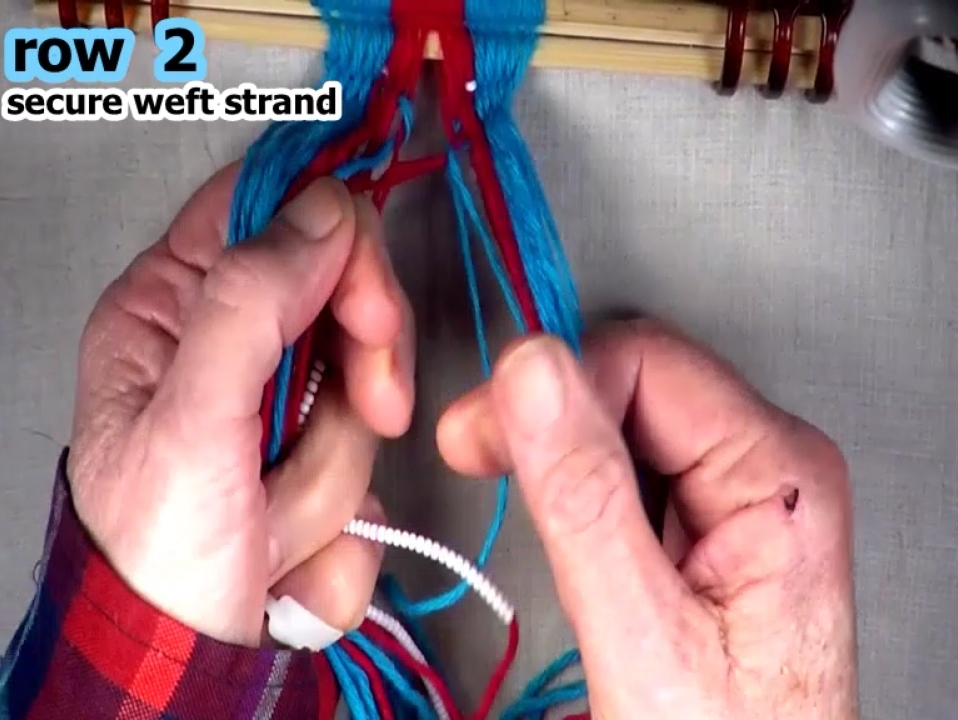
Pass the weft strand through the remainder of the shed to the middle of the work piece.
Secure the weft strand by folding the bead carrier strand down over the weft strand. The bead carrier strand is also the warp strand that is to the right of the middle of the work piece. |
|
| Previous | Next |
|
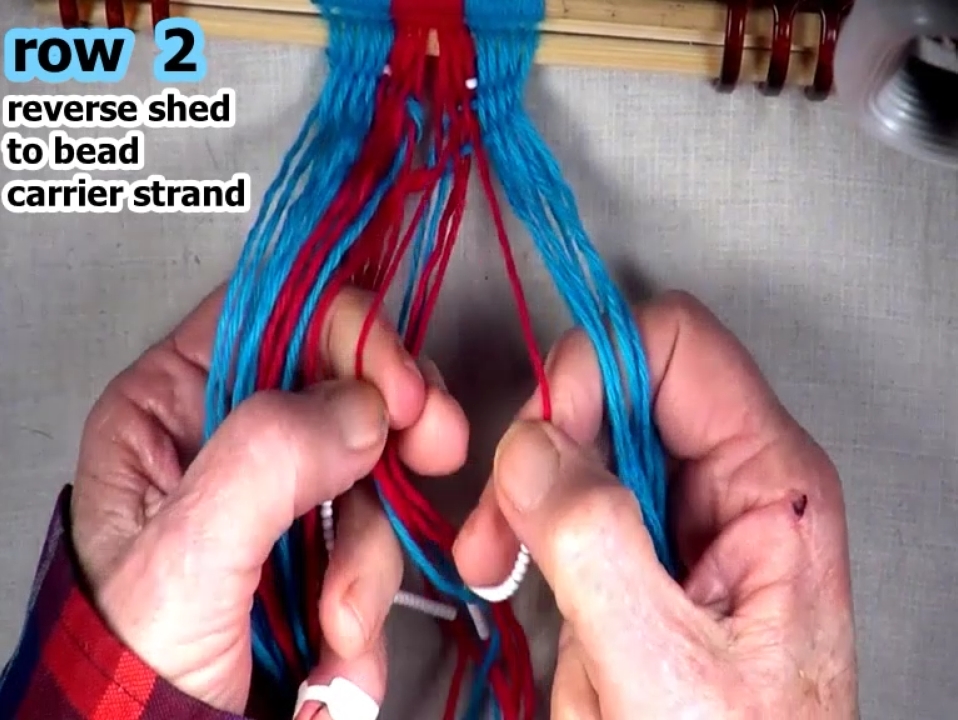
Transfer the right hand side shed to the idex finger of the left hand.
Reverse the right hand side shed to the bead carrier strand. |
|
| Previous | Next |
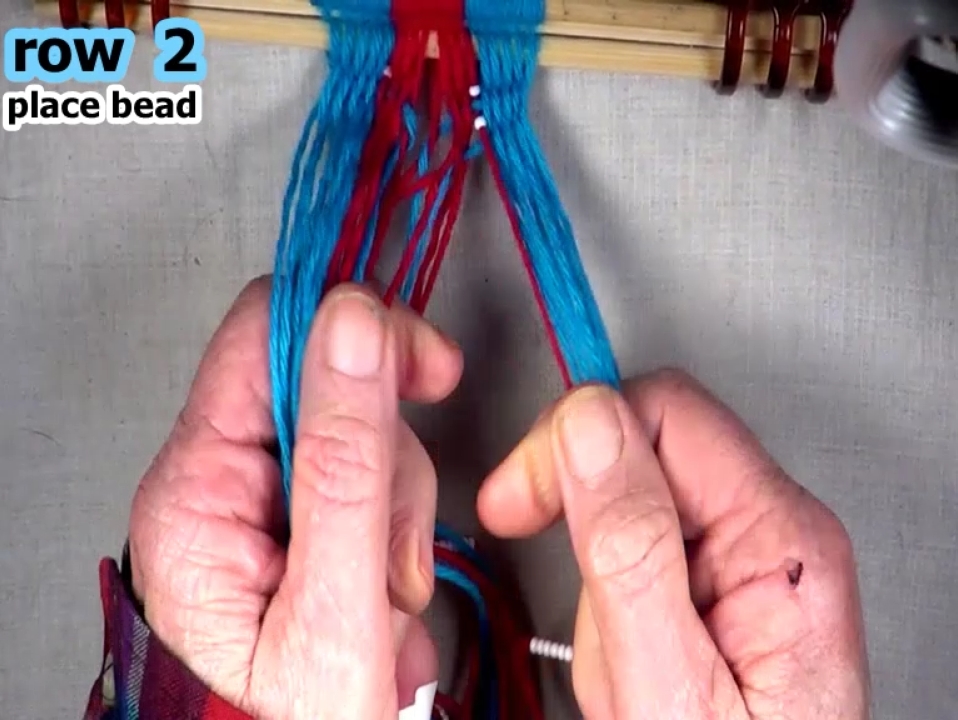
Place a bead by sliding the bead along the carrier strand to its peoper positions.
|
|
| Previous | Next |
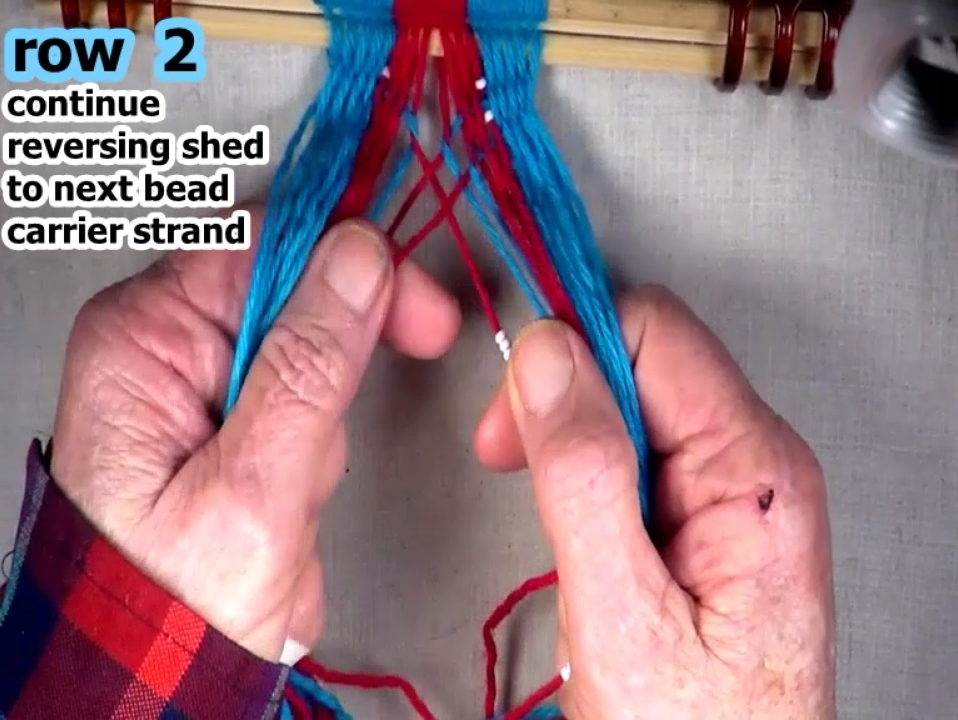
| Continue reversing the shed to the next bead carrier strand. |
|
| Previous | Next |
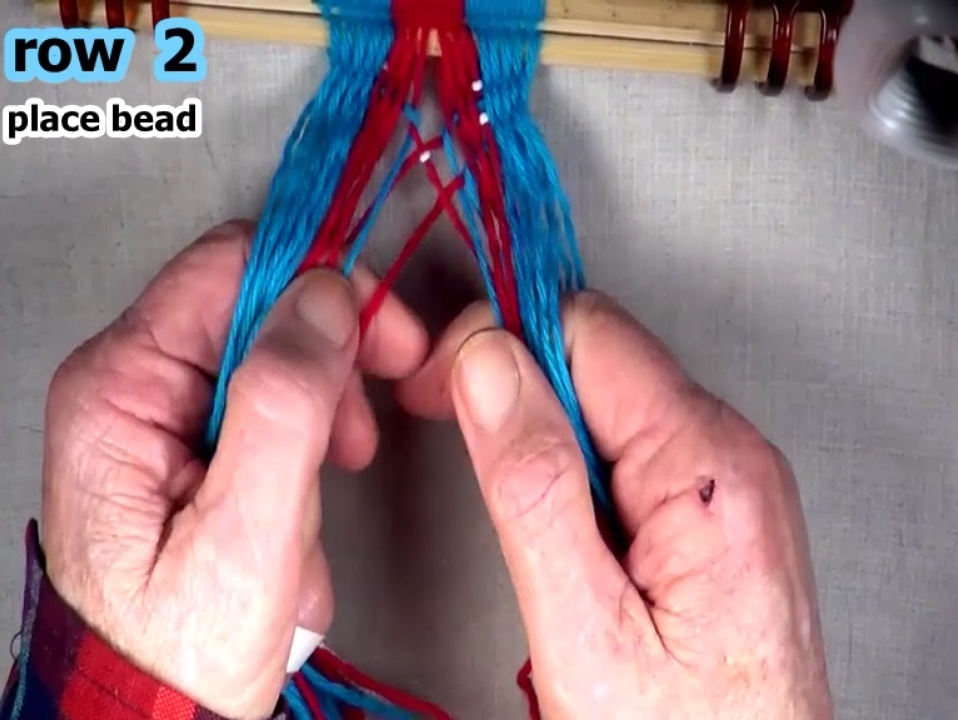
Place a bead by sliding the bead along the carrier strand to its peoper positions.
|
|
| Previous | Next |
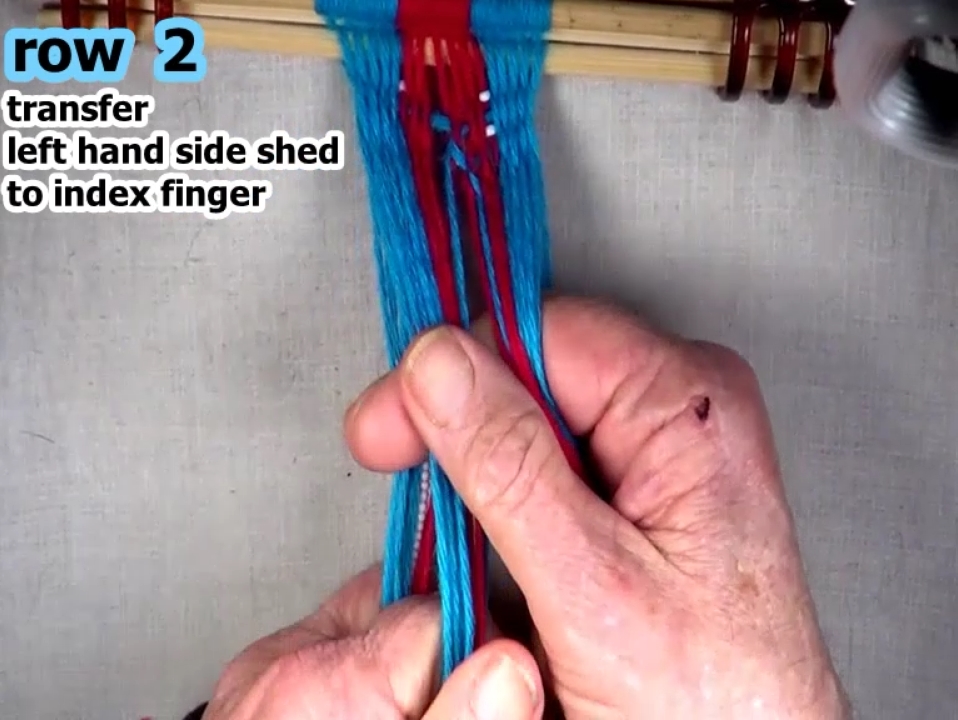
Secure the weft strand.
Thransfer the left hand side shed to the right hand index finger. |
|
| Previous | Next |
|
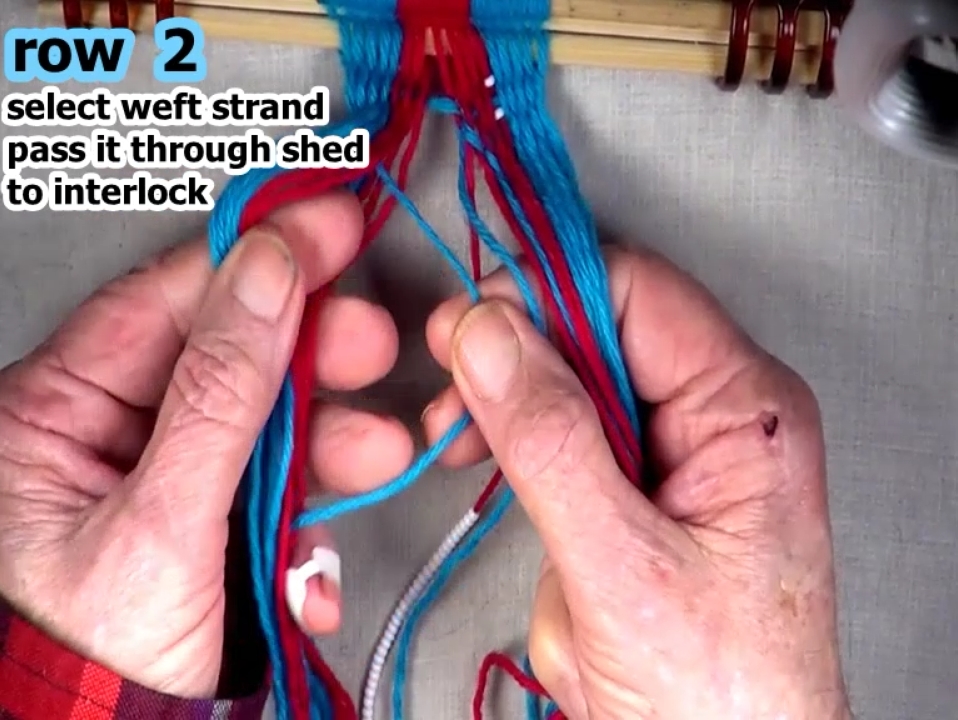
Select the left hand side row 2 weft strand.
The left hand side weft strand is the first warp strand on the left hand edge of the work piece. Pass the weft strand through the left hand side shed to the left hand side row 1 interlock. |
|
| Previous | Next |
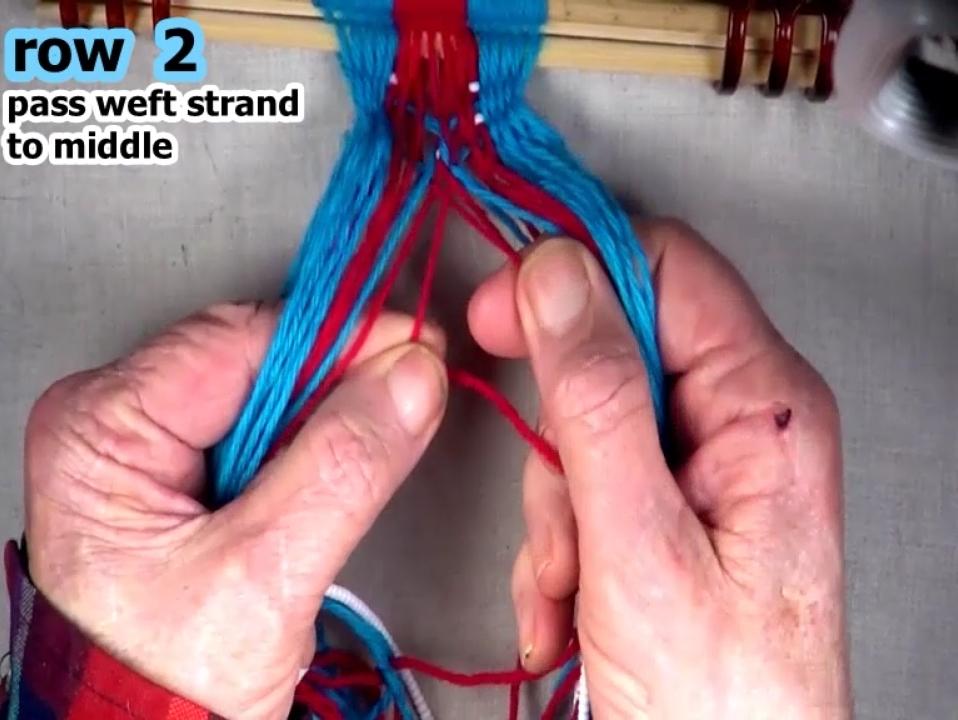
Form the row 2 left hand side interlock.
Transfer the left hand side shed to the left hand index finger. When the interlock is formed the weft strand becomes a warp strand and the adjacent warp strand becomes the next segment of the weft strand. |
|
| Previous | Next |
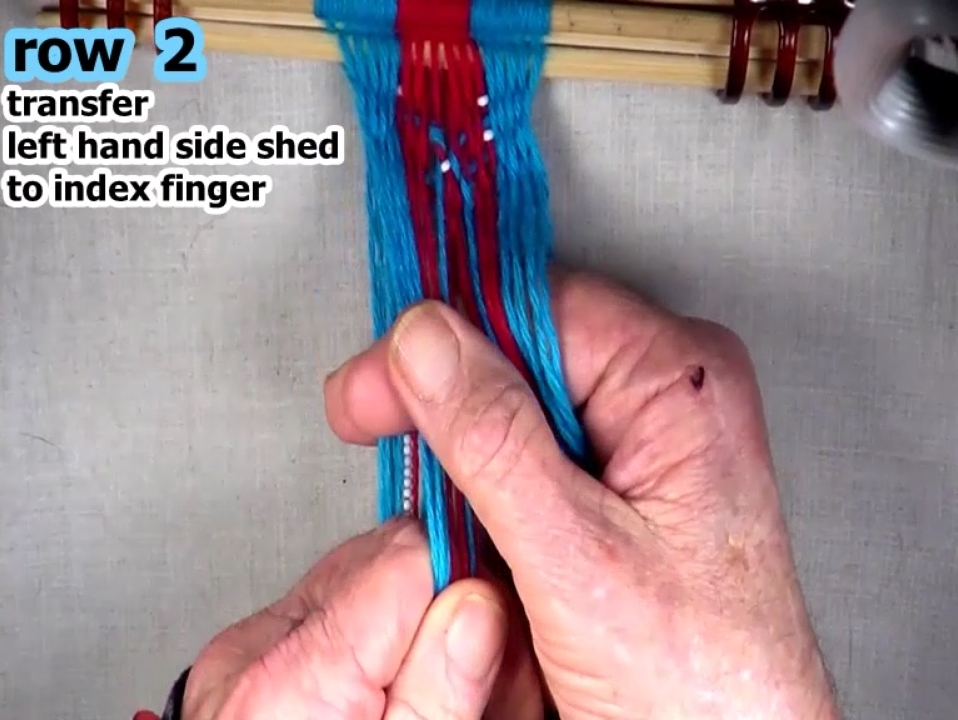
Secure the weft strand.
Transfer the left hand side shed to the right hand idex finger. |
|
| Previous | Next |
|
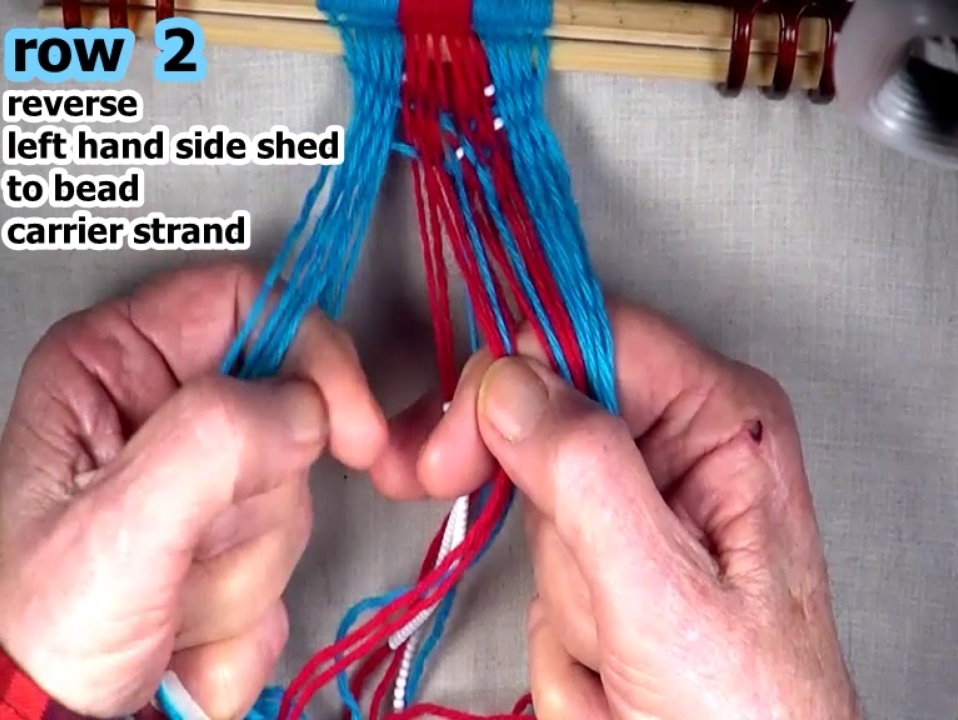
Finish reversing the left hand side shed.
Set weave by pulling the layers of the shed in opposite directions. Check bead placement. |
|
| Previous | Next |
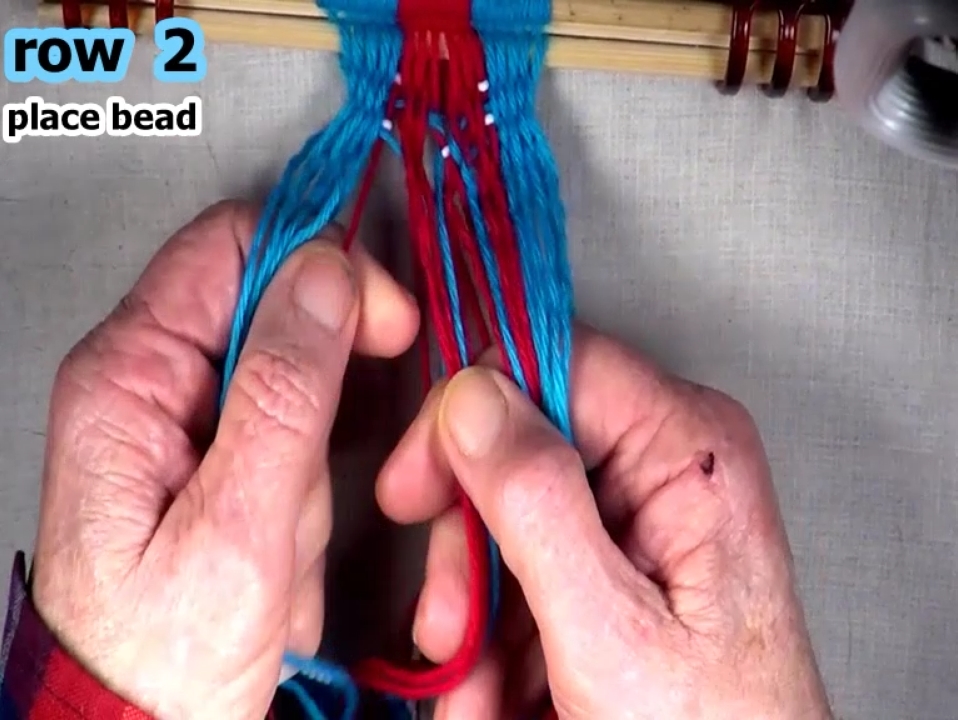
Place a bead by sliding the bead along the carrier strand to its peoper positions.
|
|
| Previous | Next |
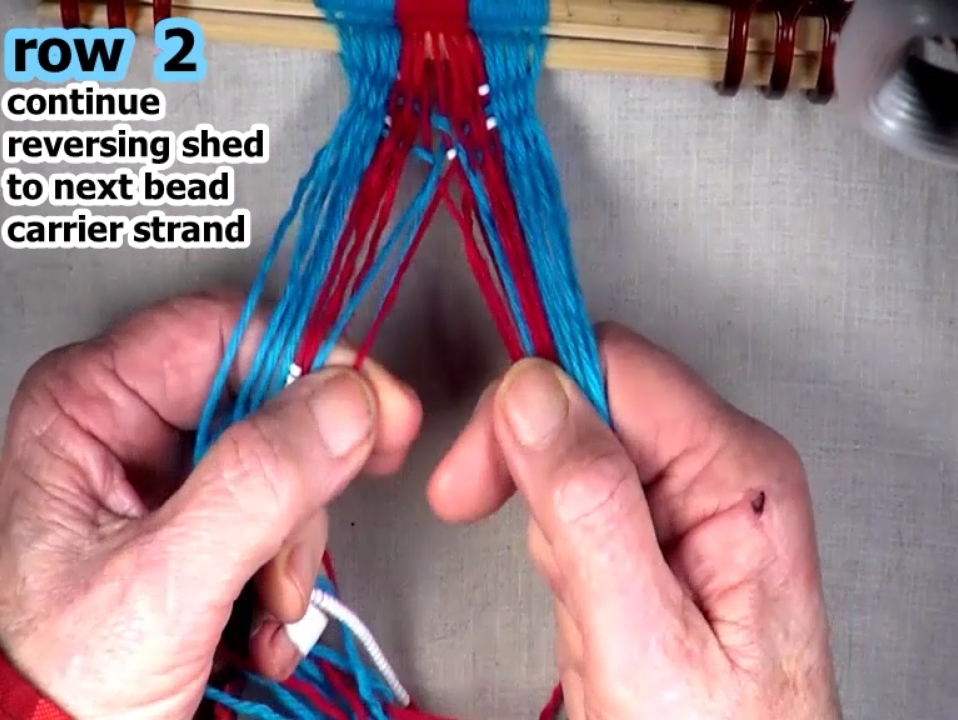
| Continue reversing the left hand side shed to the next carrier strand. |
|
| Previous | Next |
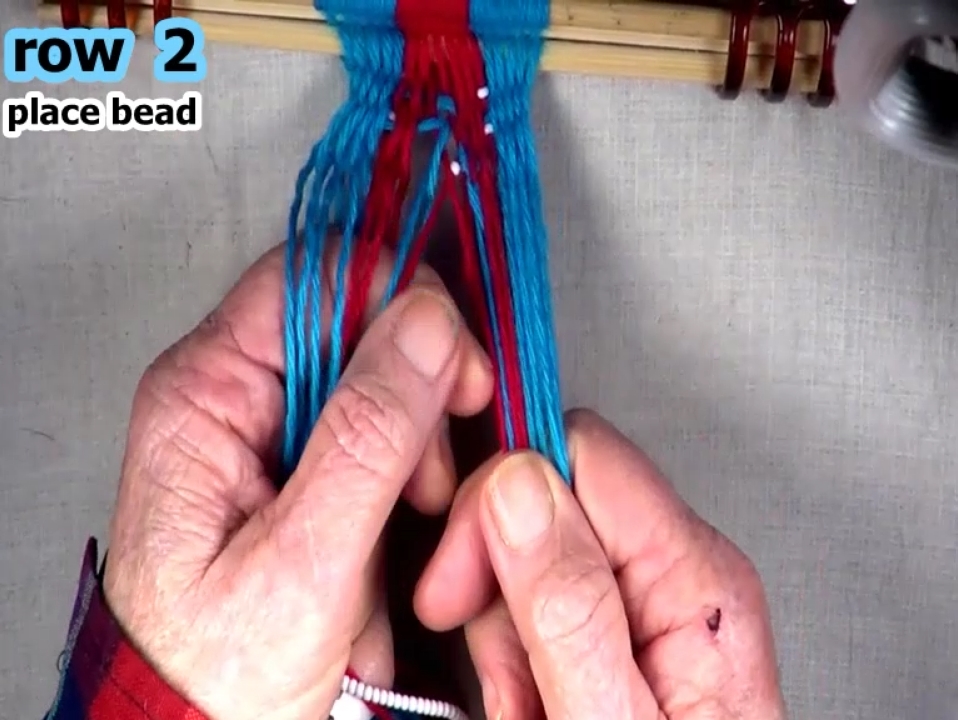
Place a bead by sliding the bead along the carrier strand to its peoper positions.
|
|
| Previous | Next |
|
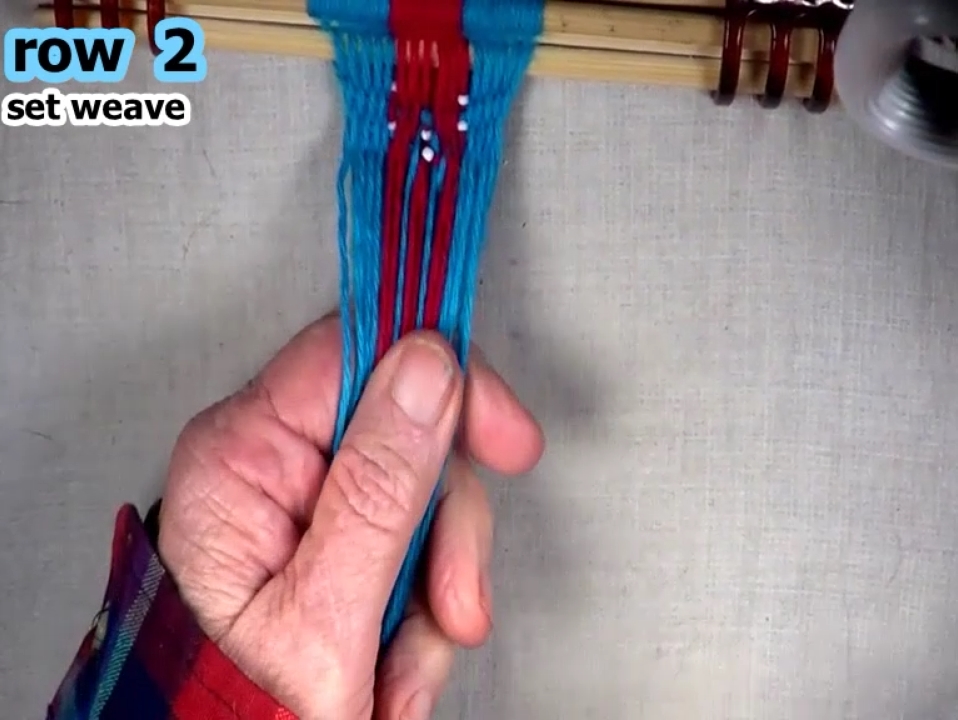
Set the roe 2 weave by pulling the two layers of the shed in opposite directions.
Check individual warp strands to make sure they are snug and even. Check bead placement.
|
|
| Previous | Next |
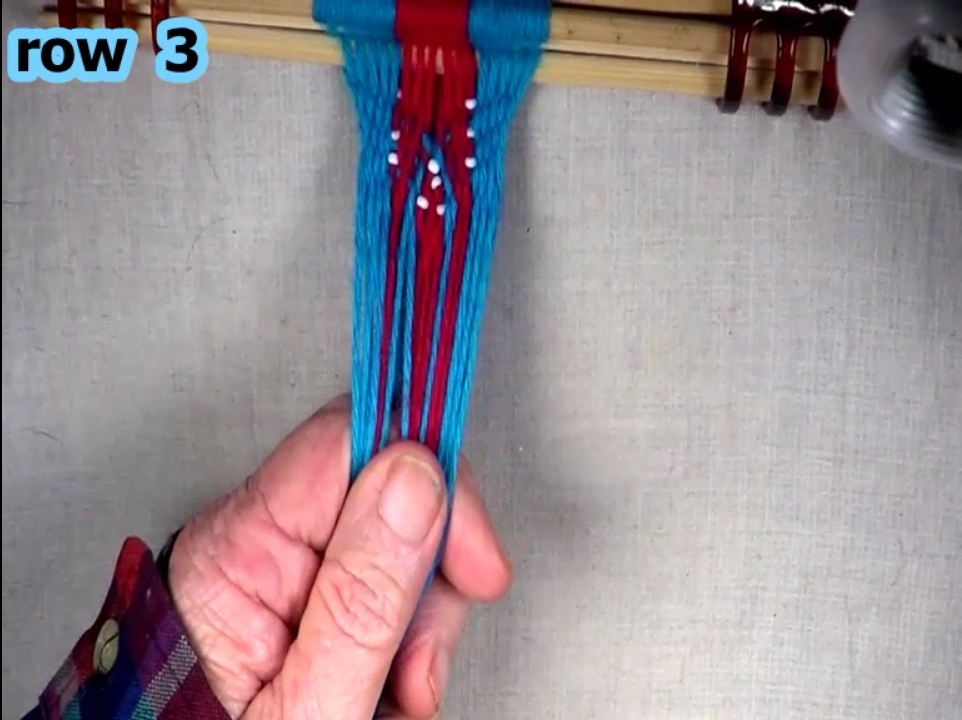
Weave row 3.
|
|
| Previous | Next |
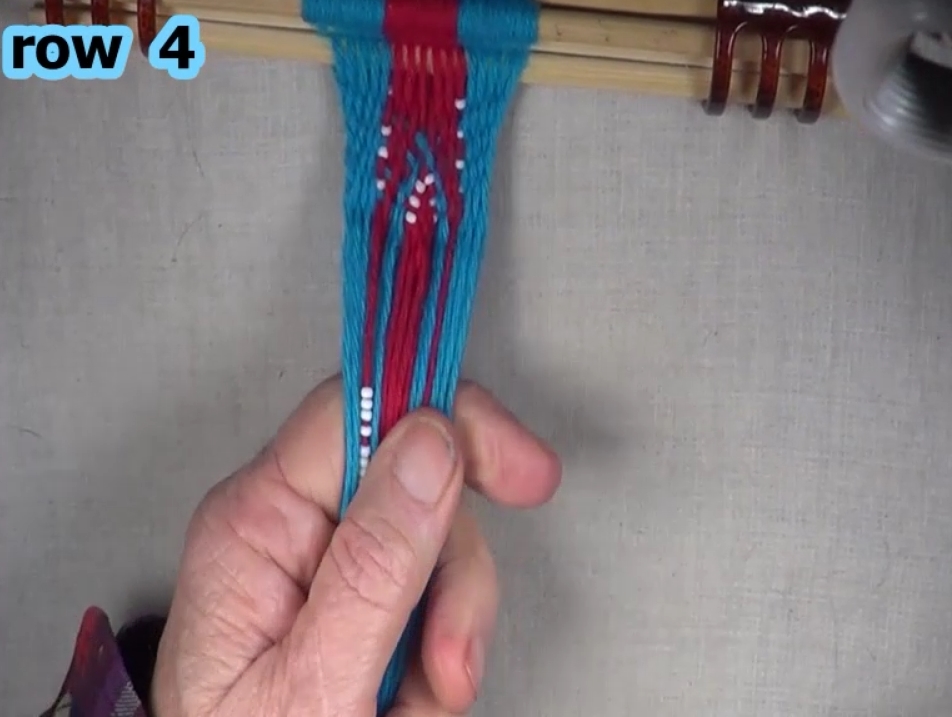
Weave row 4.
|
|
| Previous | Next |
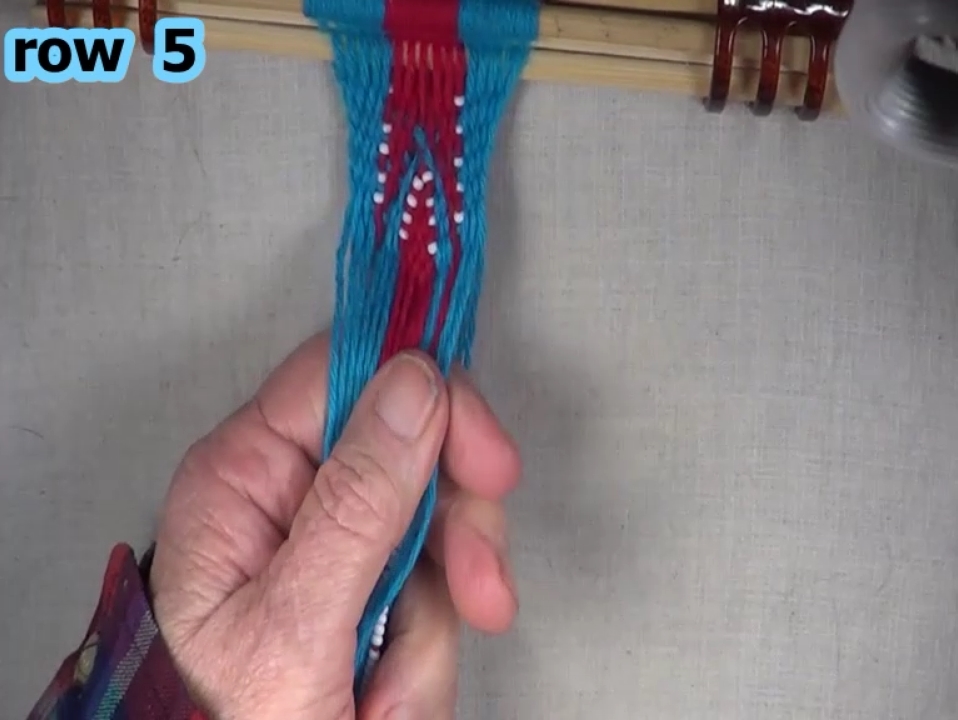
Weave row 5.
|
|
| Previous | Next |
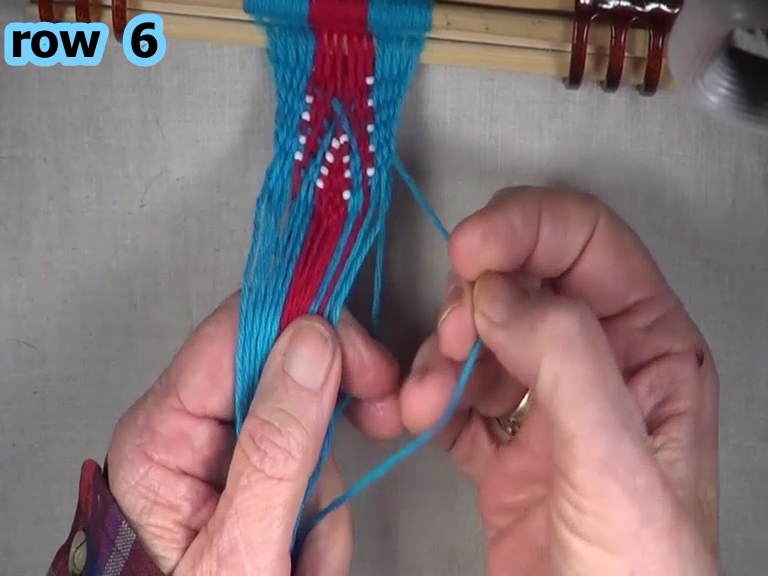
Select row 6 right hand side weft strand.
|
|
| Previous | Next |
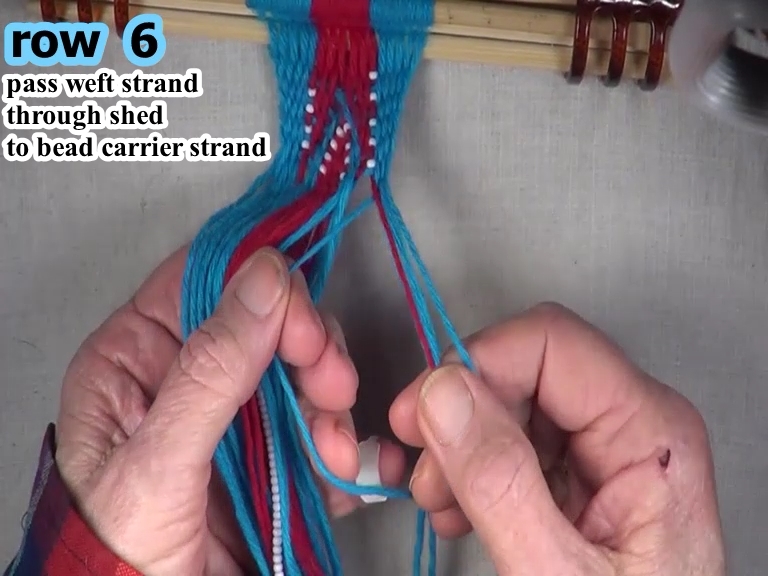
| Pass the weft strand through the shed to the first carrier strand. |
|
| Previous | Next |
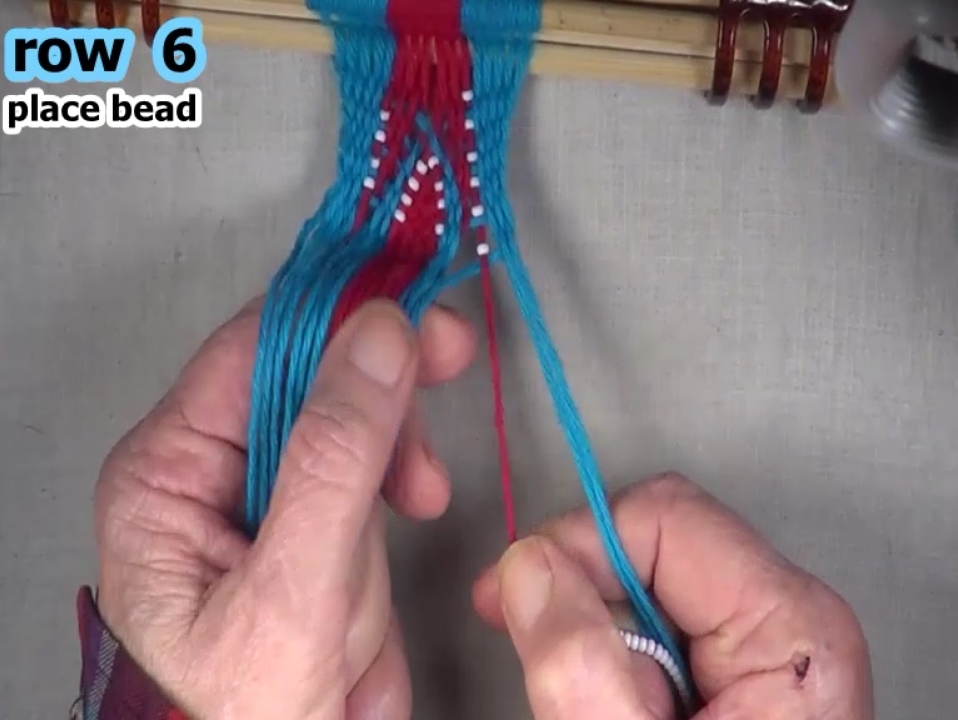
Place a bead by sliding the bead along the carrier strand to its peoper positions.
|
|
| Previous | Next |
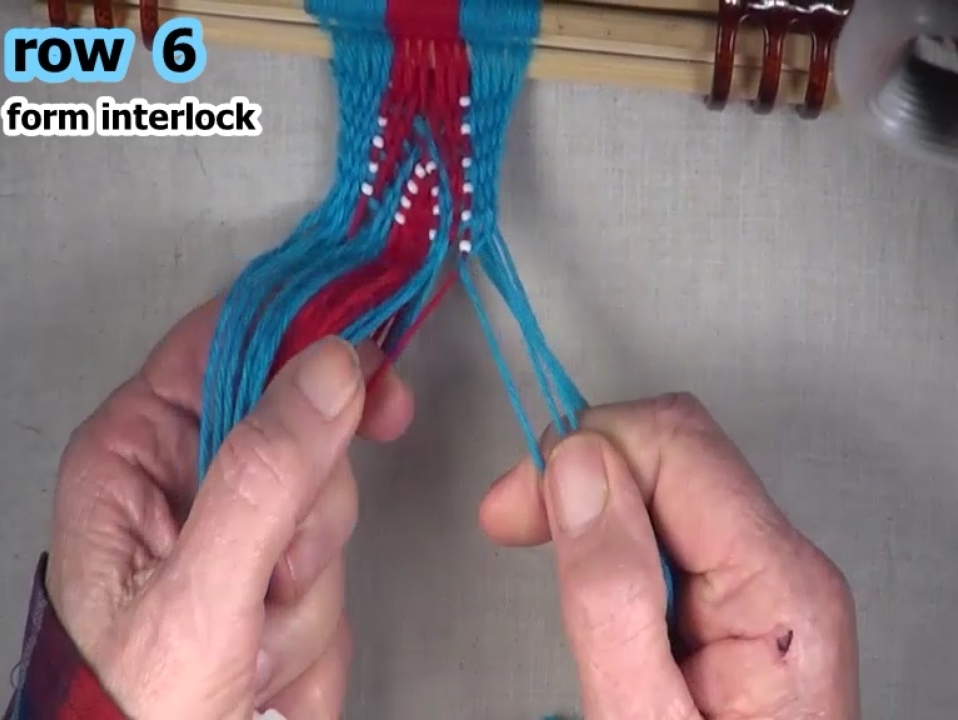
Form the right hand side row 6 interlock.
The row 6 weft strand becomes a warp strand and the bead carrier strand becomes the next segment of the row 6 weft strand. |
|
| Previous | Next |
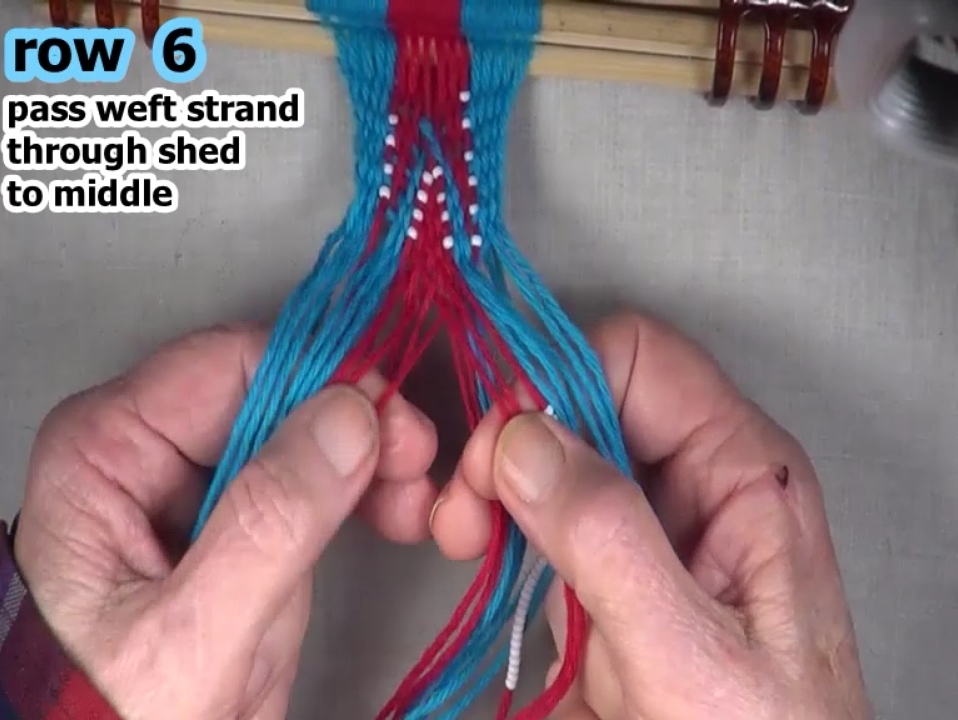
| Pass the weft strand through the remainder of the right hand side shed to the middle of the work piece. |
|
| Previous | Next |
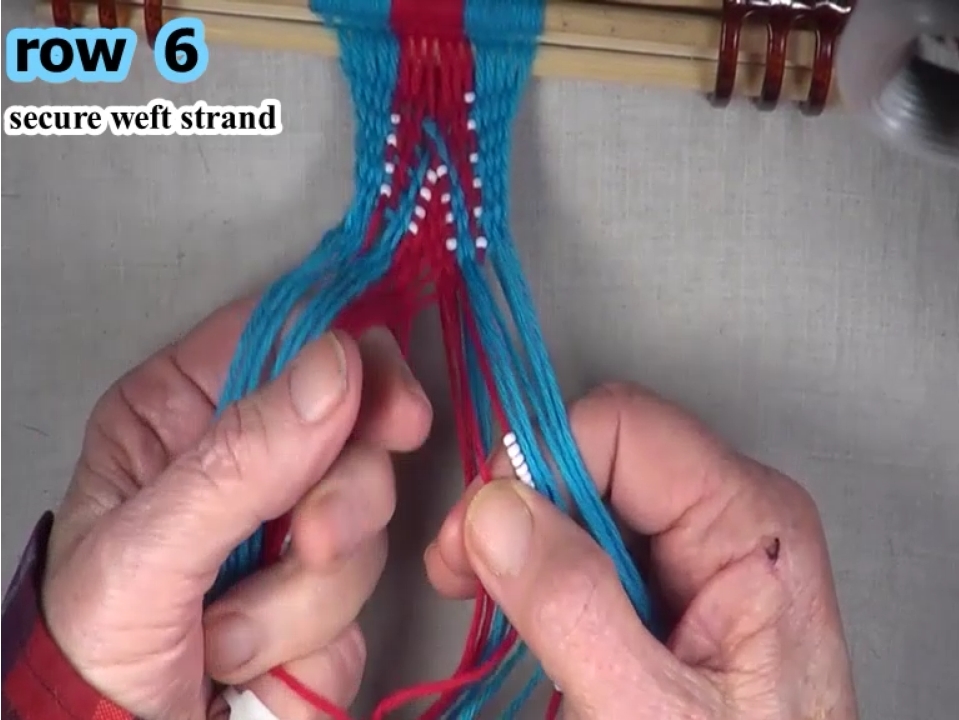
Secure the weft strand.
|
|
| Previous | Next |
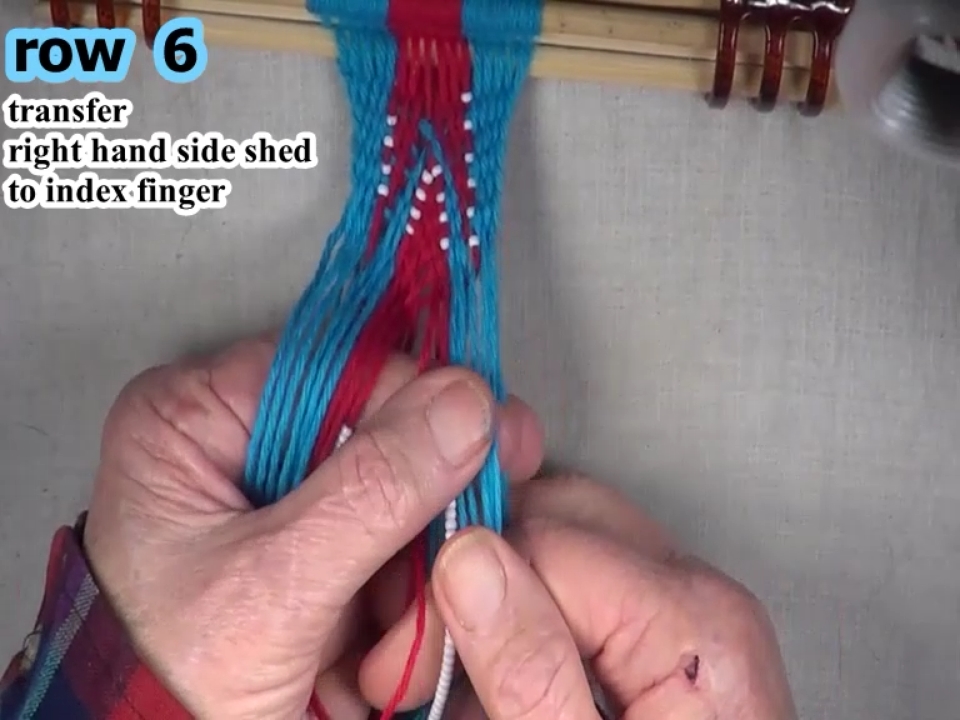
| Transfer the right hand side shed to the left hand index finger. |
|
| Previous | Next |
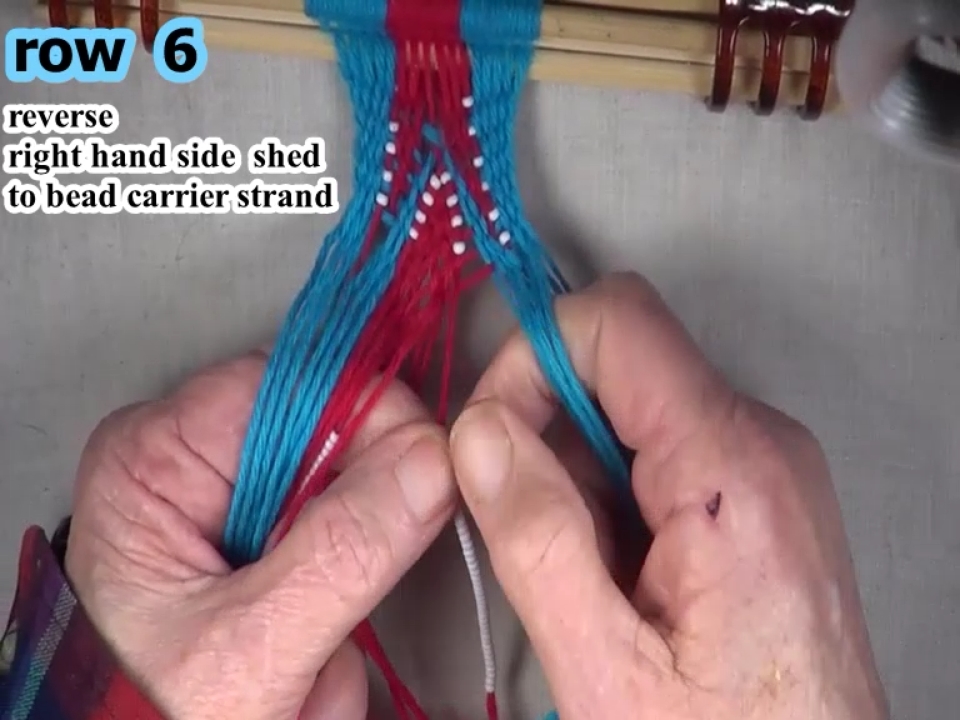
| Reverse the right hand side shed to the bead carrier strand. |
|
| Previous | Next |
Place a bead by sliding the bead along the carrier strand to its peoper positions.
|
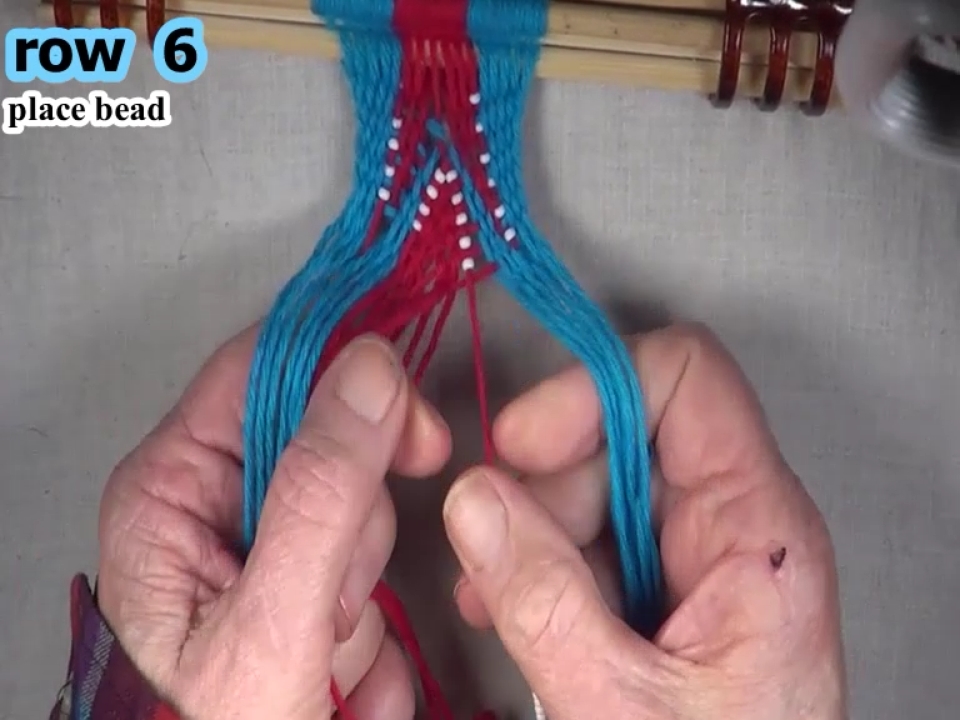
|
| Previous | Next |
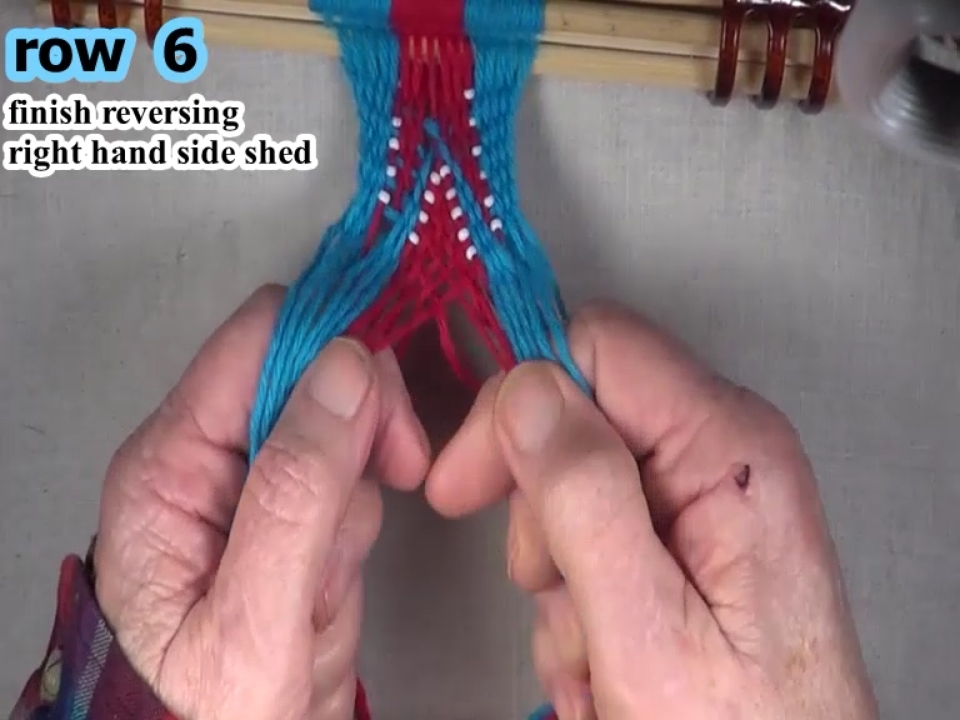
| Finish reversing the right hand side row 6 shed. |
|
| Previous | Next |
|
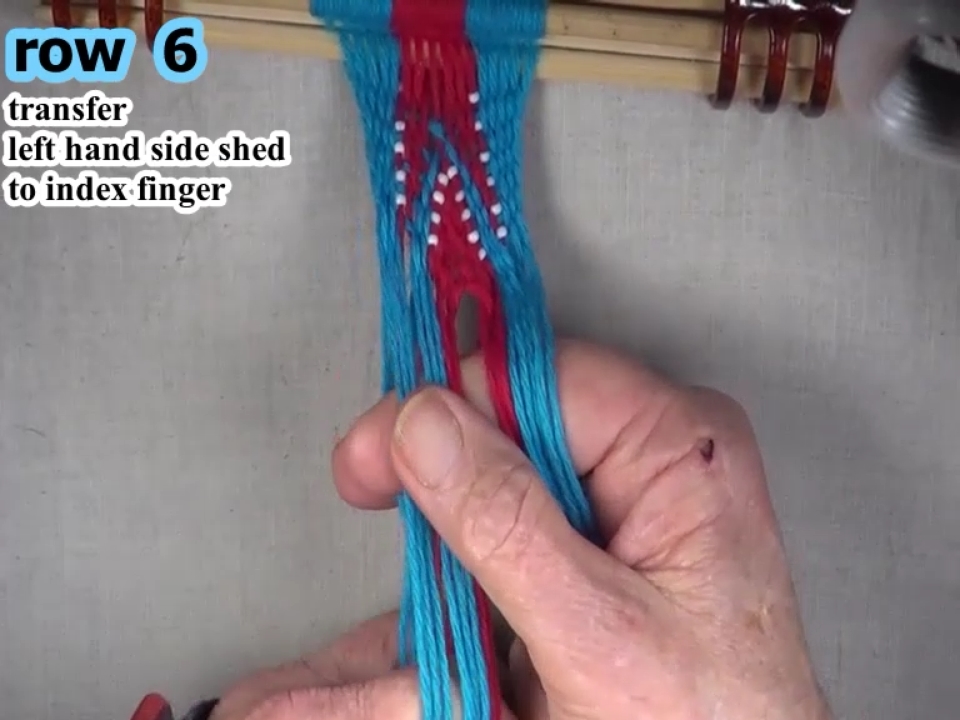
Secure the weft strand.
The weft strand is secured by folding the adjacent right hand side warp strand down over the weft strand and placing the adjacent warp strad under the left hand index finger. Transfer the left hand side shed to the right hand index finger. |
|
| Previous | Next |
|
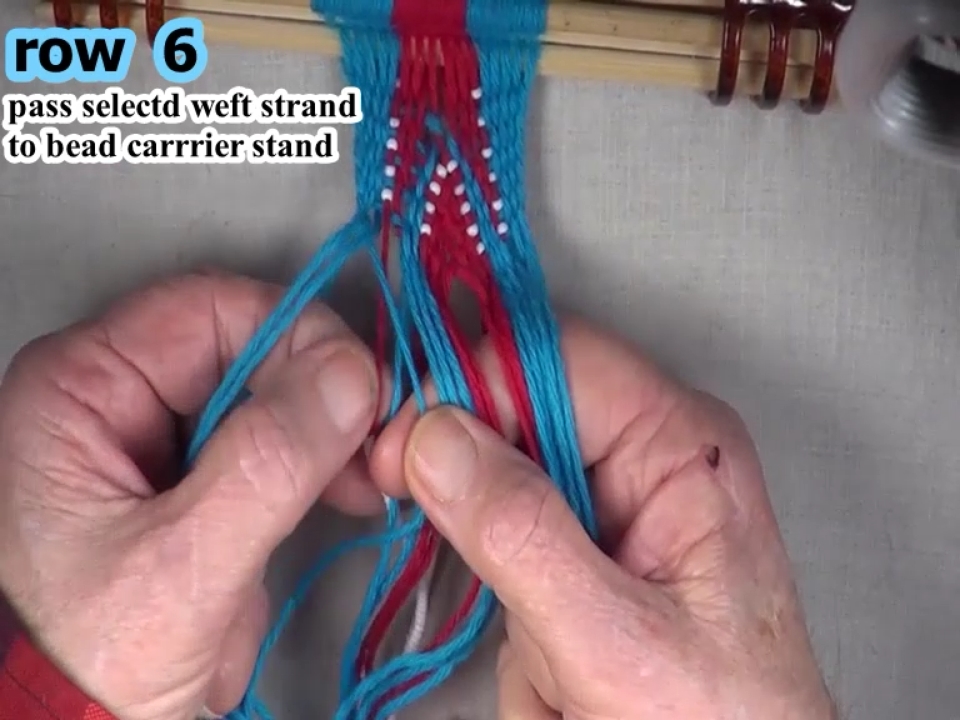
Select the left hand side weft strand.
The first warp strand on the left hand edge of the work-piece is selected as the weft strand. Pass the weft strand through the shed to the bead carrier strand. |
|
| Previous | Next |
|
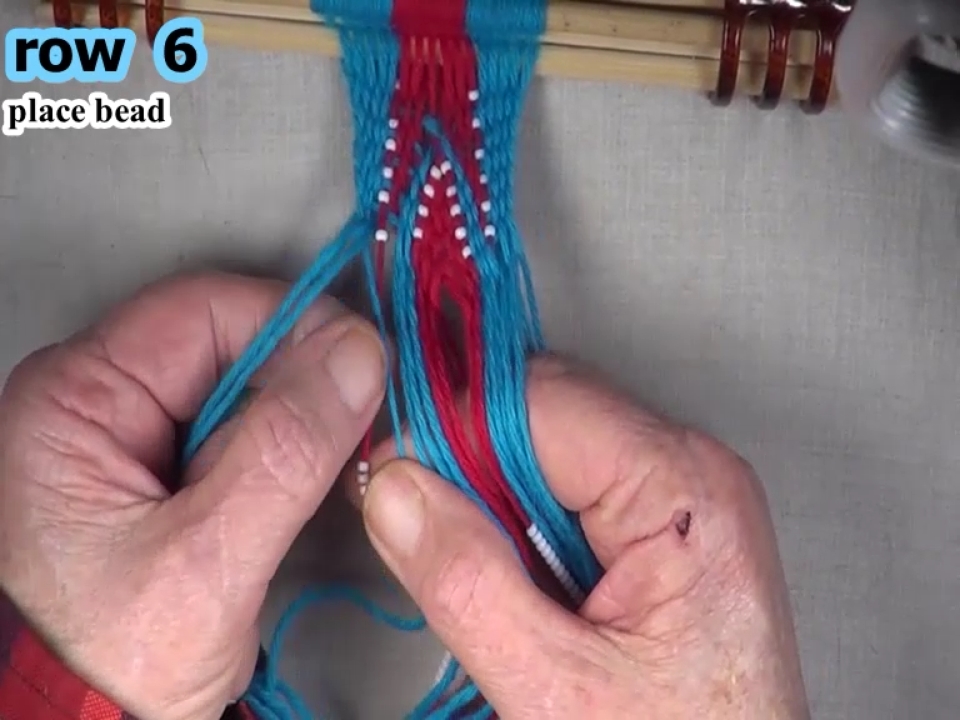
Place a bead by sliding the bead along the carrier strand to its peoper positions.
[OBSERVE]The bead is held in place by the weft strand. |
|
| Previous | Next |
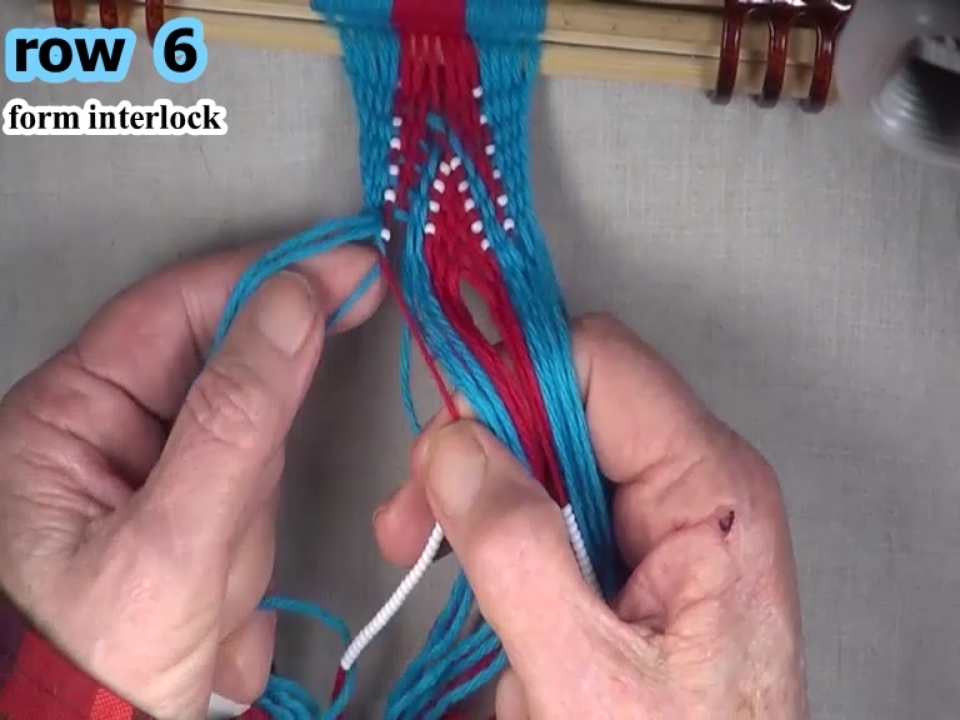
Form the left hand side row 6 interlock.
The row 6 weft strand becomes a warp strand and the bead carrier strand becomes the next segment of the row 6 weft strand. |
|
| Previous | Next |
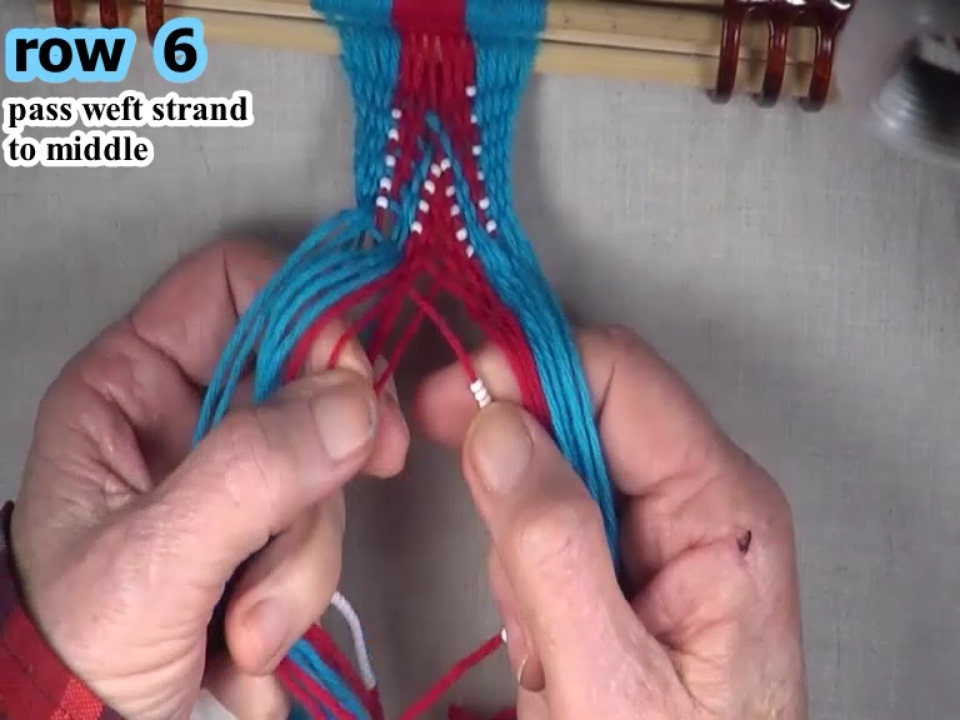
| Pass the weft strand through the remainder of the shed to the middle of the work piece. |
|
| Previous | Next |
|
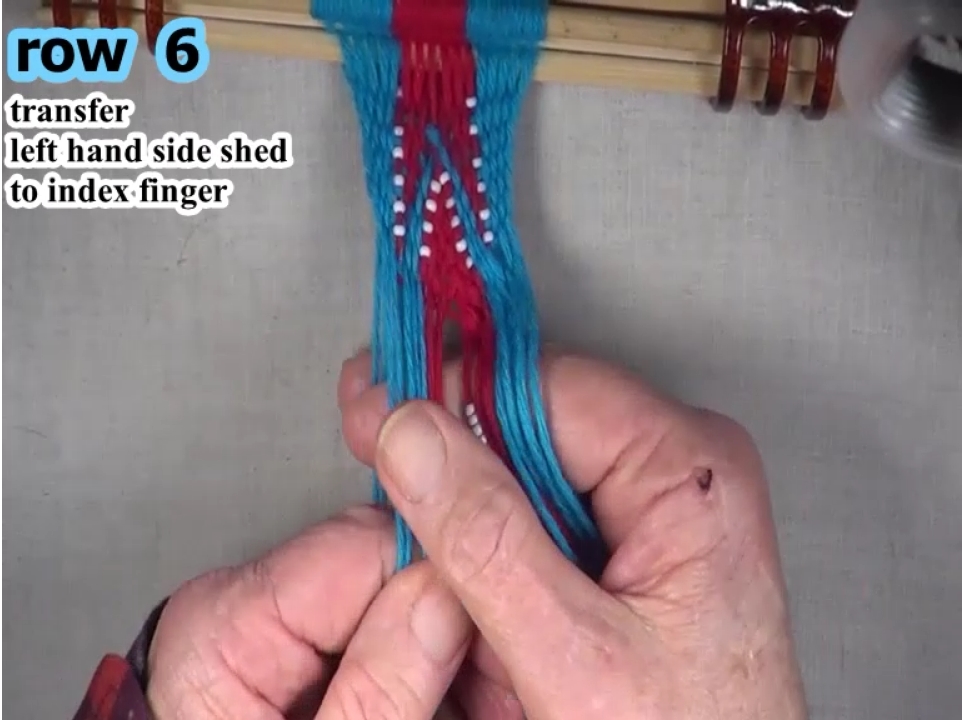
Secure the left hand side weft strand by folding the right hand side weft strand down over the left hand side weft strand.
The weft strands become the middle warp strands. Transfer the left hand side shed to the right hand index finge. |
|
| Previous | Next |
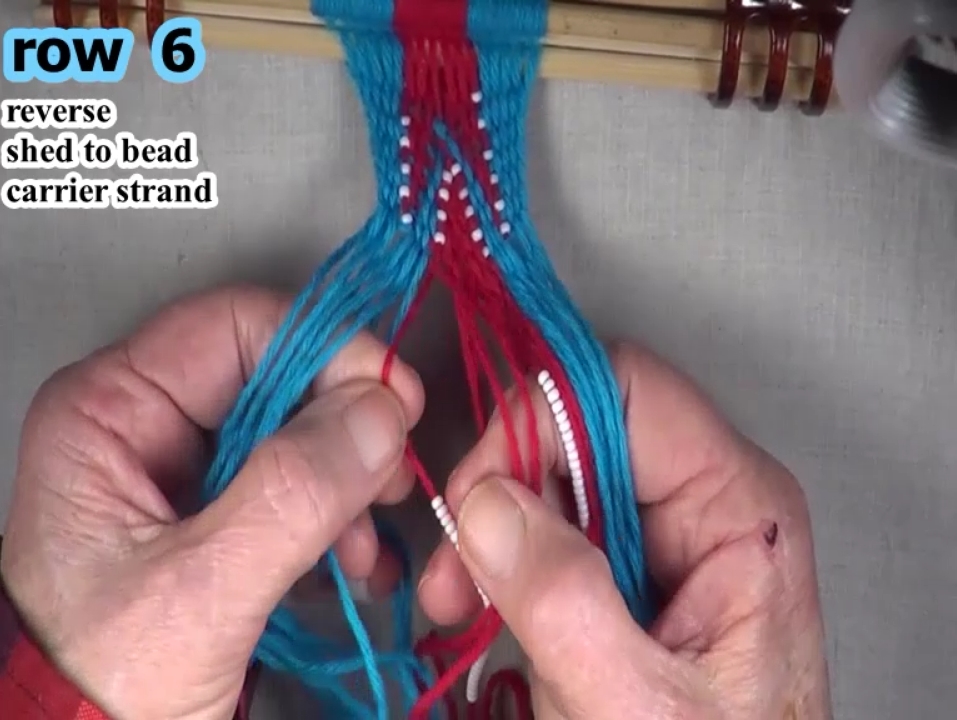
| Reverse the right hand side shed to the bead carrier strand. |
|
| Previous | Next |
|
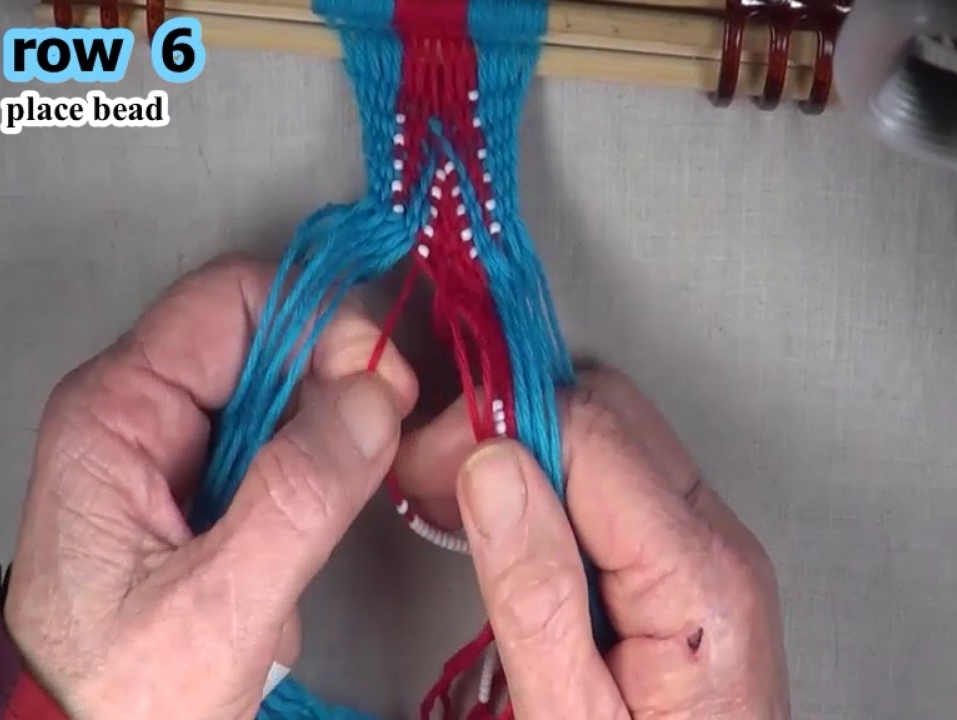
Place a bead by sliding the bead along the carrier strand to its peoper positions.
[OBSERVE]The bead is held in place by the weft strand.Select the left hand side weft strand. |
|
| Previous | Next |
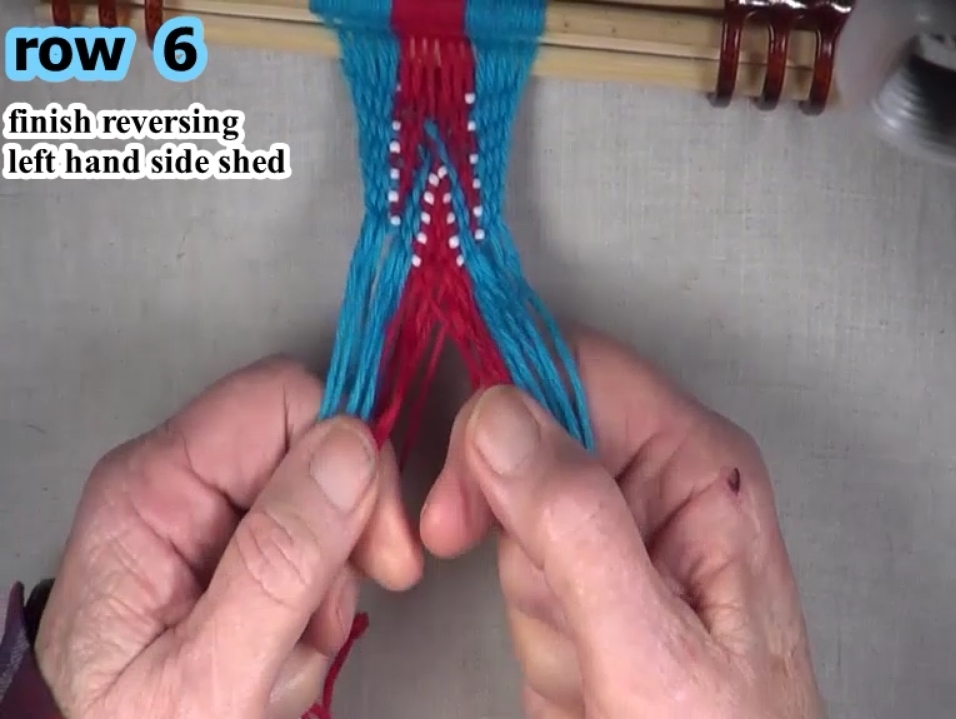
| Finish reversing the right hand side row 6 shed. |
|
| Previous | Next |
|
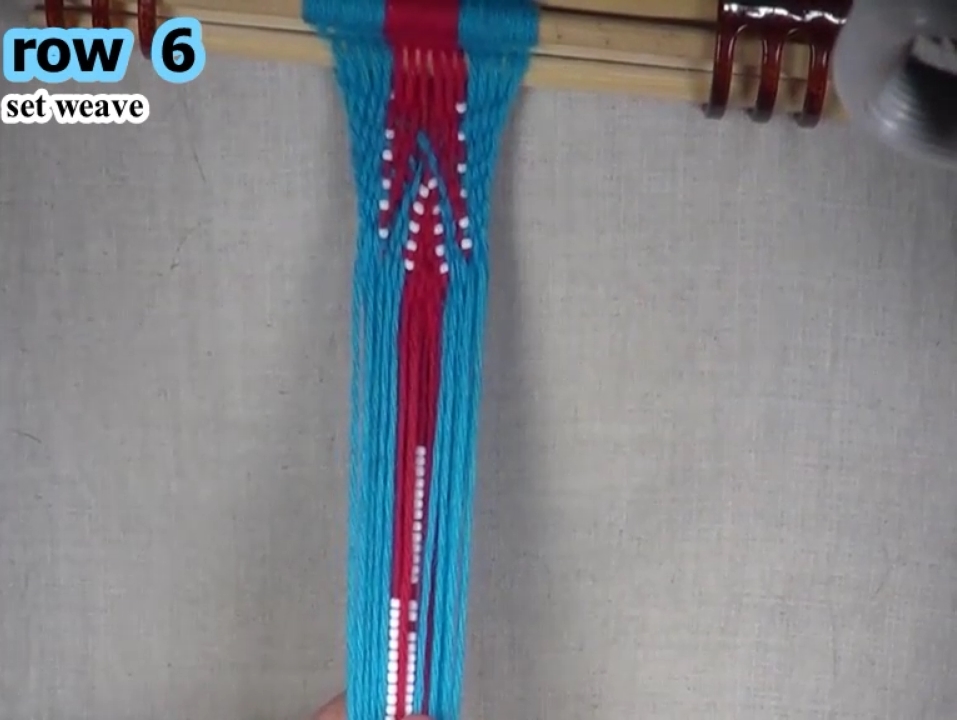
Set weave by pulling the layers of the shed in opposite directions.
Check bead placement. This completes the first segment of the point up beaded arrowhead pattern. |
|
| Previous | Next |
|
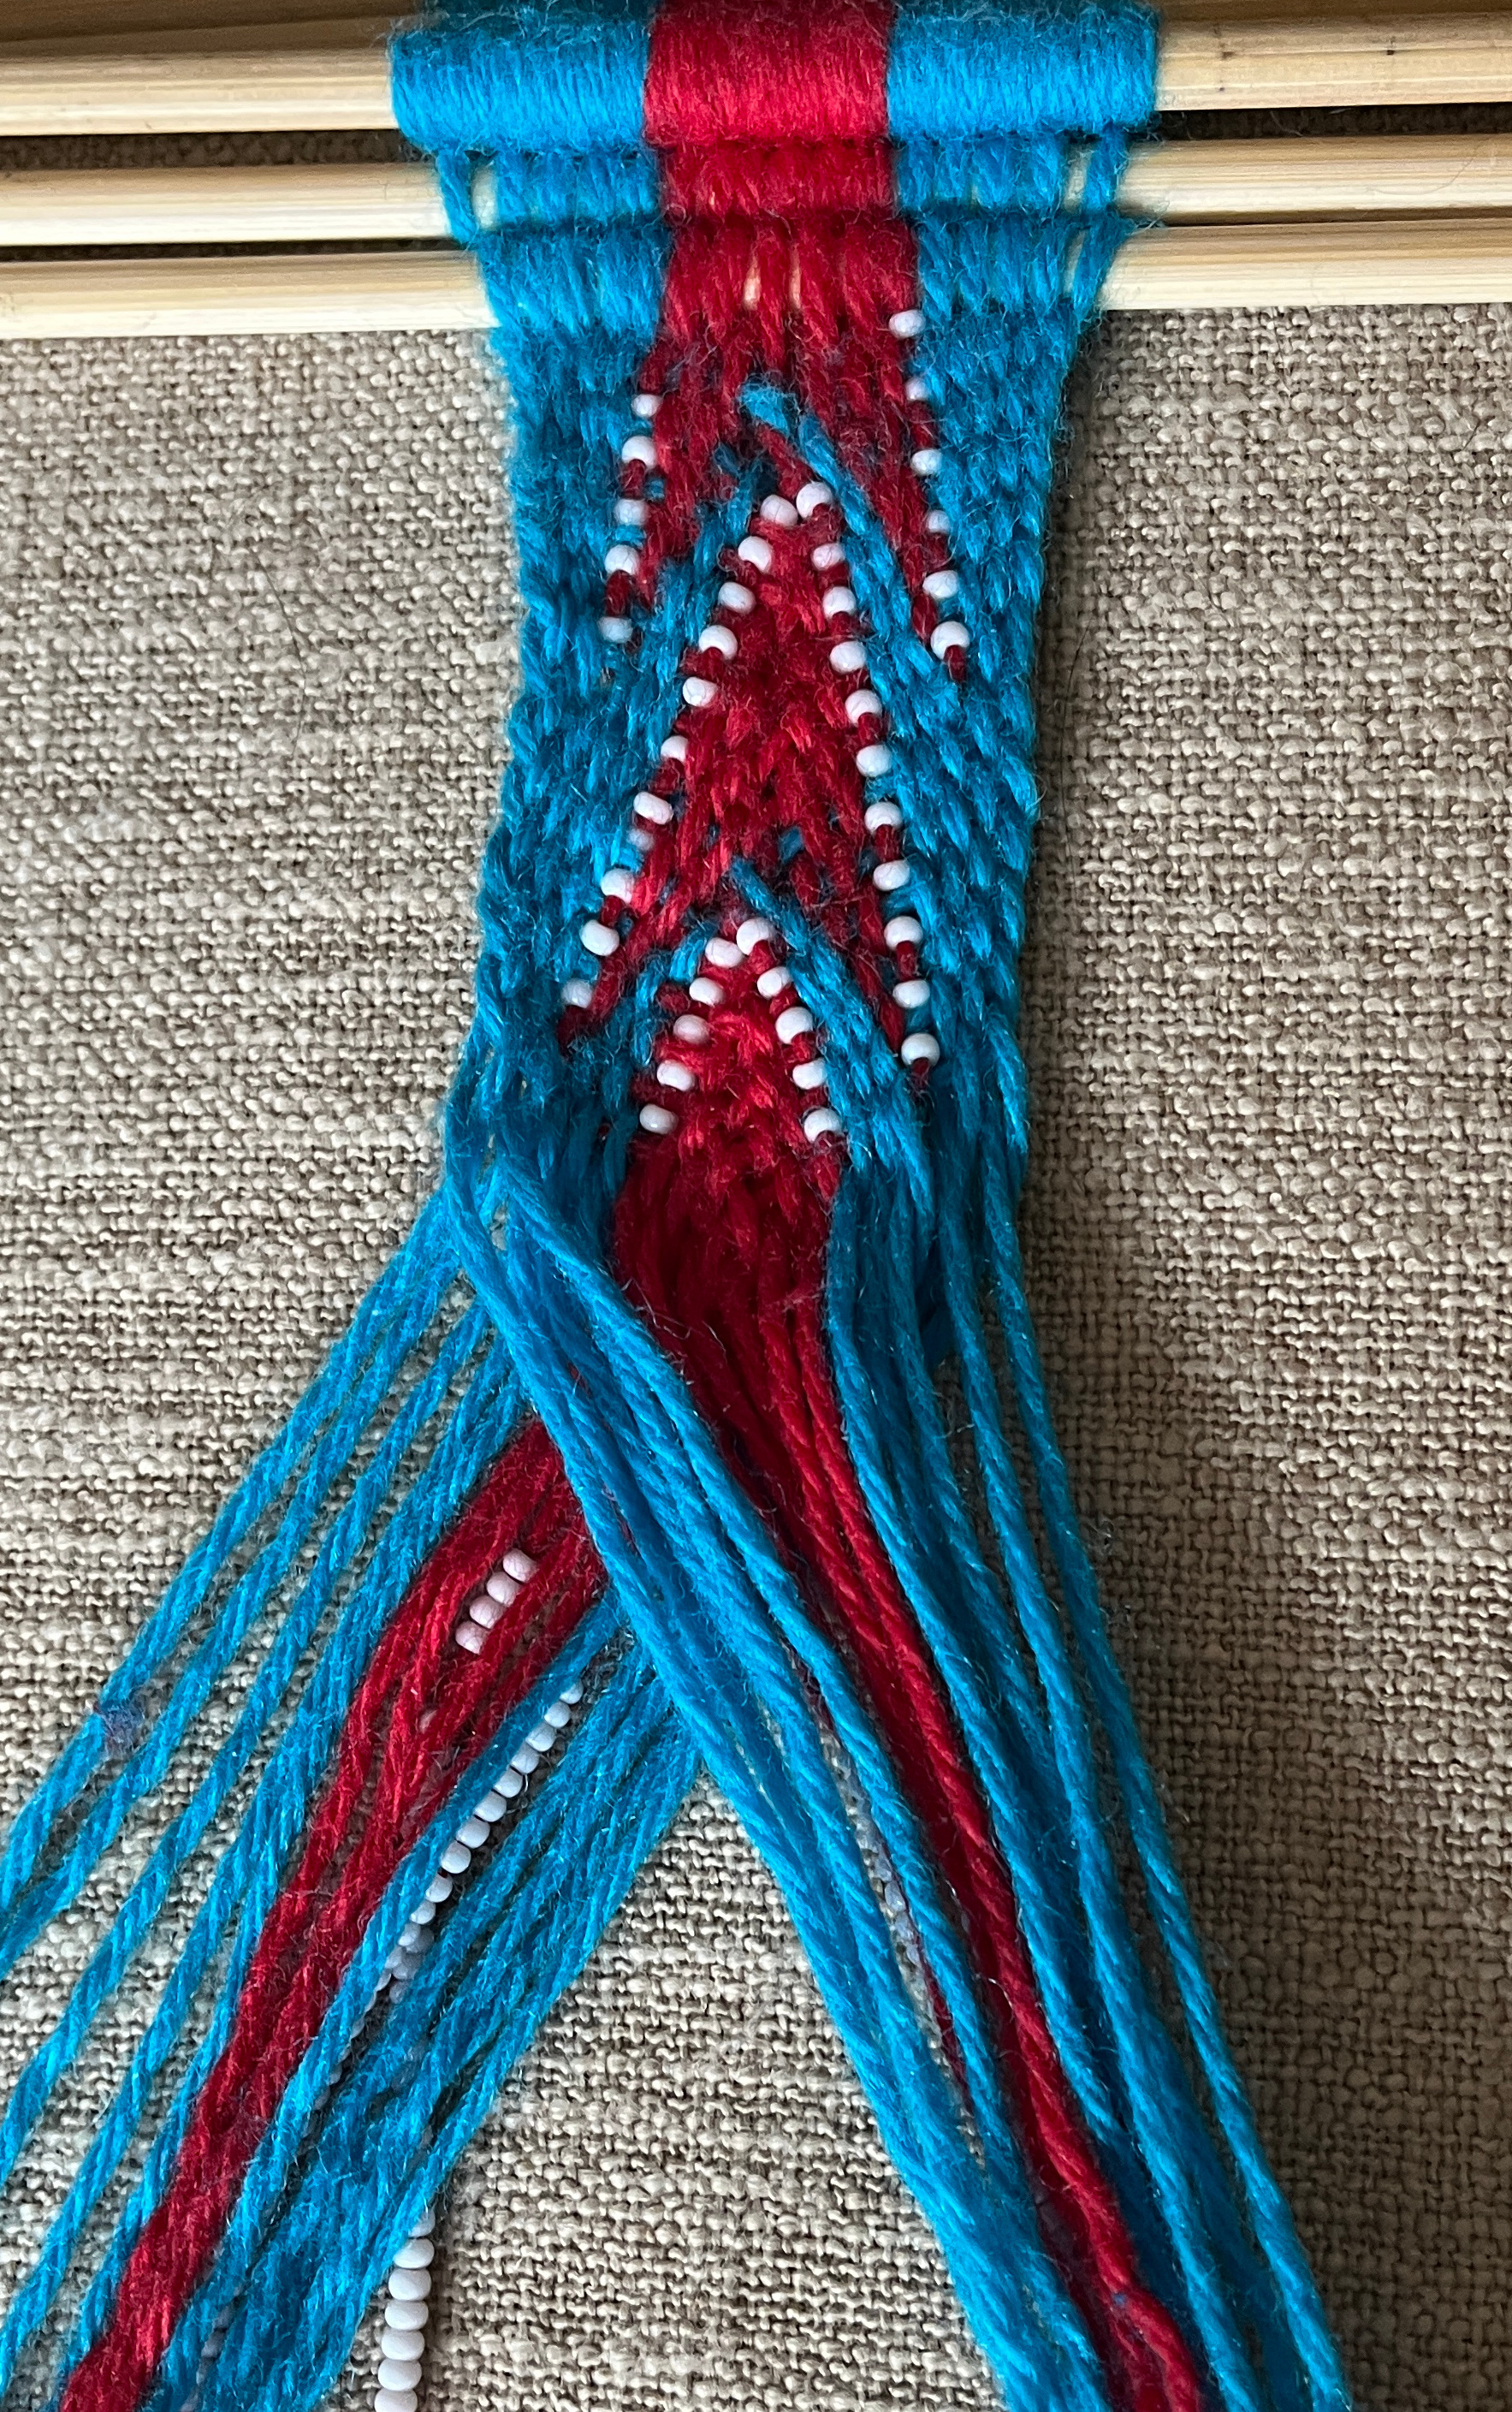
To produce a complete arrowhead designe, two segments of the basic patter are required.
[OBSERVE] Each segment is composed of two parts of the arrowhead.
|
|
| Previous | Top of Page |
|
Go to Beaded Arrowhead Introduction |