|
|
|
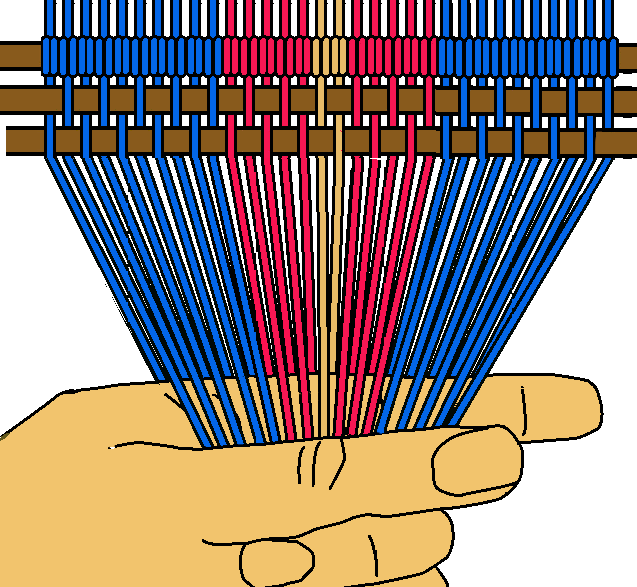
Warp strand to left of middle in top layer of shed. |
||
|
This part of the tutorial will present the steps for weaving the “point up” arrowhead pattern where the headstick configuration has the warp strand to the left of the middle in the top layer of the shed. Weaving will start on the right side of the work-piece.
[NOTE] The interlocks on the right hand side of the work-piece are made with warp strands from the bottom layer of the shed. The interlocks on the left hand side of the work-piece are made with warp strands from the top layer of the shed. [NOTE] The weft strands from the two sides meet at the middle where they become the middle warp strands. |
||
|
|
|
|
The warp strand located to the left of the middle is in the top layer of the shed.
|
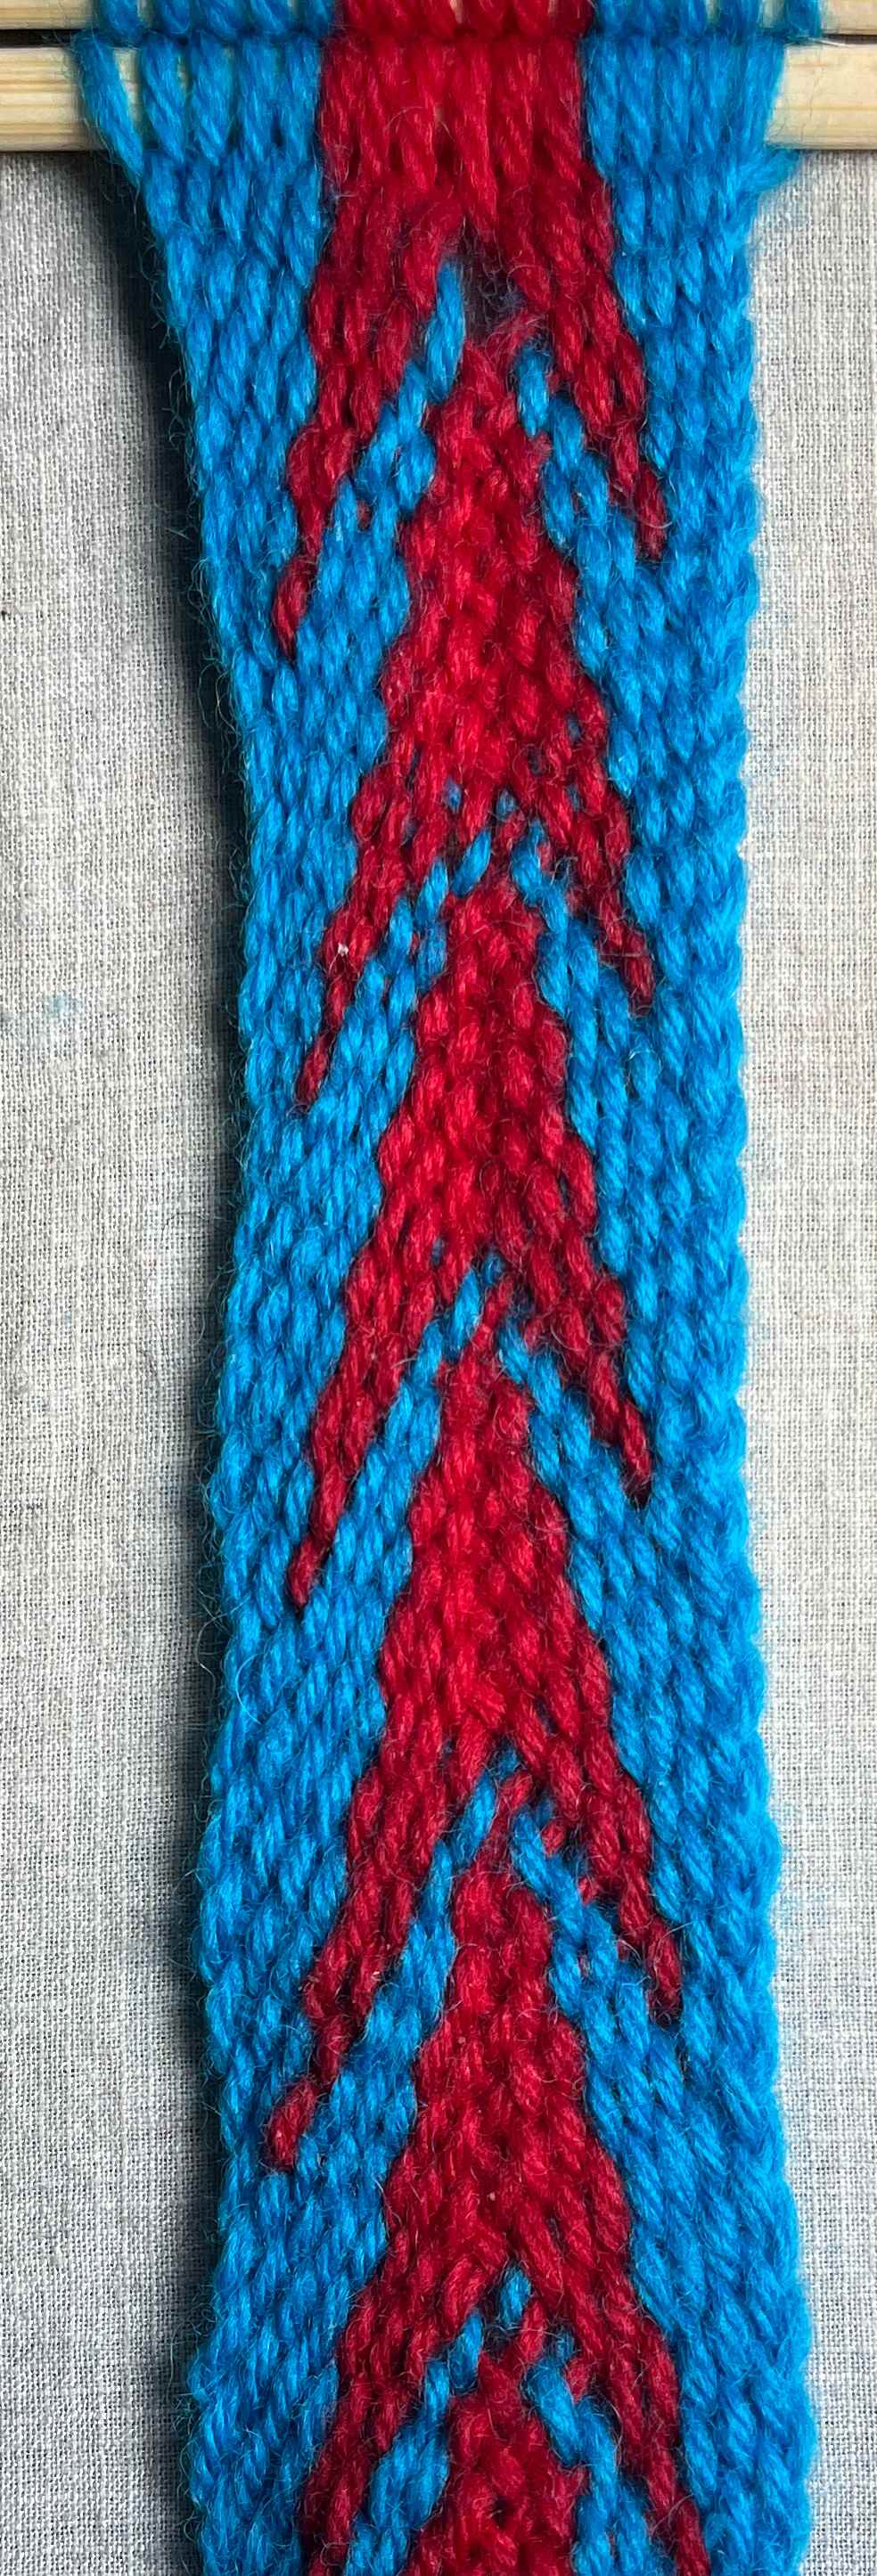
[OBSERVE] The barbs on the left side of the arrowheads are slightly longer then the barbs on the right side. This is because one more warp strand is visible on the surface of the left hand side barbs. |
|
| Back | Next figure 3 |
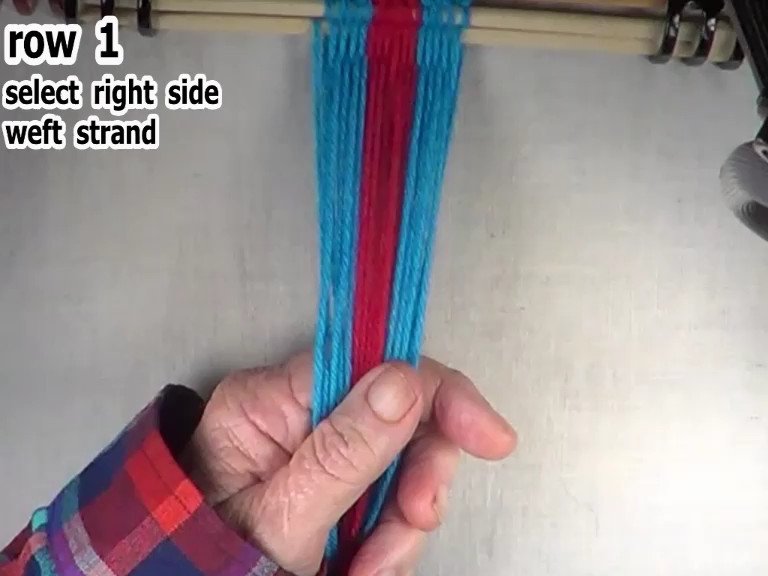
Pass the row 1 right hand side weft strand to the middle of the work-piece.
Pass the weft strand through the open right hand side shed to the middle of the warp strands that will become the arrowhead design. |
|
| Back figure 1 | Next figure 4 |
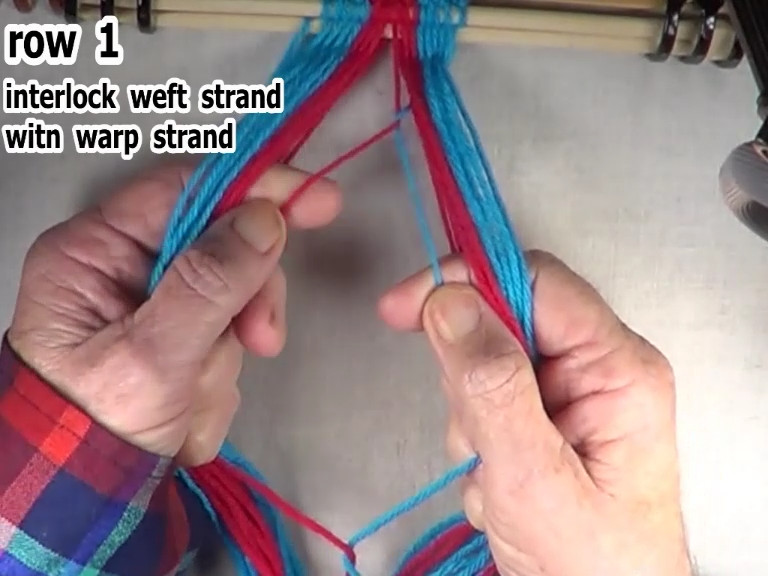
Form the interlock in the right hand side weft strand of row 1 .
Place the weft strand in the top layer of the right hand side shed. |
|
| Back figure 3 | Next figure 5 |
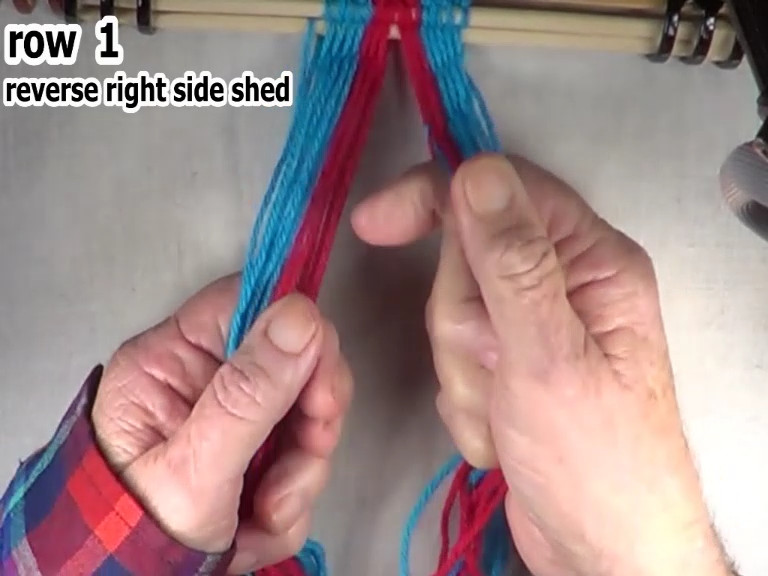
Reverse the right hand side of the row 1 shed.
Work from the right hand edge of the work-piece to the middle of the work-piece. |
|
| Back figure 4 | Next figure 6 |
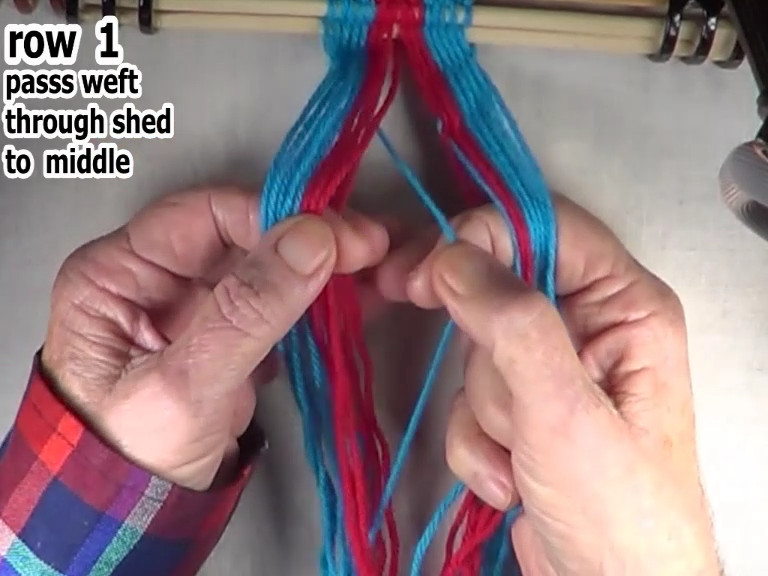
Pass the row 1 left hand side weft strand to middle of the work-piece.
Pass the weft strand through the open shed to the middle of the warp strands that will become the arrowhead designe. |
|
| Back figure 5 | Next figure 7 |
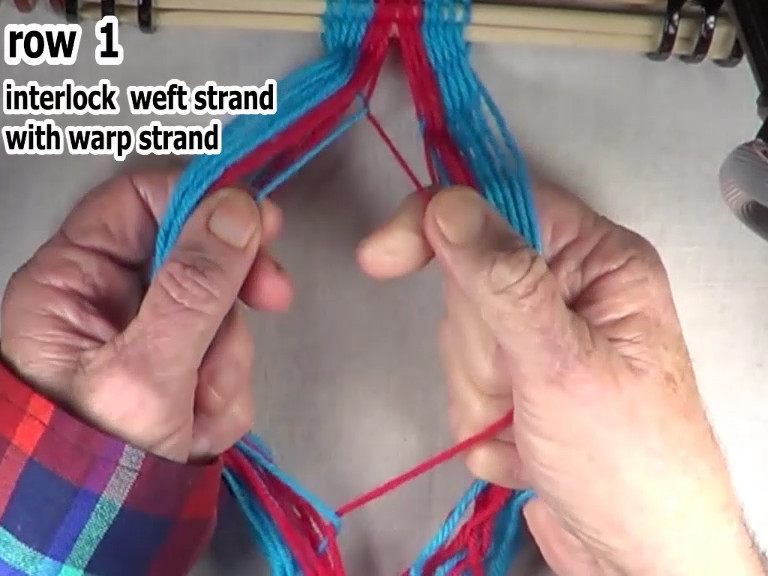
Form the first interlock in the left hand side weft strand of the row 1 shed.
Place the weft strand in the bottom layer of the shed. The warp strand that was to the left of the middle becomes the next segment of the row 1 left hand side weft strand. |
|
| Back figure 6 | Next figure 8 |
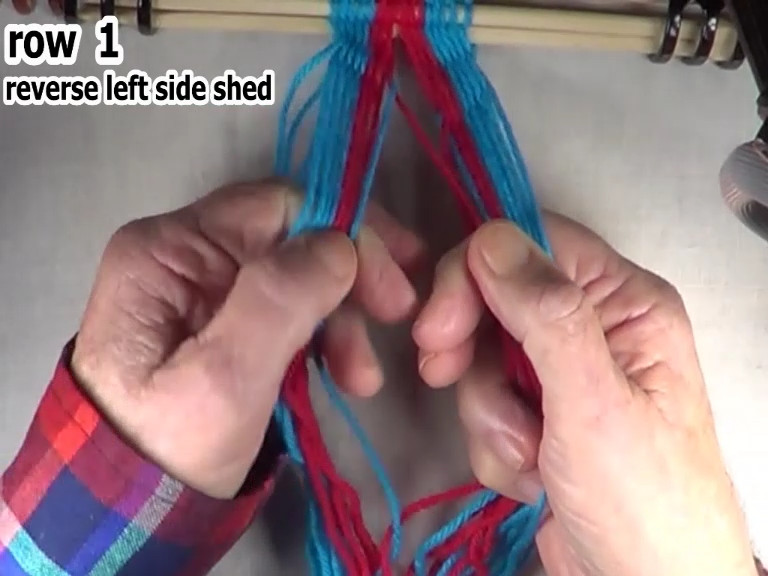
Reverse the shed of the left hand side of row 1.
Transfer the left hand side row 1 shed to the index finger of the right hand. Work from the left hand edge of the work-piece to the middle of the work-piece. |
|
| Back figure 7 | Next figure 9 |
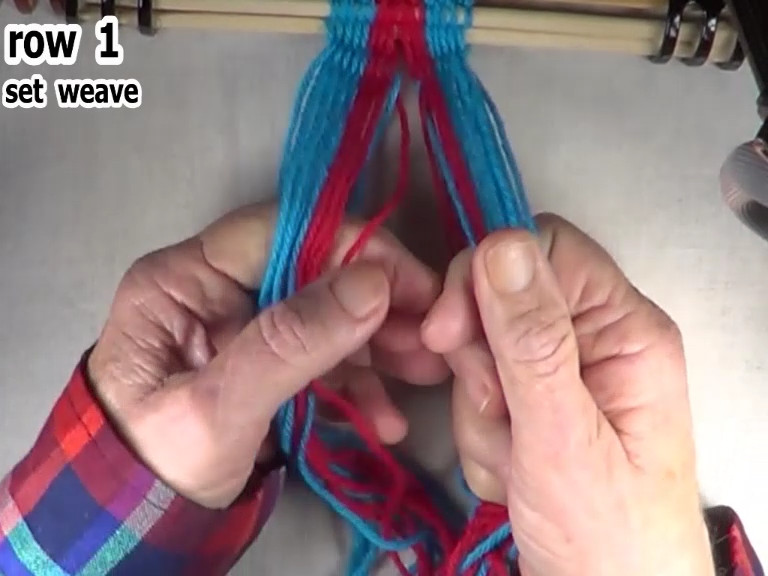
Set the row 1 weave.
Check individual warp strands to ensure that they are snug and even. [TIP]Use index fingers as beaters. |
|
| Back figure 8 | Next figure 10 |
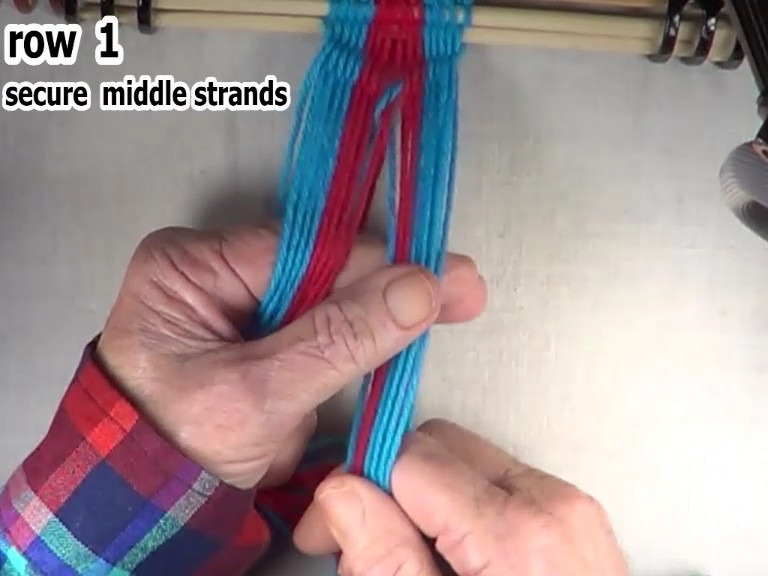
Complete row 1 weaving.
Then place the right hand side weft strand in the top layer of the left hand side shed. Place the left side weft strand in the bottom layer of the shed. |
|
| Back figure 9 | Next figure 11 |
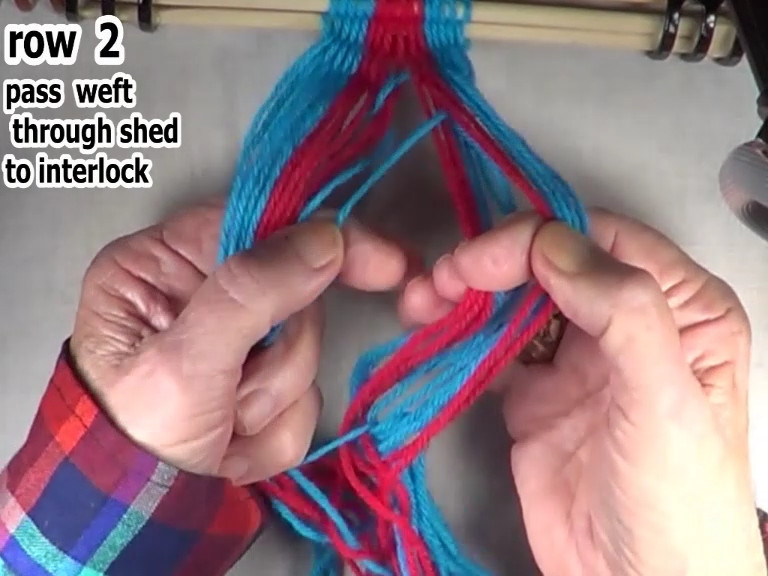
Pass row 2 right hand side weft strand to the row 1 interlock.
Pass the weft strand through the open right hand side shed to the interlock in row 1. |
|
| Back figure 10 | Next figure 12 |
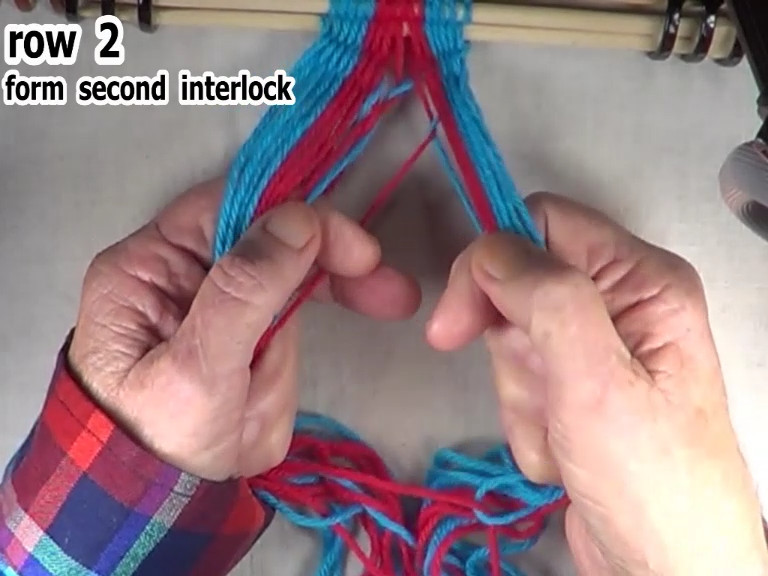
Form the first interlock in the row 2 right hand side weft strand.
Place the weft strand in the bottom layer of the shed. When the first part of the row 2 right side weft strand is placed in the bottom layer of the shed, the weft strand becomes a warp strand. The interlocked warp strand becomes the next part of the row 2 right side weft strand. |
|
| Back figure 11 | Next figure 13 |
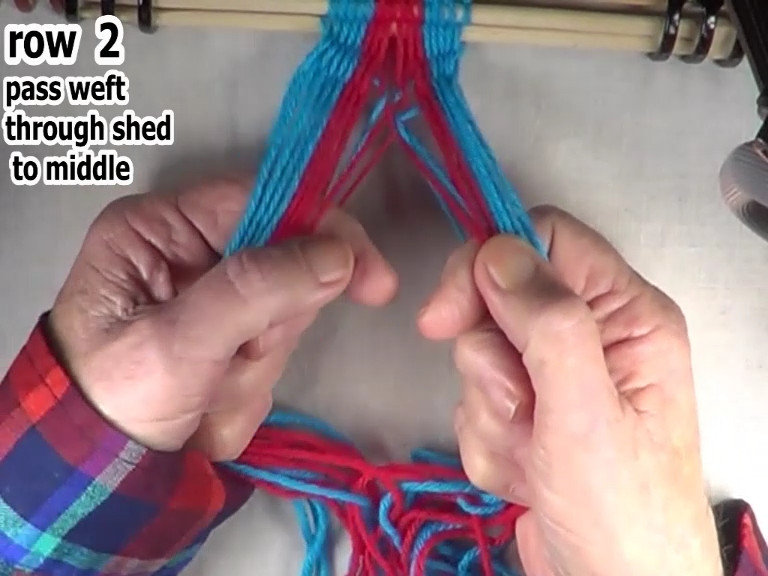
Pass the row 2 right side weft strand to the middle of the work-piece.
Place the row 2 right side weft strand in the bottom layer of the shed. The row 2 right side weft strand becomes the left hand side middle warp strand when it is placed in the bottom layer of the left hand side shed. Secure the left hand side middle warp strand by placing the right hand side middle warp strand in the top layer of the shed. |
|
| Back figure 12 | Next figure 14 |
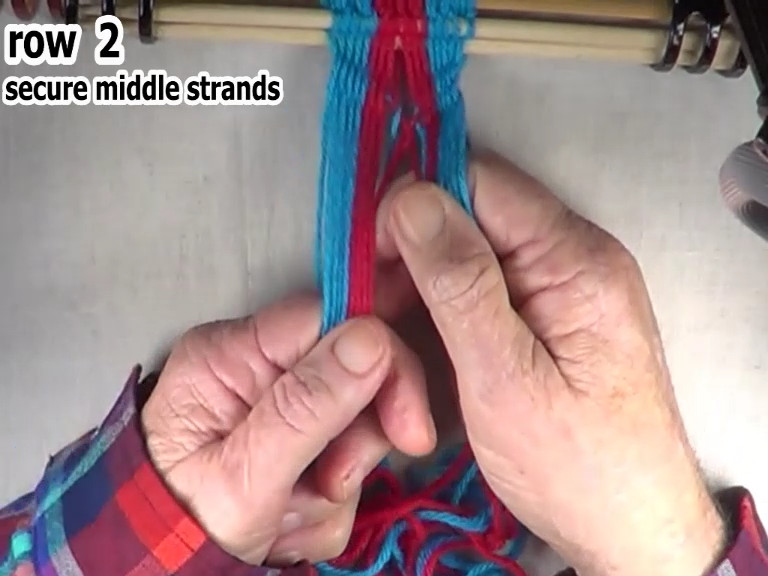
Reverse the shed on the right hand side of the row 2.
Work from the right hand edge of the work-piece to the middle of the work-piece. |
|
| Back figure 13 | Next figure 15 |
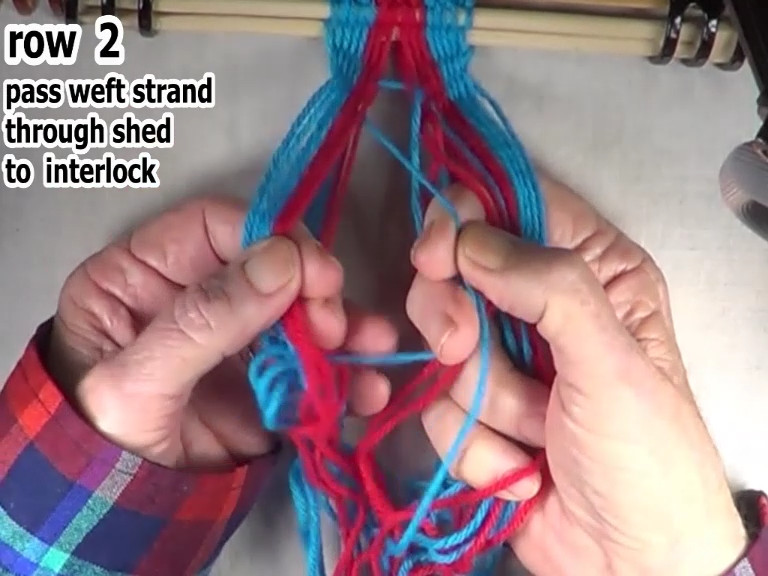
Pass the row 2 left hand side weft strand to row 1 interlock.
Pass the weft strand through the open shed to the to the row 1 interlock. |
|
| Back figure 14 | Next figure 16 |
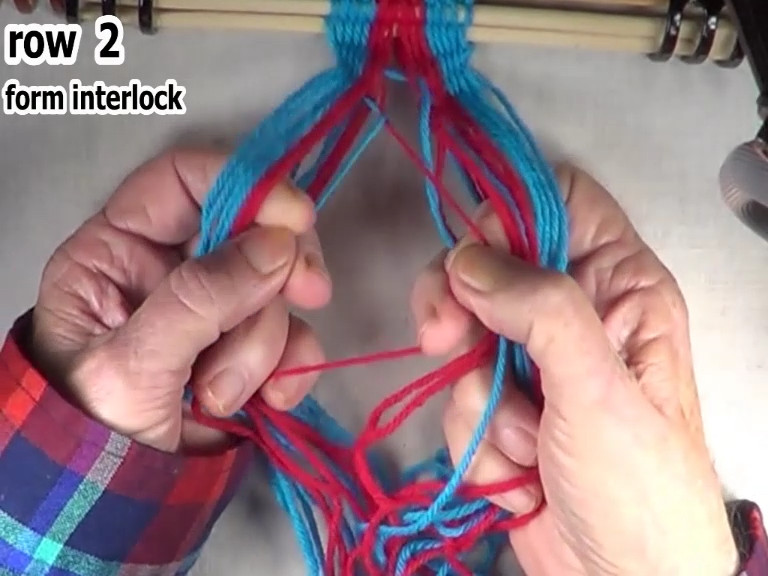
Form the left hand side interlock in the row 2 left hand side weft strand.
Place the first part of the row 2 weft strand in the bottom layer of the shed. When the first part of the row 2 weft strand is placed in the bottom layer of the shed the interlocked warp strand becomes the next part of the row 2 left hand side weft strand. |
|
| Back figure 15 | Next figure 17 |
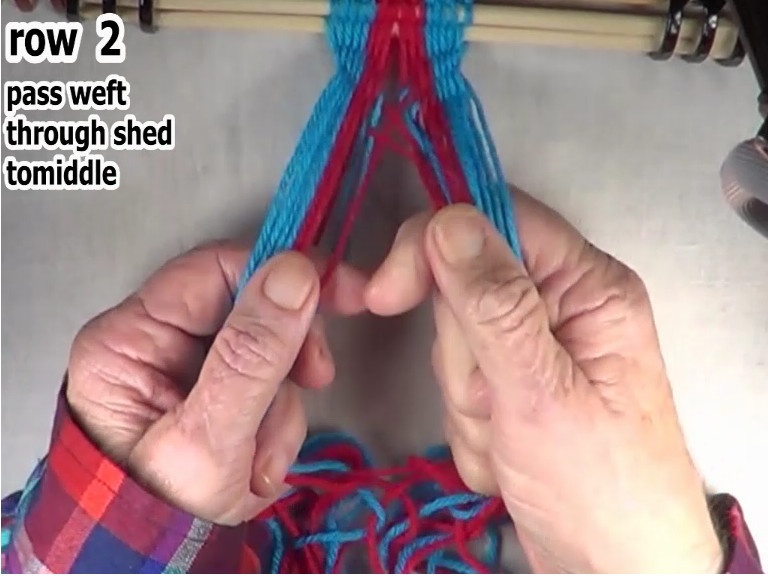
Pass the row 2 left hand side weft strand to the middle of the work-piece.
|
|
| Back figure 16 | Next figure 18 |
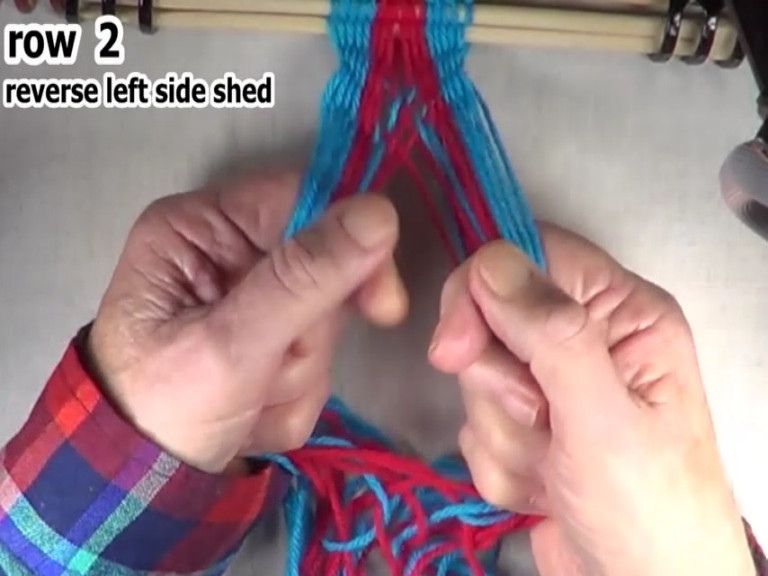
Reverse the row 2 left hand side shed.
Work from the left hand edge of the work-piece to the middle of the work-piece. |
|
| Back figure 17 | Next figure 19 |
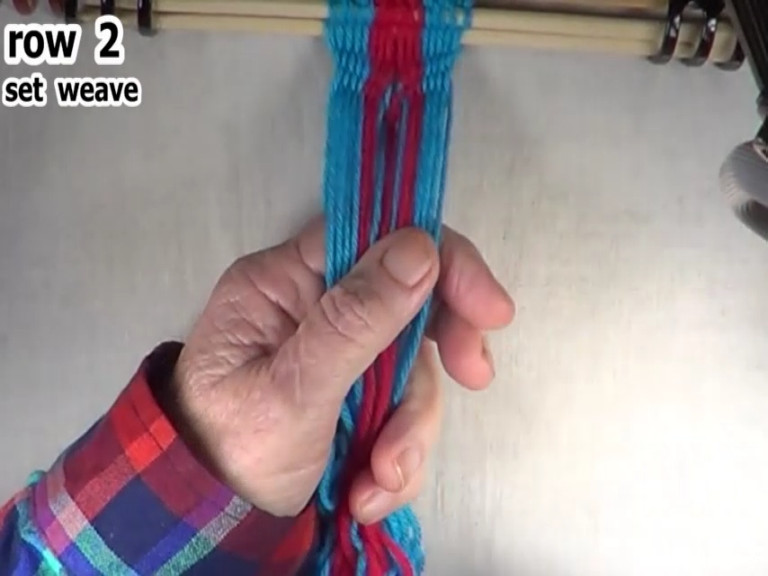
Set the row 2 weave.
Check individual warp strands to ensure that they are snug and even. [TIP]Use index fingers as beaters. |
|
| Back figure 18 | Next figure 20 |
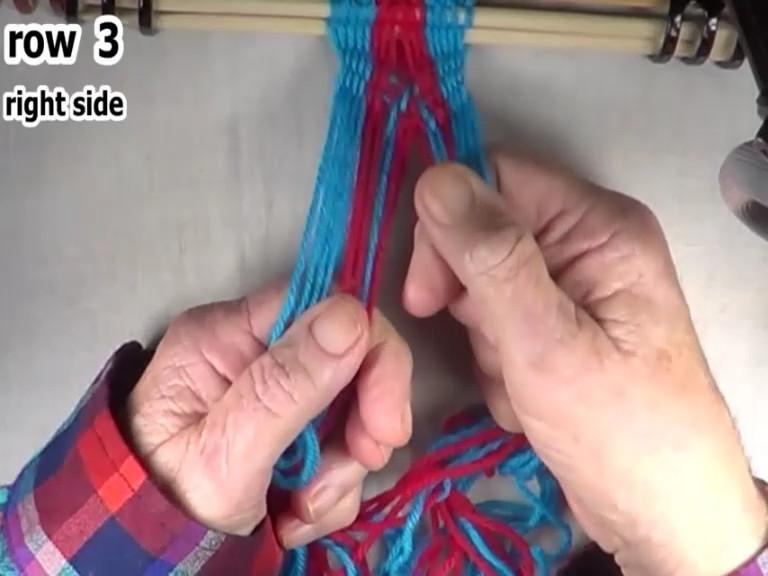
| Weave the right hand side of row 3. |
|
| Back figure 19 | Next figure 21 |
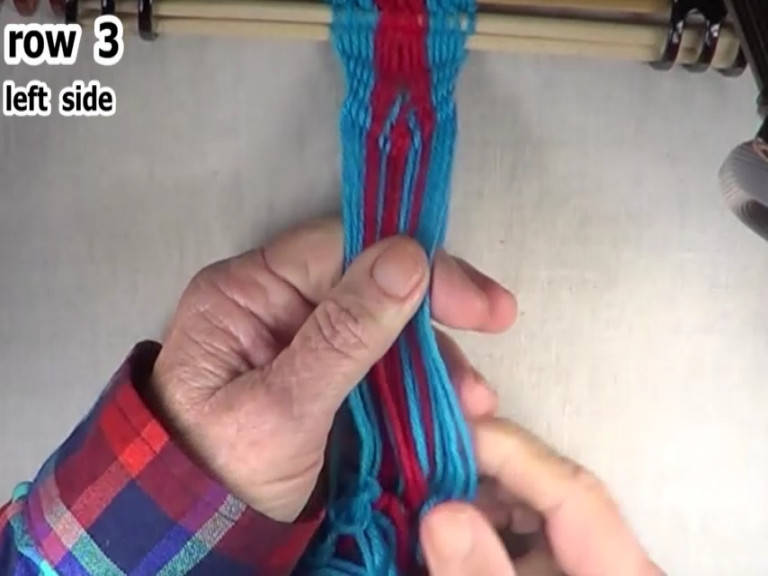
| Weave the left hand side of row 3. |
|
| Back figure 20 | Next figure 22 |
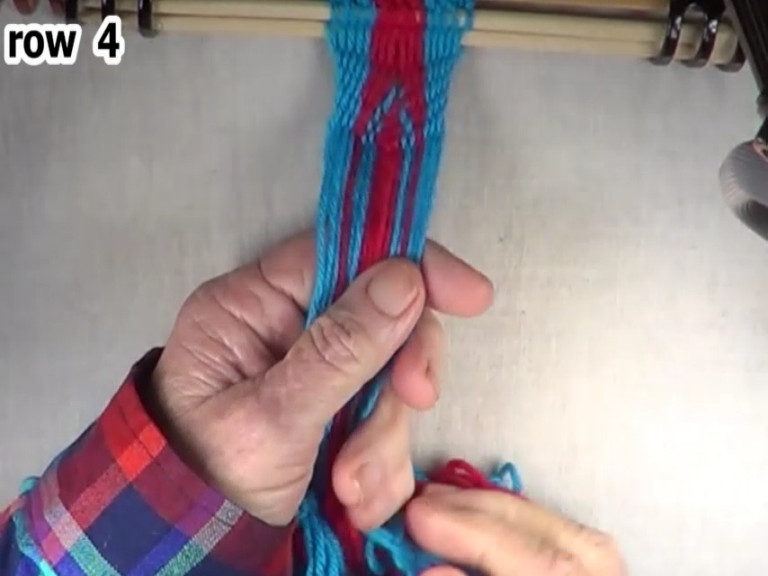
| Row 4 requires the same sequesence of weaving steps as row 3. |
|
| Back figure 21 | Next figure 23 |
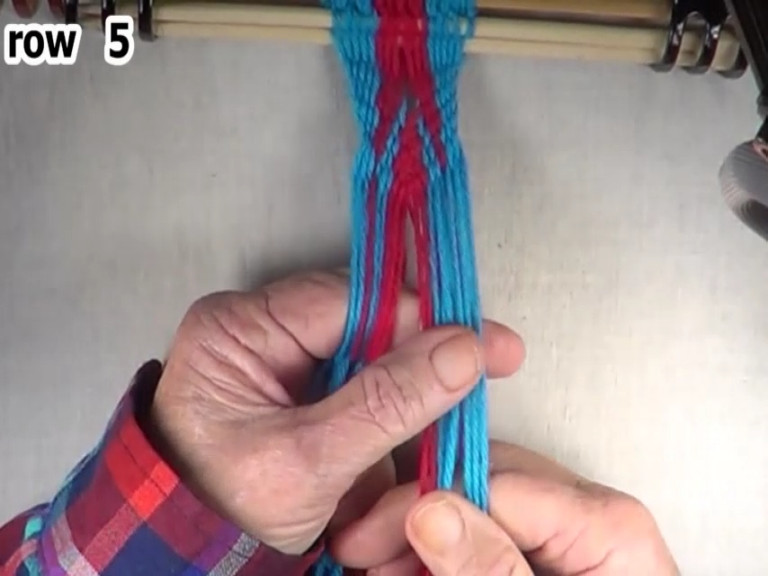
| Row 5 requires the same sequesence of weaving steps as row 4. |
|
| Back figure 22 | Next figure 24 |
|
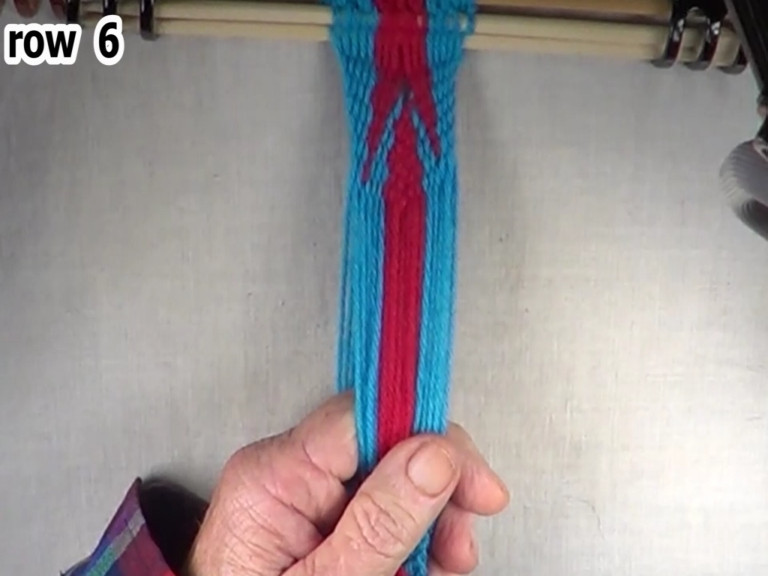
Row 6 requires the same sequesence of weaving steps as row 5.
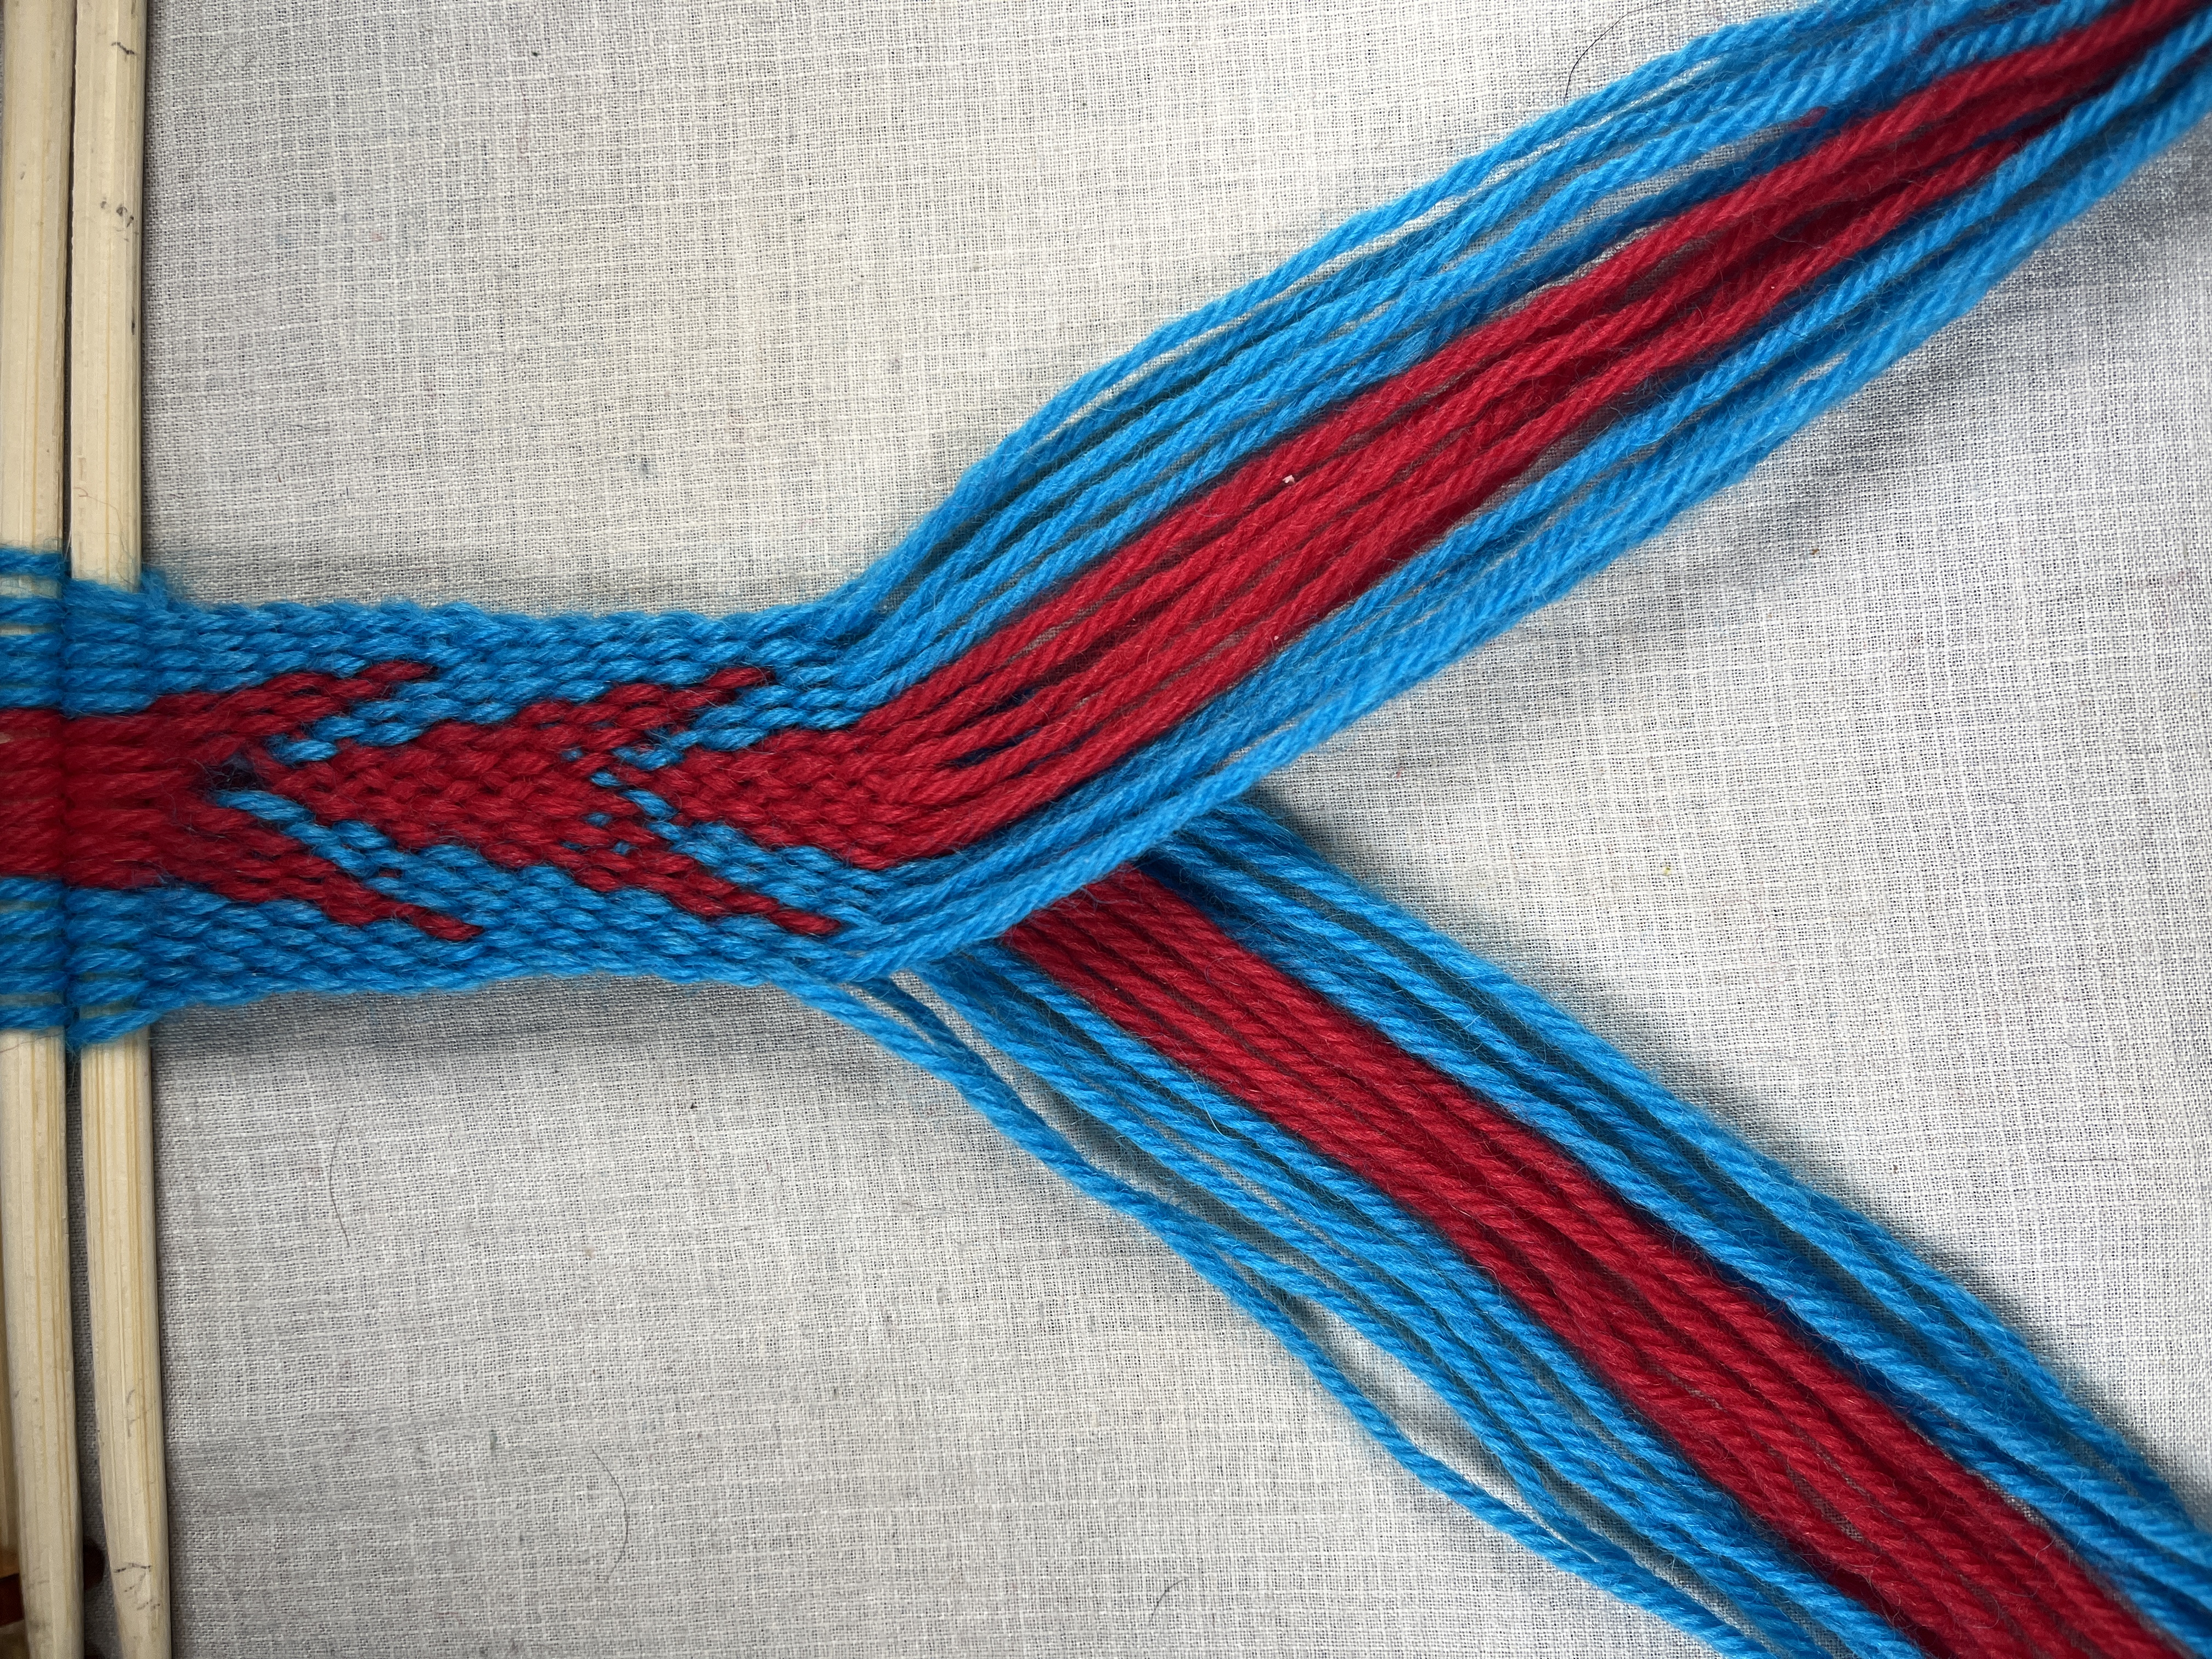
This completes the first segment of the arrowhead pattern. [OBSERVE] Each segment is composed of two parts of the arrowhead.
|
|
| Back figure 23 | Next figure 25 |
|
Segment 2 of arrowhed pattern.
[NOTE] To produce a complete arrowhead designe, two segments of the basic patter are required. Continue adding segments untill the work-piece is the desired length |
|
| Back figure 24 | Next figure 26 |
| Starting on the left hand side of the work-piece | |
|
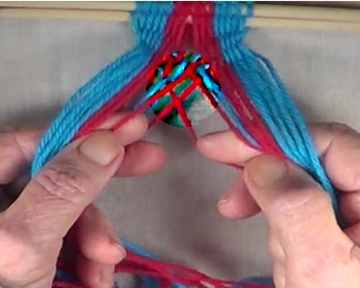
This part of the point up arrowhead tutorial will deal with starting on the left hand side of the work-piece.
The difference in starting on the left side or the right side is the sequence of steps as the left and right weft strands meet in the middle of the pattern. All the other step remain the same. At the middle of the pattern where the weft strands meet, the weft strands have an over/under configuratuon. [NOTE] It does not matter which side the weaving starts on, the end result is the same. [NOTE] The arangement of the warp strand on the headstick remains the same as the arangement for starting on the right hand side of the work-piece. |
|
| Back figure 25 |
|
--- [ Go to Arrowhead Point Up Menue ] --- [ Go to Arrowhead Menu] |