|
|
Both middle warp strand in top layer of the shed.. |
||
This part of the tutorial will present the steps for weaving the “point down” arrowhead pattern when both middle warp strands are in the in the bottom layer of the shed.
[NOTE] The weaving of each row will start in the middle of the work-piece. [NOTE] The interlocks on both sides of the work-piece are made with warp strands from the top layer of the shed. [NOTE] The right hand side and the left hand side of the arrowhead pattern are mirror images. |
Start Tutorial |
Headstick Setup Configuration
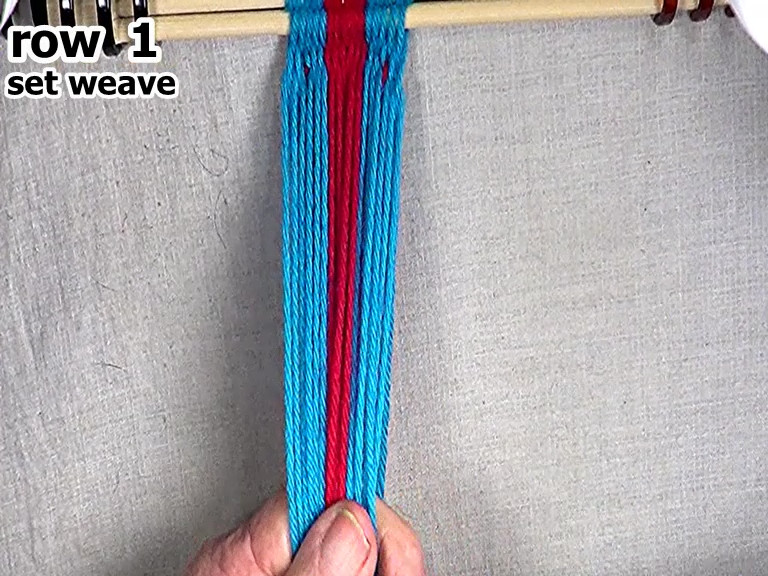
The warp strands that are in the middle of the work-piece are in the bottom layer of the shed. ![]() |
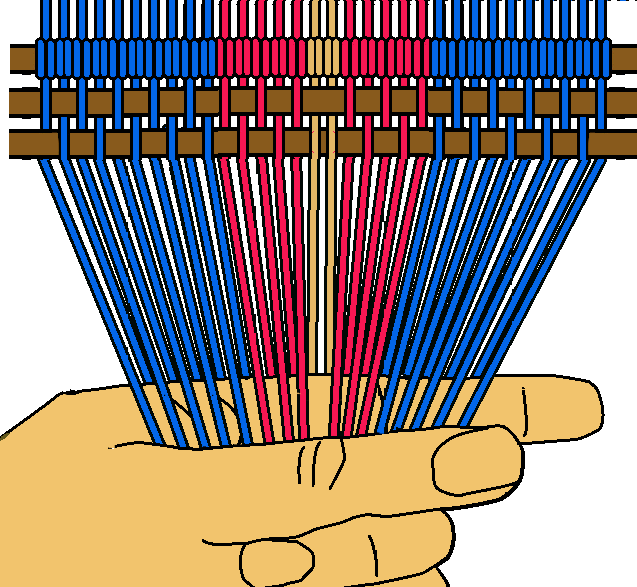
[figure-2]
![]() [OBSERVE] The barbs on both sides of the arrowhead pattern are the same length. |
Top of Page | Next |
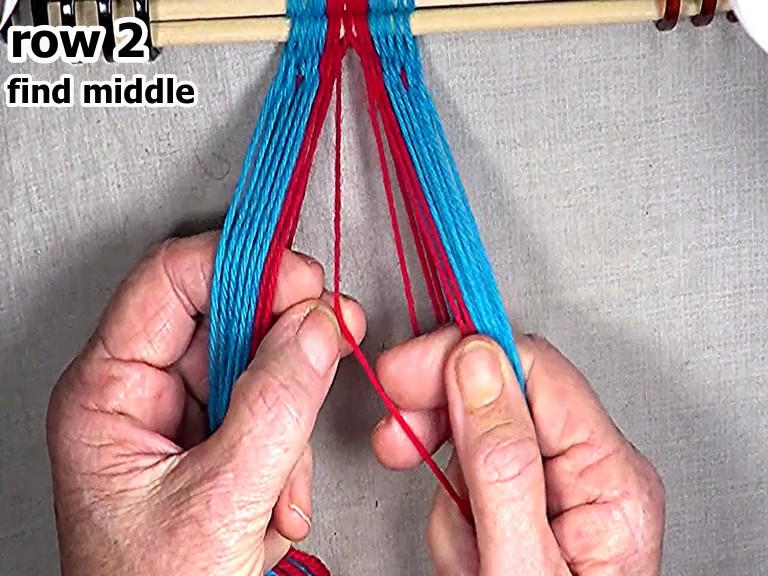
Find the middle of the work-piece. |
[figure-3] [click here to see video]
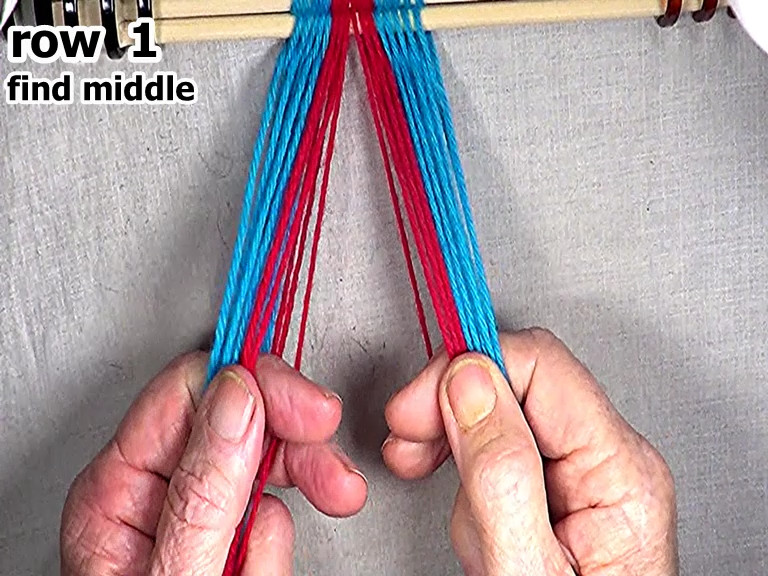
![]() |
Previous | Next |
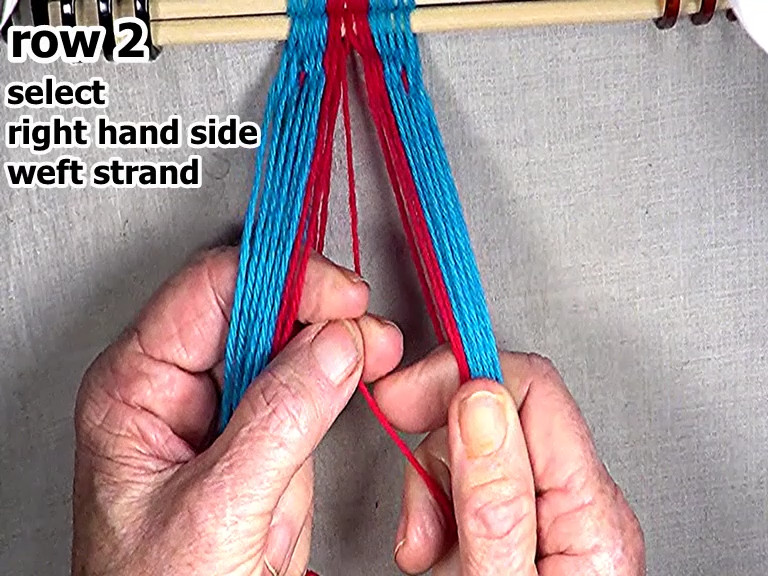
Select the row 1 right hand side weft strand.
[NOTE] When starting a row of weaving, each row's right side weft strand is the first warp strand to the left of the middle. |
[figure-4] [click here to see video]
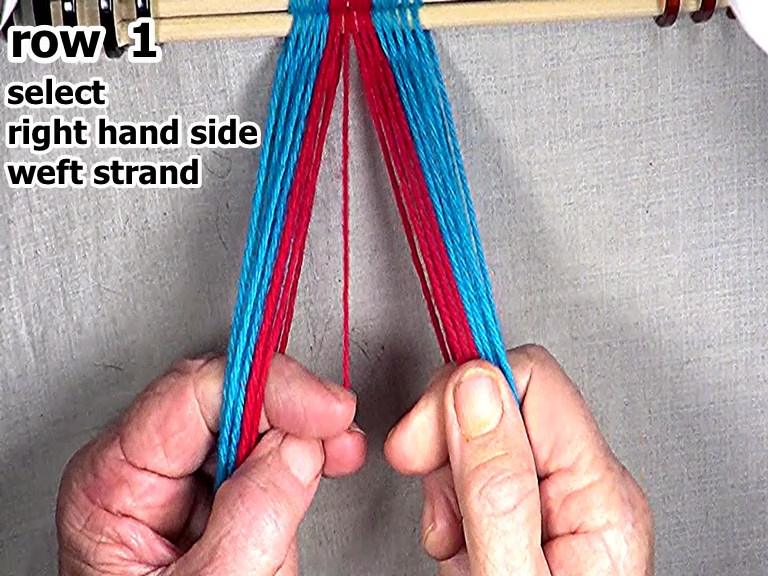
![]() |
Previous | Next |
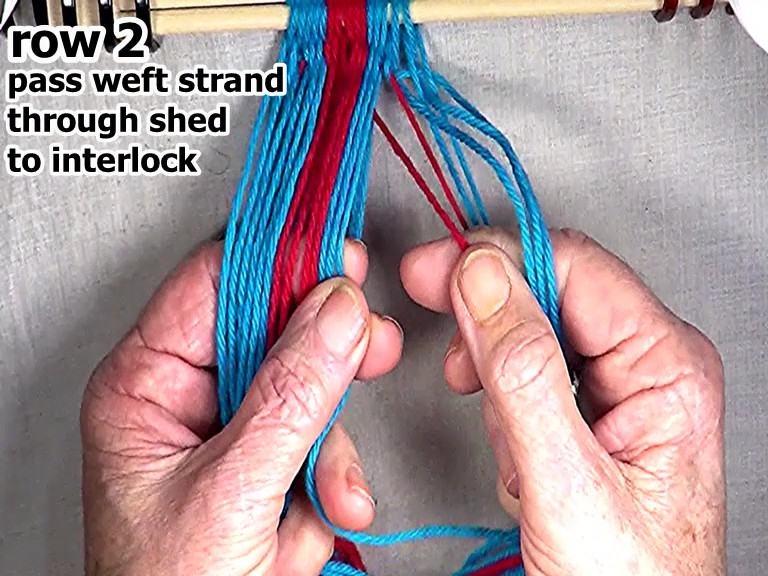
Pass the weft strand through the open shed to right hand side background color warp strand that is one half the number of warp strands used for arrowhead design.
|
[figure-5] [click here to see video]
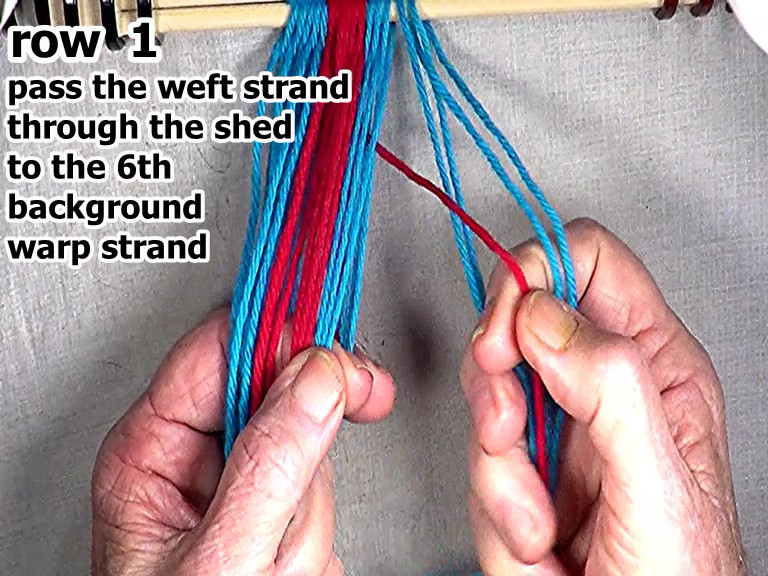
![]() |
Previous | Next |
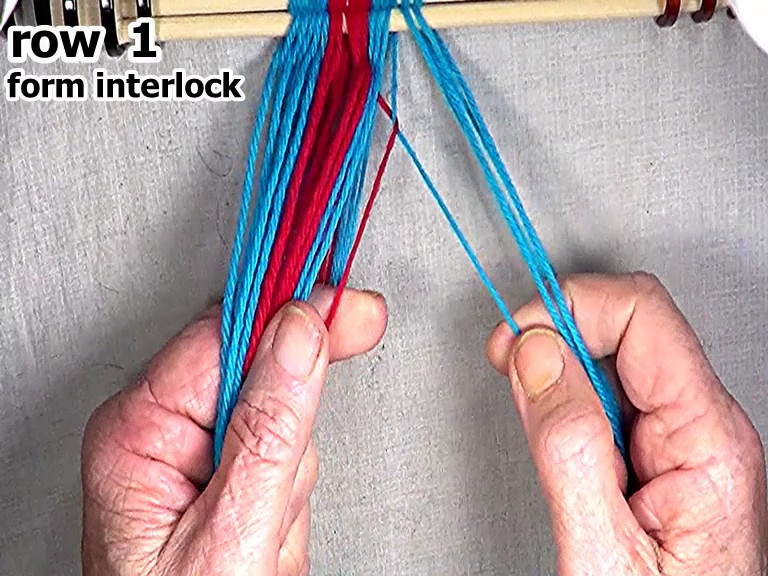
Form the interlock in the row 1 right hand side weft strand.
Place the weft strand in the top layer of the shed.
[NOTE] The warp strand that was the 6th background warp strand becomes the next segment of the row 1 right side weft strand. |
[figure-6] [click here to see video]
![]() |
Previous | Next |
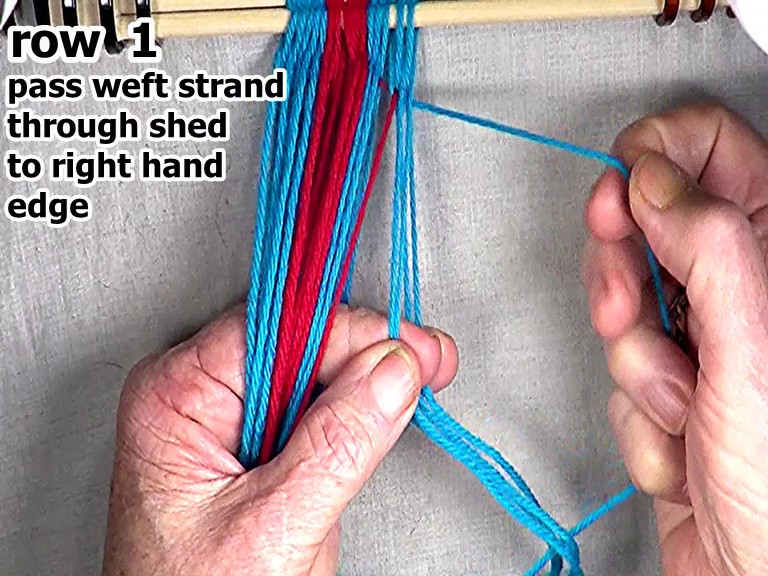
Pass the weft strand through the right hand side shed to the right hand edge of the work-piece. |
[figure-7] [click here to see video]
![]() |
Previous | Next |
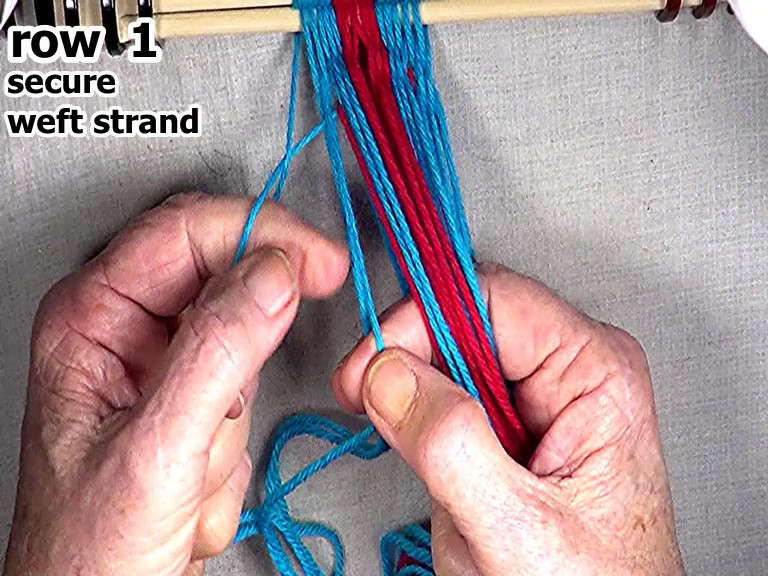
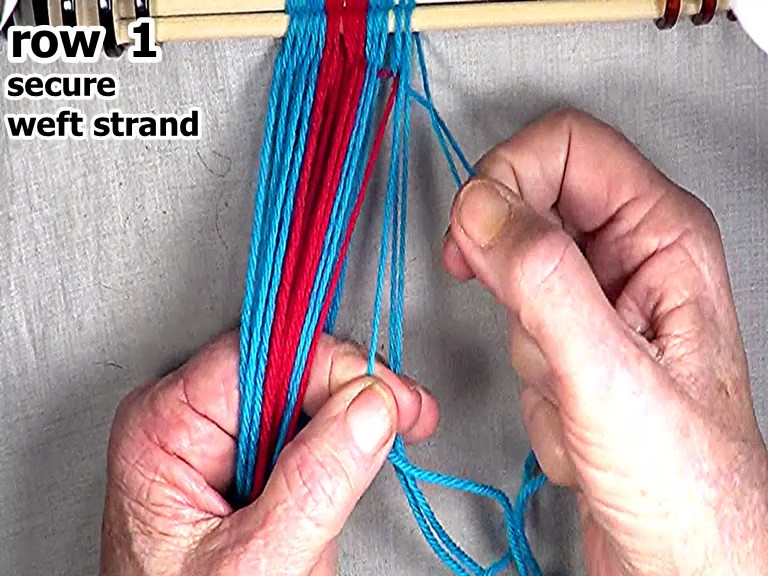
Secure the weft strand.
|
[figure-8] [click here to see video]
![]() |
Previous | Next |
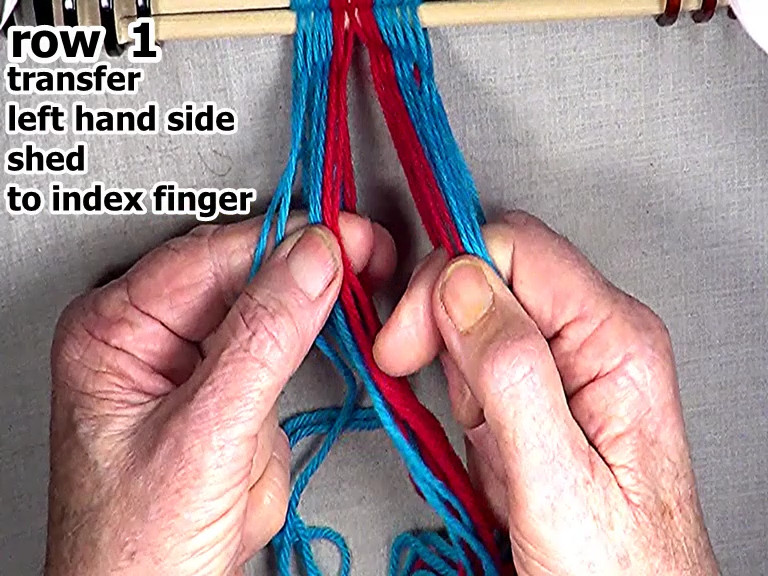
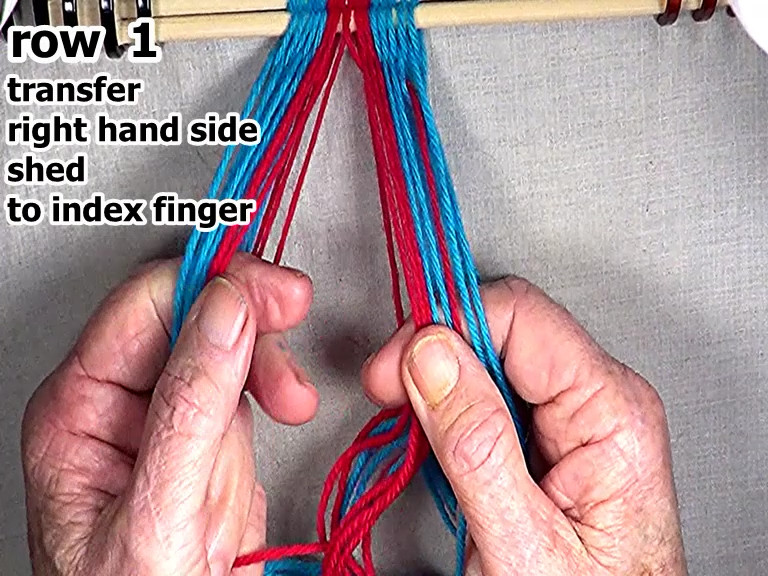
Transfer the right hand side shed to the right hand index finger.
[figure-9] [click here to see video]
|
![]() |
Previous | Next |
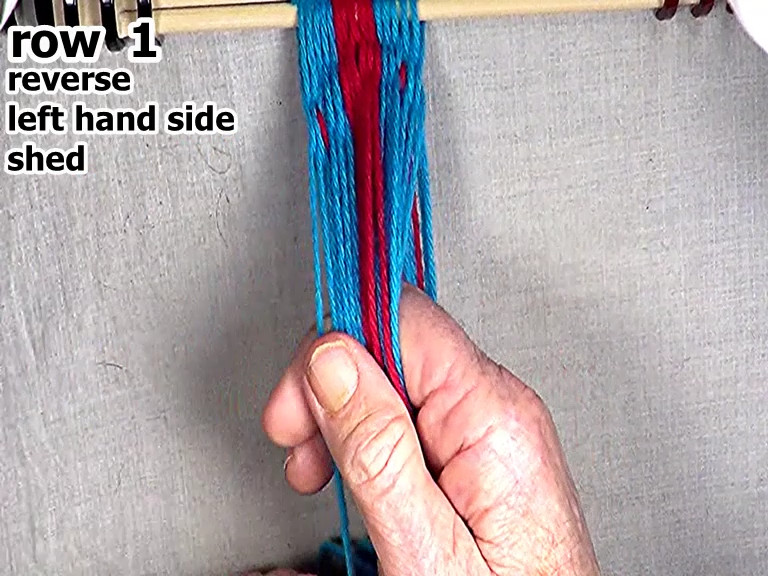
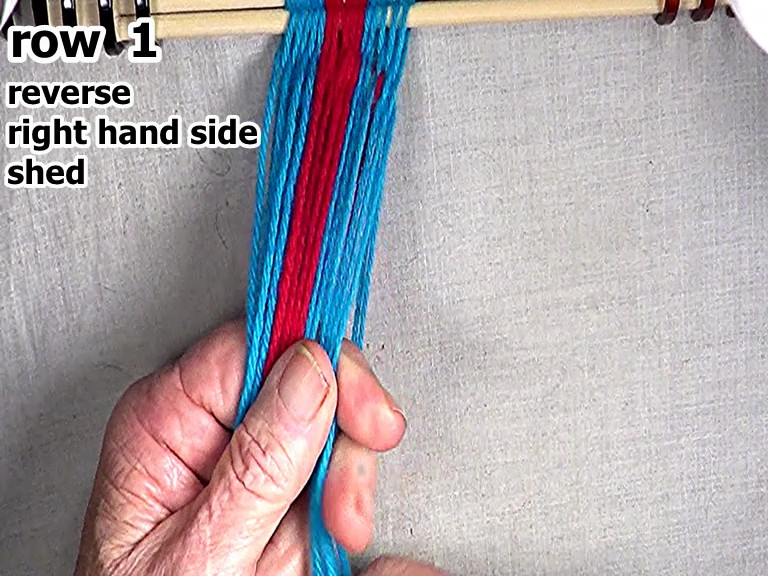
Reverse the right hand side of the row 1 shed.
[NOTE] make sure that the over/under configuration is maintained. Keep the warp strands parallel. |
[figure-10] [click here to see video]
![]() |
Previous | Next |
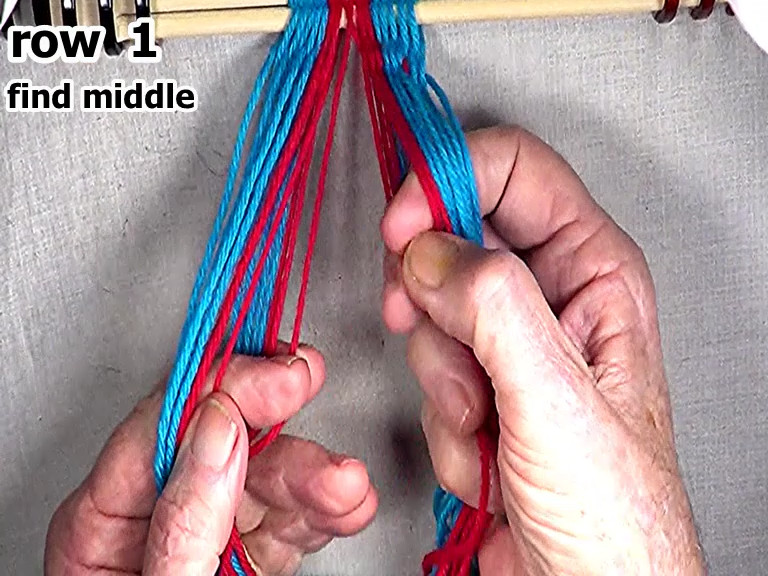
Find the middle of the work piece. |
[figure-11] [click here to see video]
![]() |
Previous | Next |
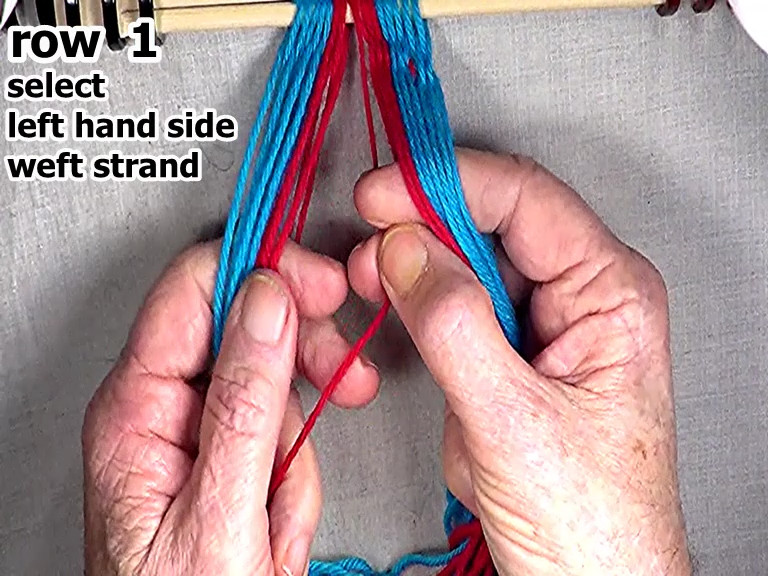
Select the left hand side row 1 weft strand.
[NOTE] When starting the left hand side of a row of weaving, each row's left side weft strand is the first warp strand on the left hand side of the right hand side shed. |
[figure-12] [click here to see video]
![]() |
Previous | Next |
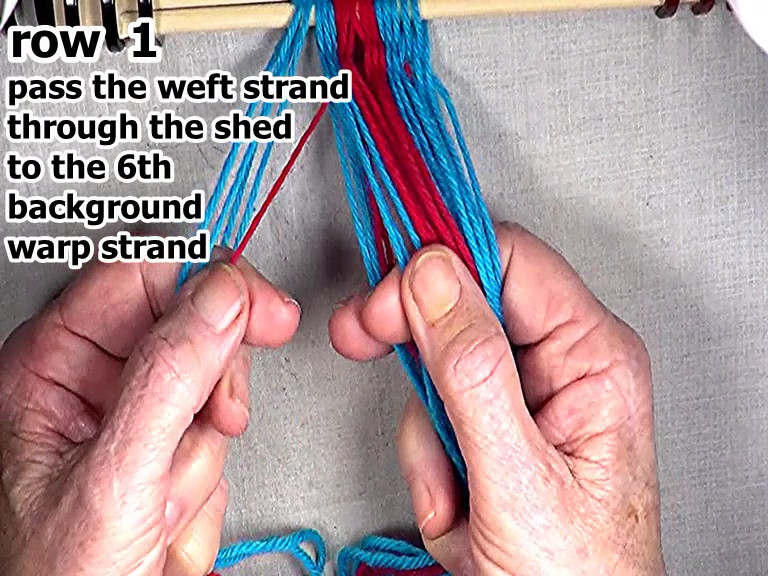
Pass the weft strand through the left hand side of the shed to the 6th background warp strand. |
[figure-13] [click here to see video]
![]() |
Previous | Next |
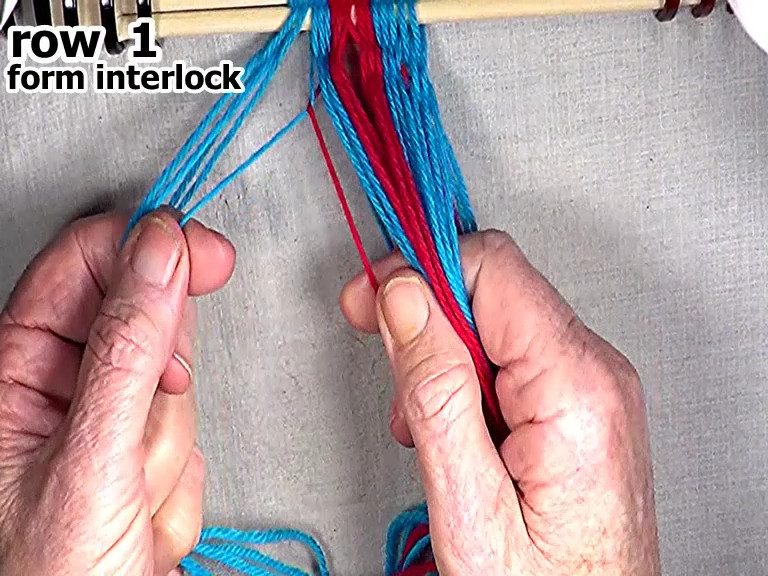
Form the interlock in the row 1 left hand side weft strand.
Place the weft strand in the top layer of the shed. The warp strand that was the 6th background warp strand becomes the next segment of the row 1 left side weft strand. |
[figure-14] [click here to see video]
![]() |
Previous | Next |
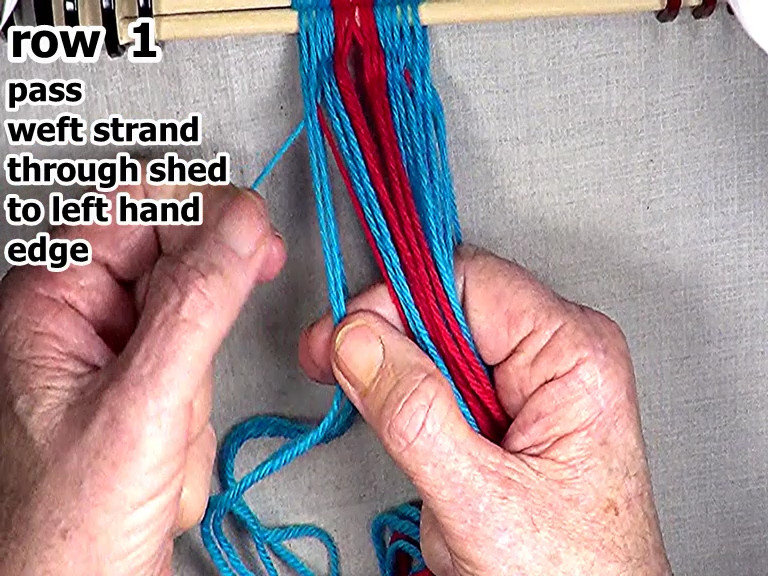
Pass the weft strand through the shed to the left hand edge of the work-piece. |
[figure-15] [click here to see video]
![]() |
Previous | Next |
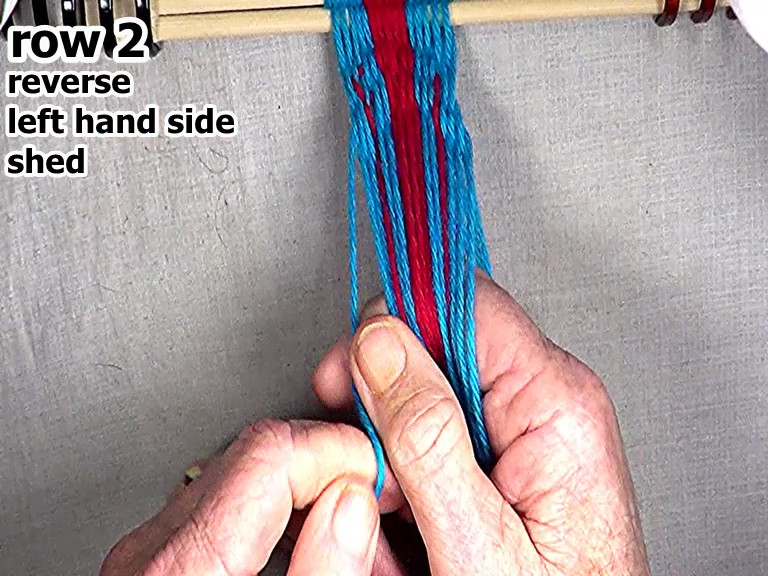
Secure the row 1 left hand side weft strand. |
[figure-16] [click here to see video]
![]() |
Previous | Next |
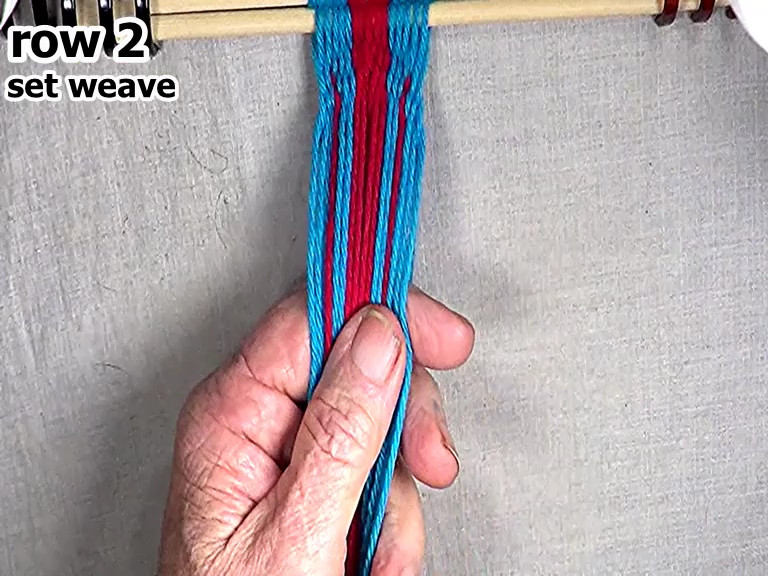
Transfer the left hand side shed to the left hand index finger. |
[figure-17] [click here to see video]
![]() |
Previous | Next |
Reverse the shed on the left hand side of row 1.
[NOTE] make sure that the over/under configuration is maintained. Keep the warp strands parallel. |
[figure-18] [click here to see video]
![]() |
Previous | Next |
Set the row 1 weave.
Check individual strands to see that they are snug and even. [TIP] Use index finger as a beater. |
[figure-19] [click here to see video]
![]() |
Previous | Next |
Find the middle of the work-piece.
[NOTE] The middle is the point where the row 1 weft strands cross. [NOTE]There are five arrowhead warp strands in the right hand side shed and 5 arrowhead warp strands in the left hand side shed. |
[figure-20] [click here to see video]
![]() |
Previous | Next |
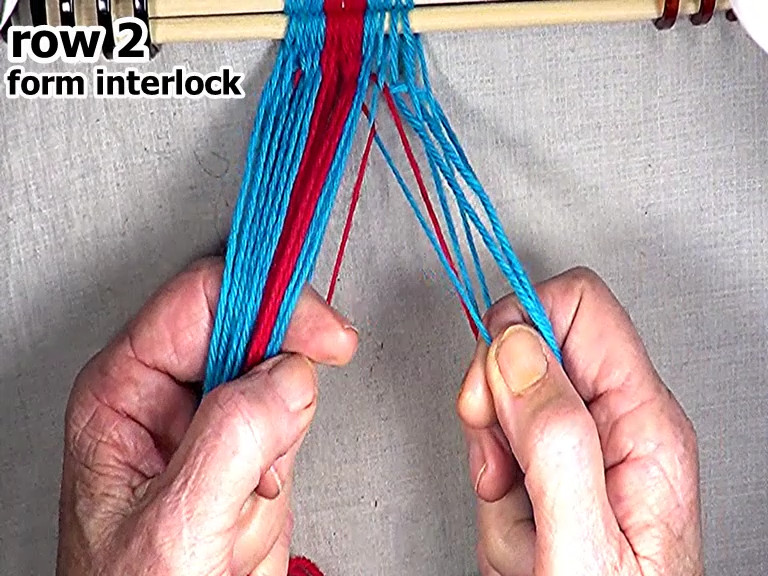
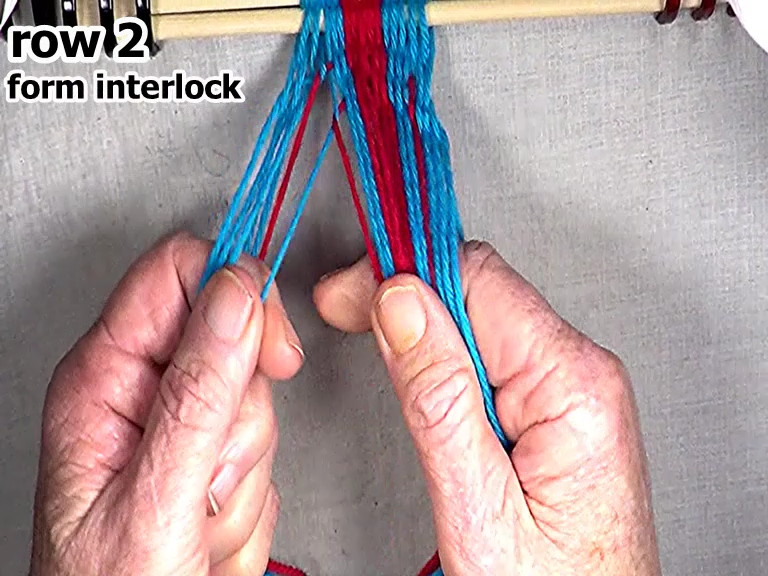
Select the row 2 right hand side weft strand.
|
[figure-21] [click here to see video]
![]() |
Previous | Next |
Pass the row 2 left hand side weft strand through the open shed to the interlock in row 1. |
[figure-22] [click here to see video]
![]() |
Previous | Next |
Form the row 2 right hand side weft strand interlock.
Place the weft strand in the top layer of the shed. When the weft strand is placed in the top layer of the shed the weft strand becomes a warp strand. The interlocked warp strand becomes the next part of the weft strand. |
[figure-23] [click here to see video]
![]() |
Previous | Next |
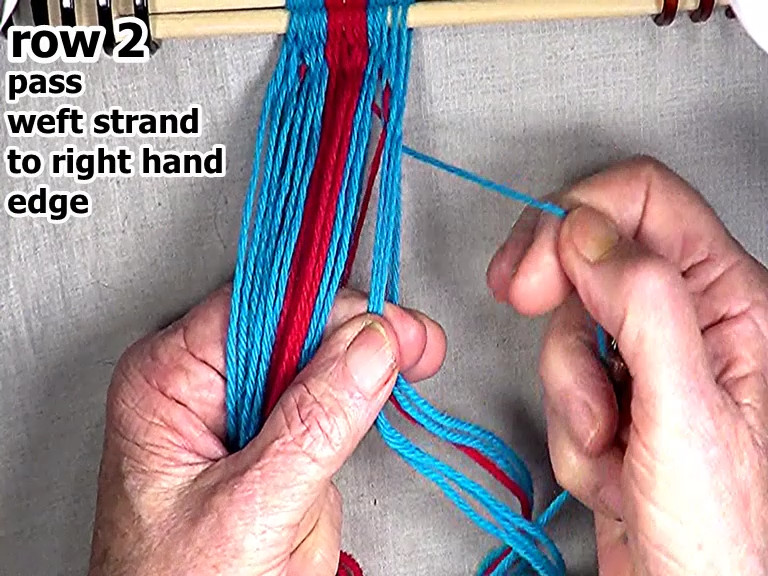
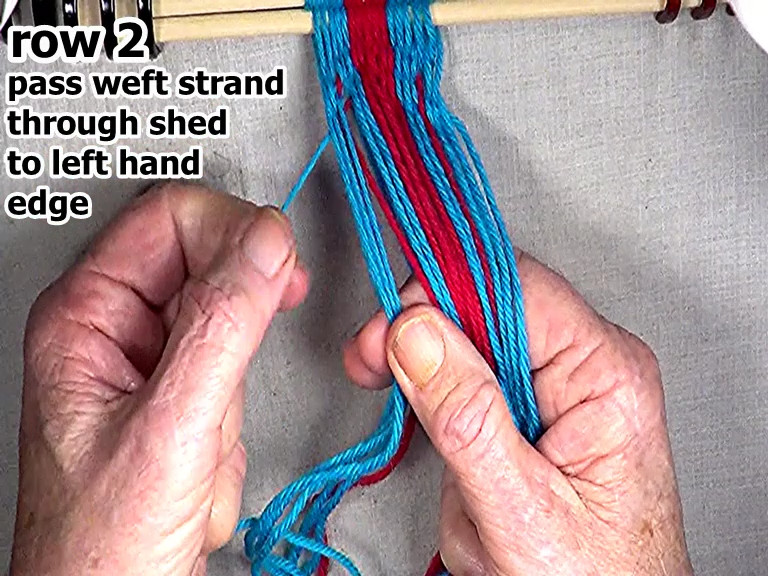
Pass the row 2 weft strand through the shed to the right hand edge of the work-piece. |
[figure-24] [click here to see video]
![]() |
Previous | Next |
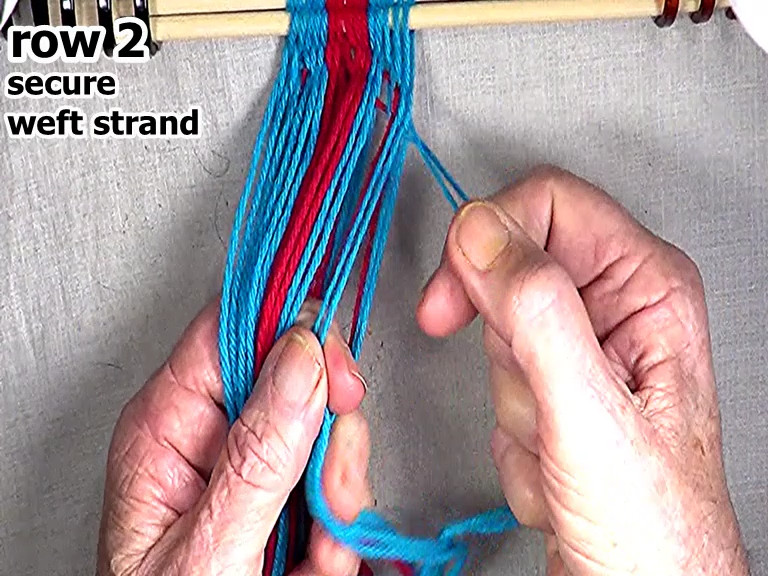
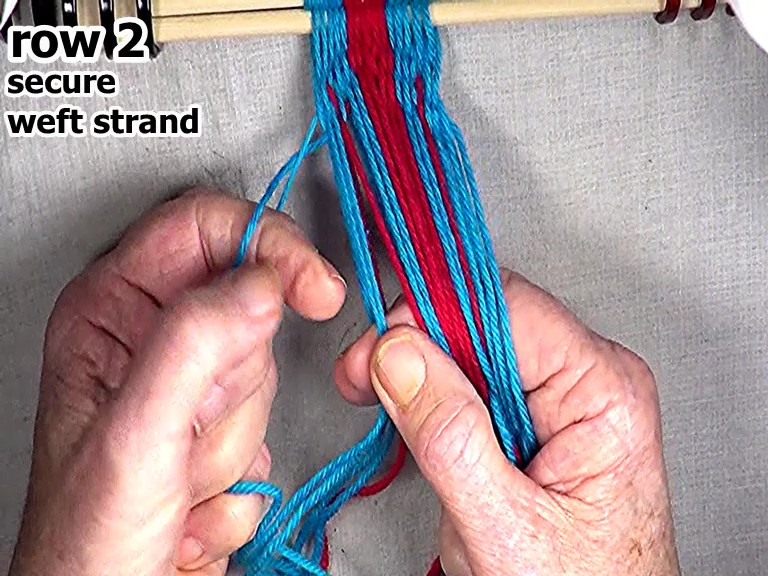
Secure the weft strand.
|
[figure-25] [click here to see video]
![]() |
Previous | Next |
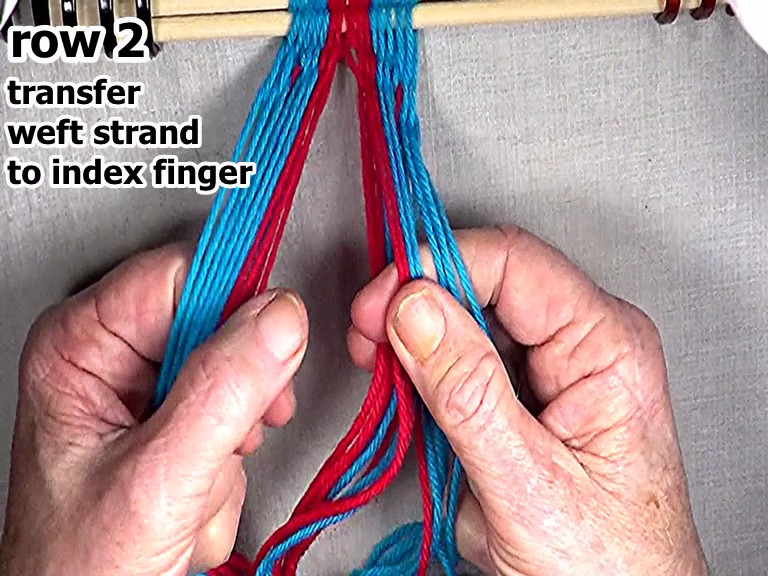
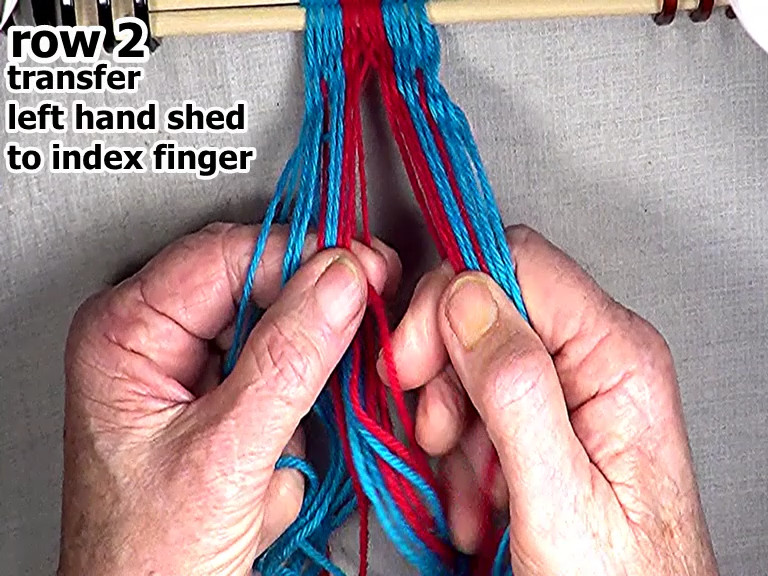
Transfer the right hand side shed to the right hand index finger. |
[figure-26] [click here to see video]
![]() |
Previous | Next |
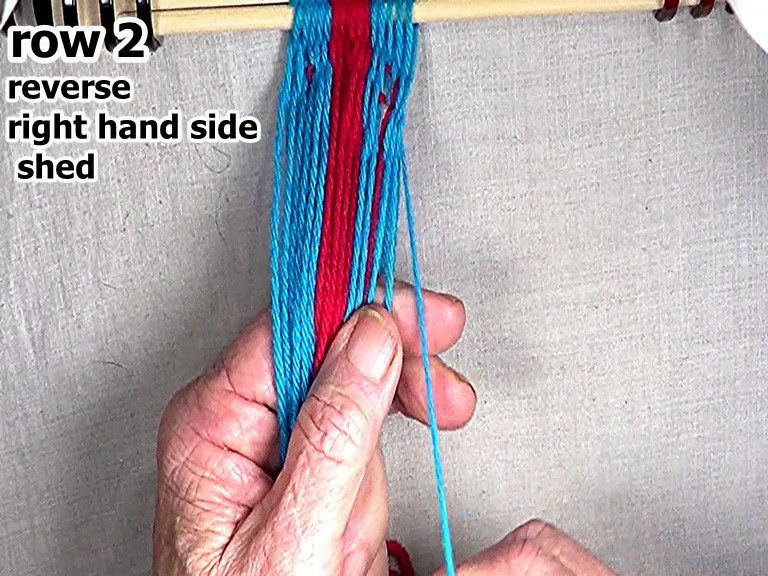
Reverse the shed on the right hand side of row 2.
Work from the middle to the right hand edge of the shed. |
[figure-27] [click here to see video]
![]() |
Previous | Next |
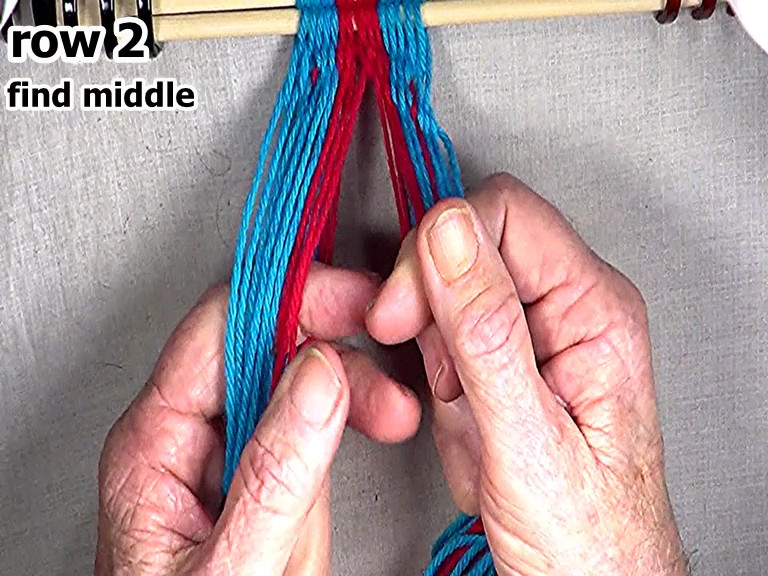
Find the middle of the work piece.
[NOTE]There are five arrowhead warp strands in the right hand side of the shed and 4 arrowhead warp strands in the left hand side of the shed. |
[figure-28] [click here to see video]
![]() |
Previous | Next |
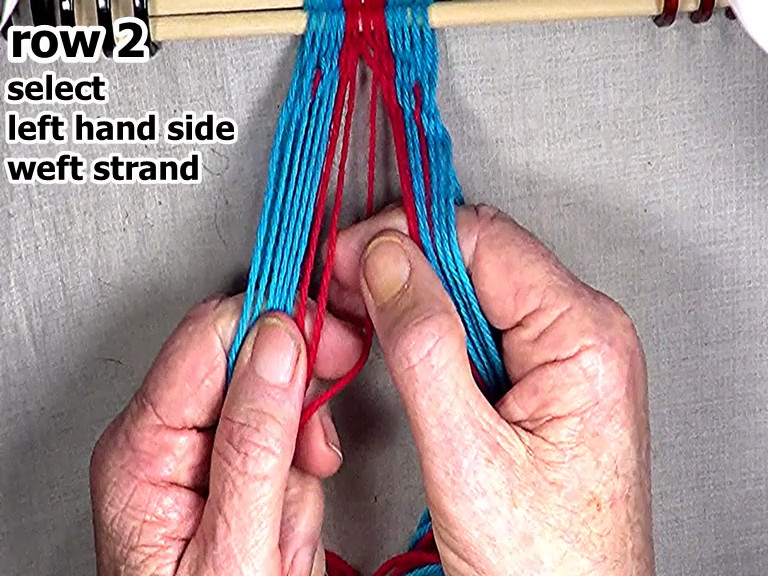
Select the left side row 2 weft strand.
|
[figure-29] [click here to see video]
![]() |
Previous | Next |
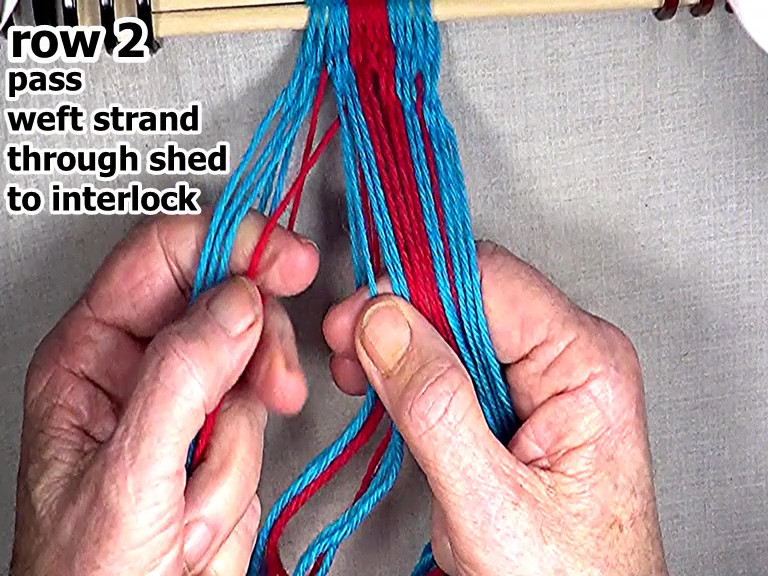
Pass the row 2 left hand side weft strand through the open shed to the row 1 interlock.
|
[figure-30] [click here to see video]
![]() |
Previous | Next |
Form the interlock on the left hand side of the row 2 weft strand.
Place the weft strand in the top layer of the shed. When the weft strand is placed in the top layer of the shed, the weft strand becomes a warp strand. The warp strand that was next to the first interlock becomes the next part of the left hand side weft strand. |
[figure-31] [click here to see video]
![]() |
Previous | Next |
Pass the row 2 left weft strand through the shed to the left hand edge of the work-piece.
|
[figure-32] [click here to see video]
![]() |
Previous | Next |
Then secure the row 2 left hand side weft strand.
|
[ [figure-33] [click here to see video]
![]() |
Previous | Next |
Transfer the left hand side shed to the left hand index finger. |
[figure-34] [click here to see video]
![]() |
Previous | Next |
Reverse the left hand side row 2 shed.
[NOTE] make sure that the over/under configuration is maintained. Keep the warp strands parallel. |
[figure-35] [click here to see video]
![]() |
Previous | Next |
Set the row 2 weave.
Check individual strands to see that they are snug and even. [TIP] Use index finger as a beater. |
[figure-36] [click here to see video]
![]() |
Previous | Next |
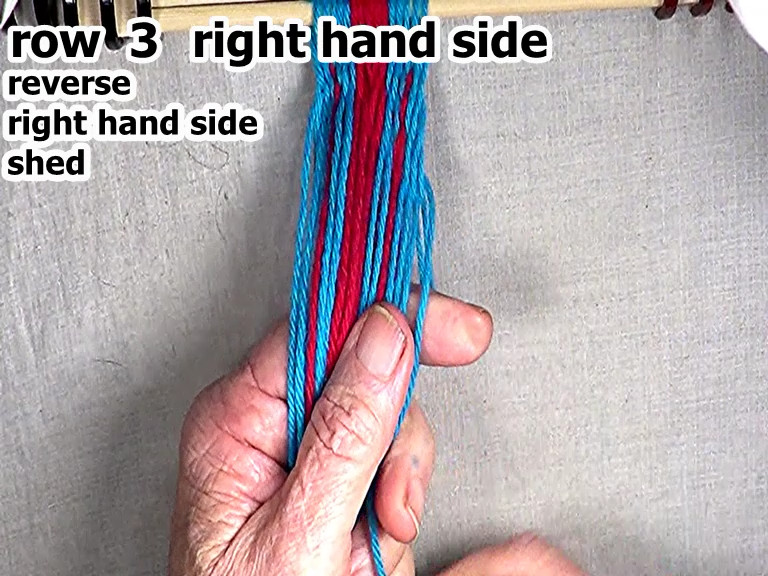
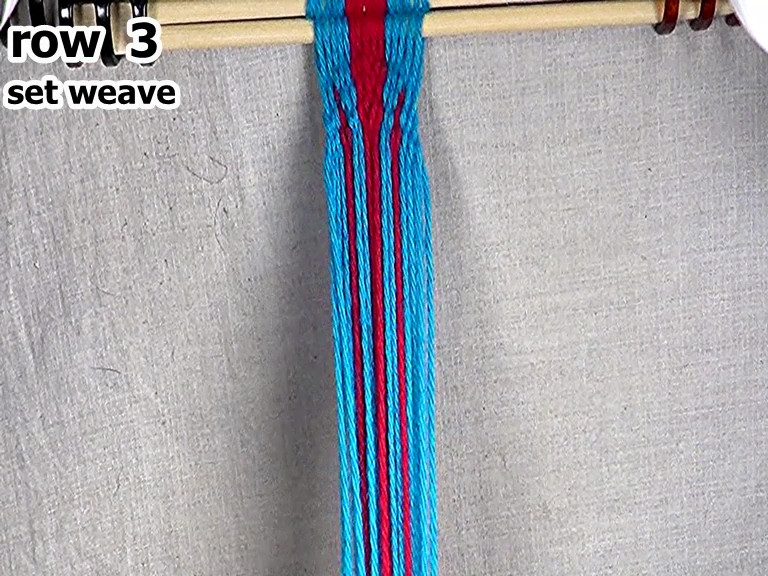
Weave the right hand side of row 3.
|
[figure-37] [click here to see video]
![]() |
Previous | Next |
Weave the left side of row 3.
|
[figure-38] [click here to see video]
![]() |
Previous | Next |
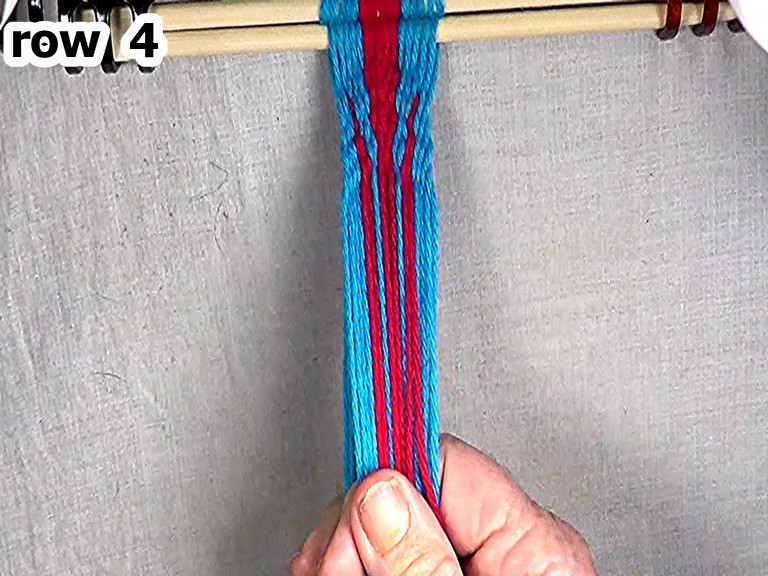
> Weave row 4. The same sequence of weaving steps are required as used for the weaving of row 3. |
[figure-39] [click here to see video]
![]() |
Previous | Next |
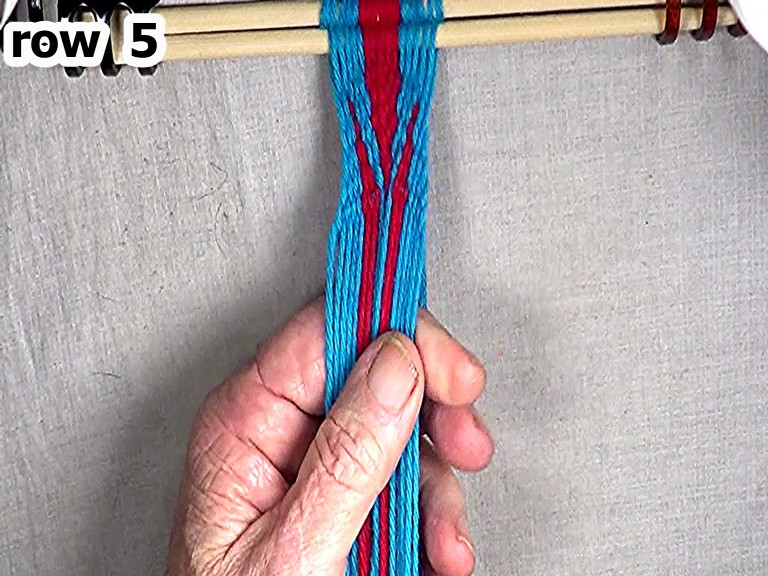
Weave row 5. The same sequence of weaving steps are required as used for the weaving of row 4. |
[figure-40] [click here to see video]
![]() |
Previous | Next |
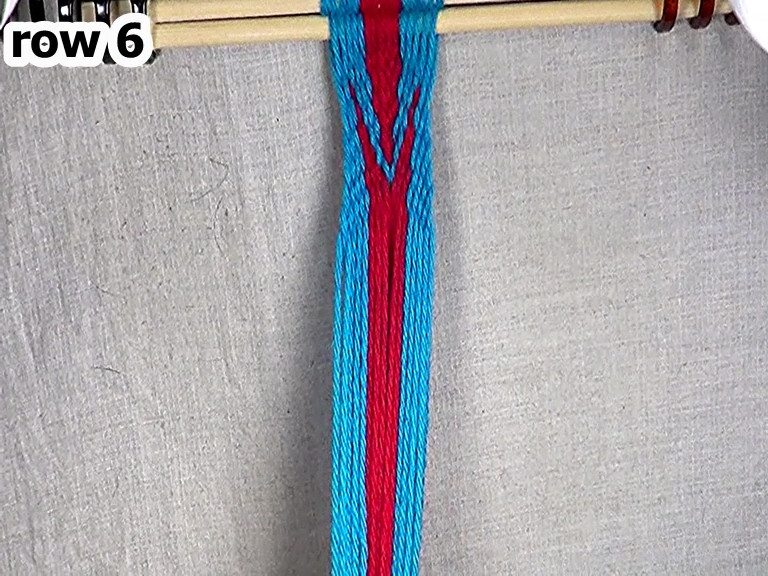
Row 6 requires the same sequence of weaving steps as used for the weaving of row 5.
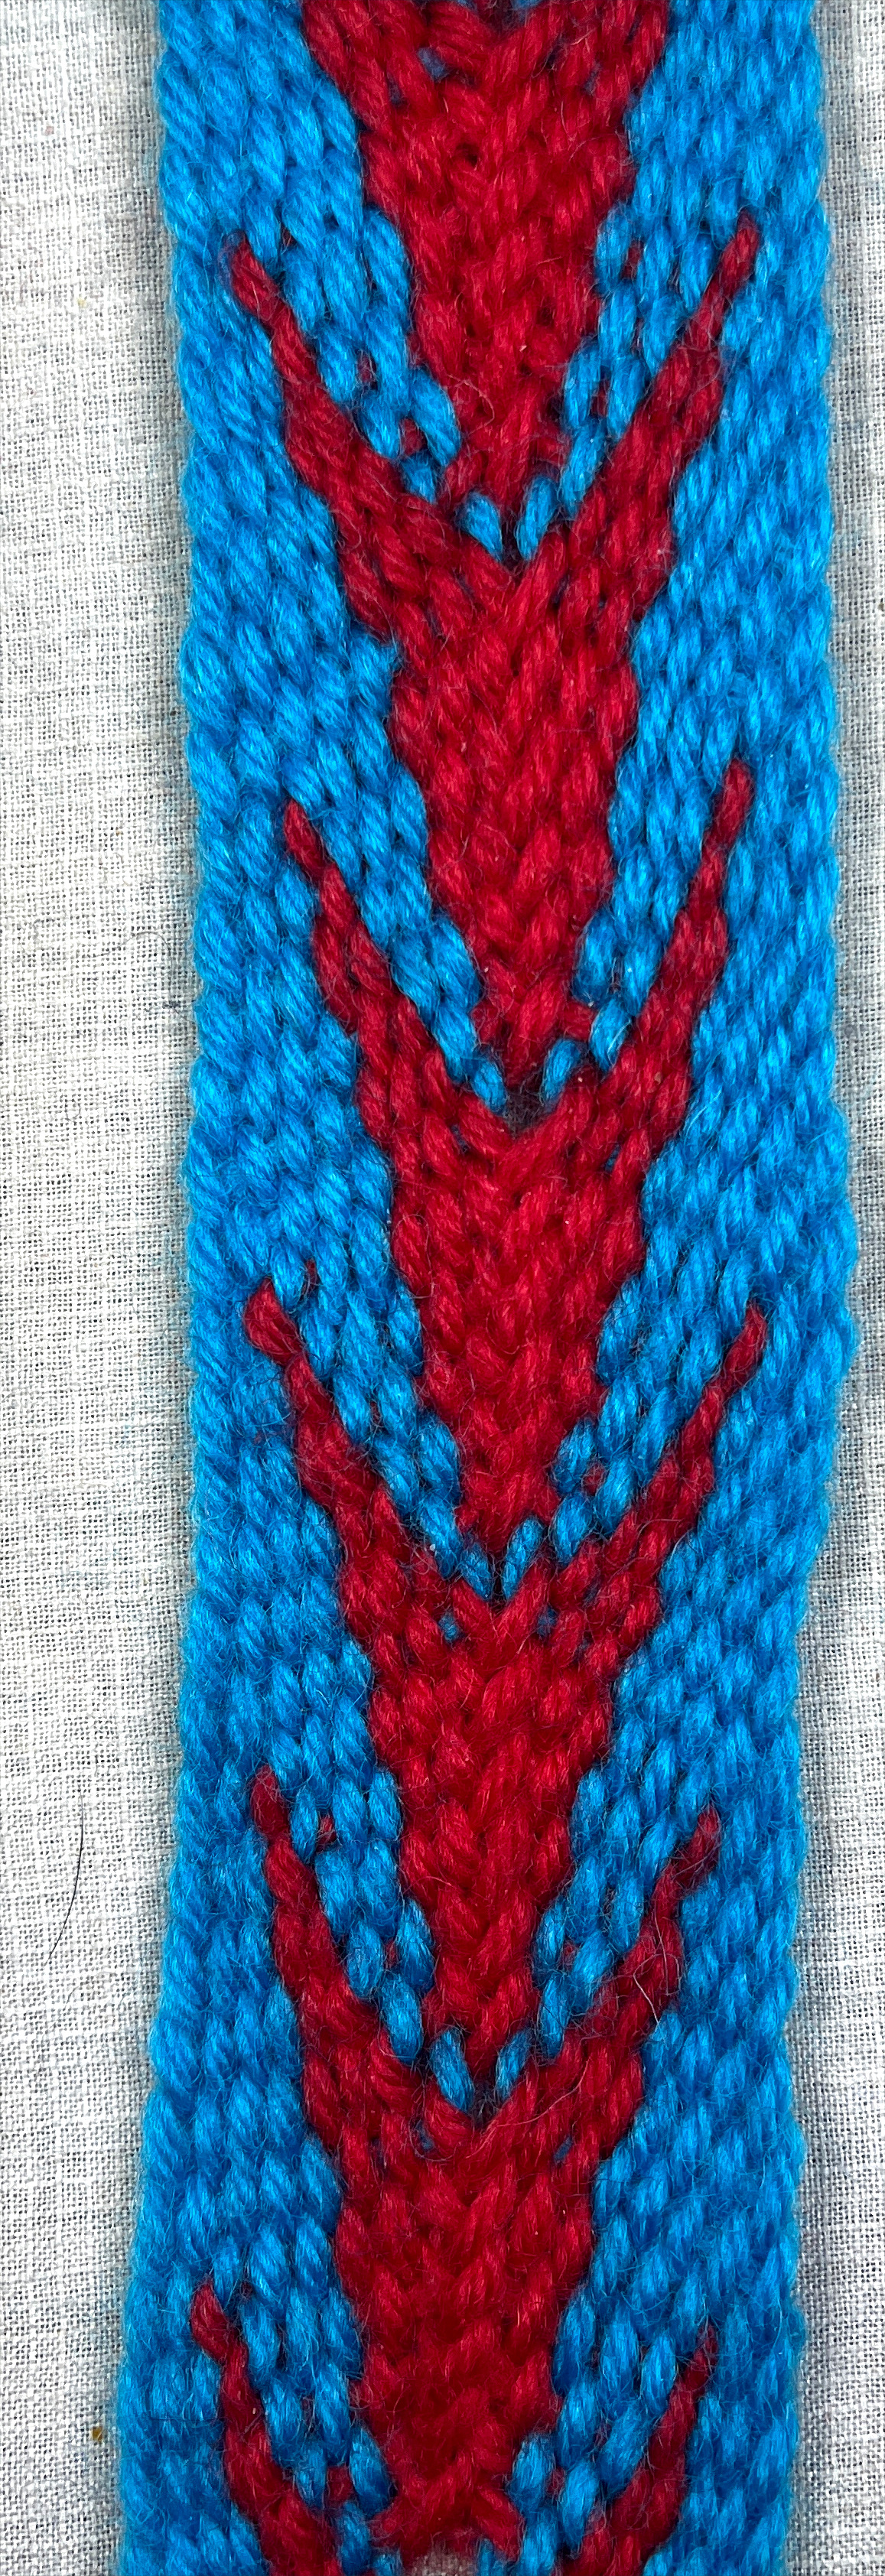
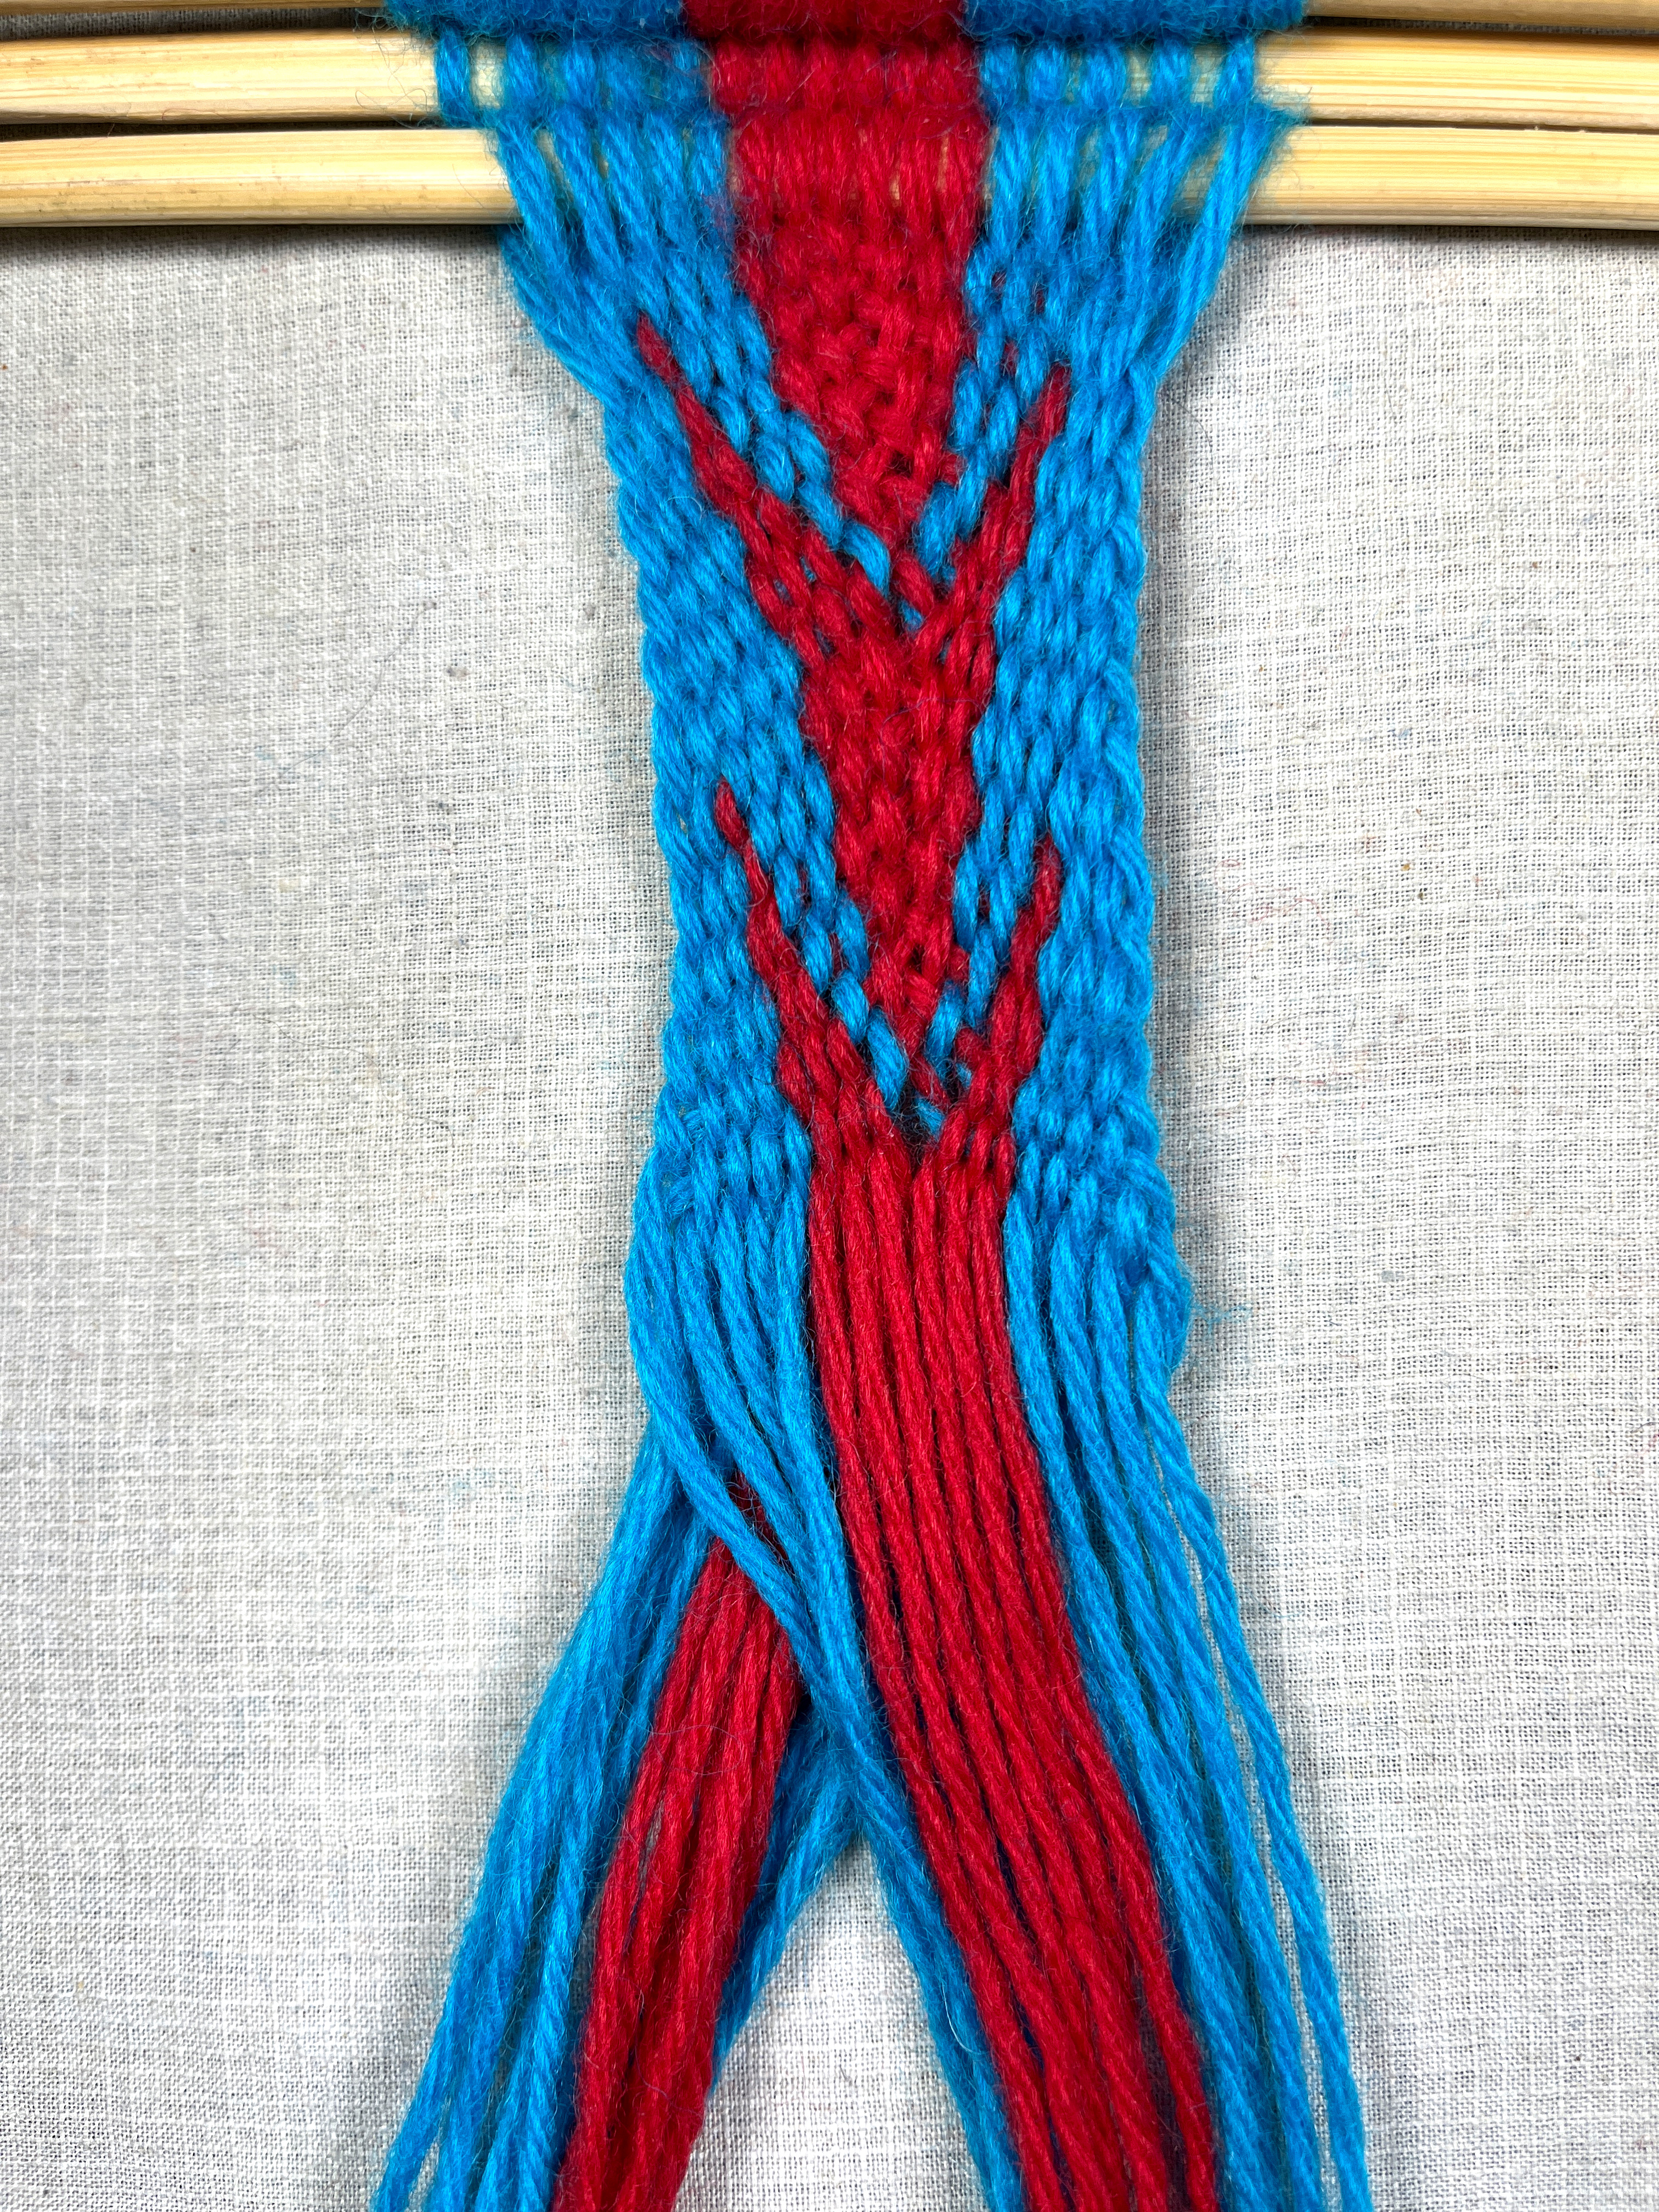
This completes the first segment of the arrowhead pattern. [OBSERVE] Each segment is composed of two parts of the arrowhead.
|
[figure-41] [click here to see video]
![]() |
Previous | Next |
Segment 2 of arrowhed pattern.
[NOTE] To produce a complete arrowhead designe, two segments of the basic patter are required. Continue adding segments untill the work-piece is the desired length |
![]() |
Previous | Next |
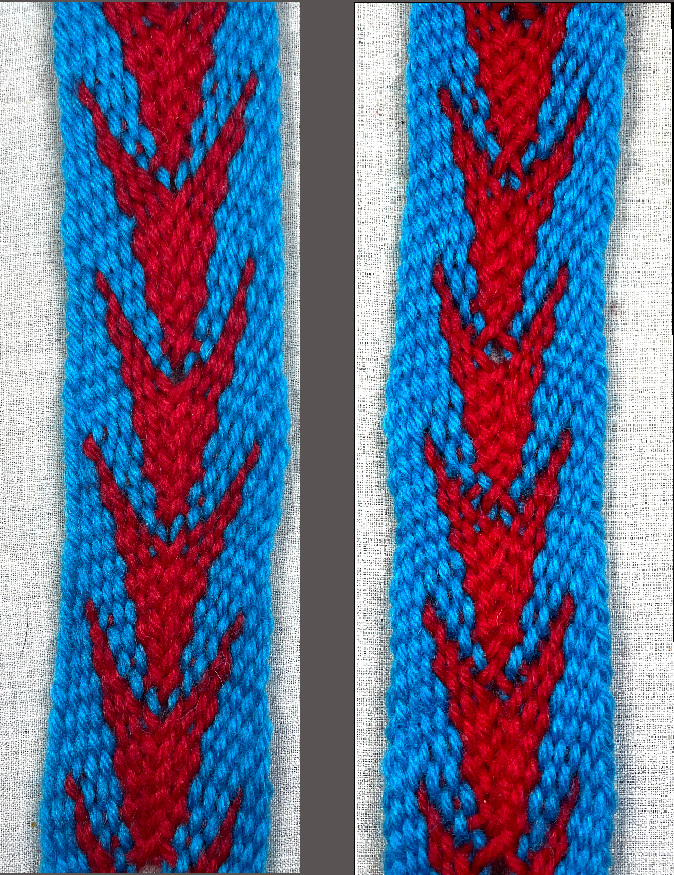
[NOTE] The arrowhead pattern that has the two middle warp strands in the same layer of the shed produces a pattern that has a front and a back.
Figure 42 and 43 are the front and back of this arrowhead pattern.
Figure 43 is the back of the pattern. This can also be the result of the headstick being set up so that the middle warp strands are in the top layer of the shed.
|
front -------------- back ![]() |
Previous | Top of Page |
|