|
[2 color][worked right to left ] |
|
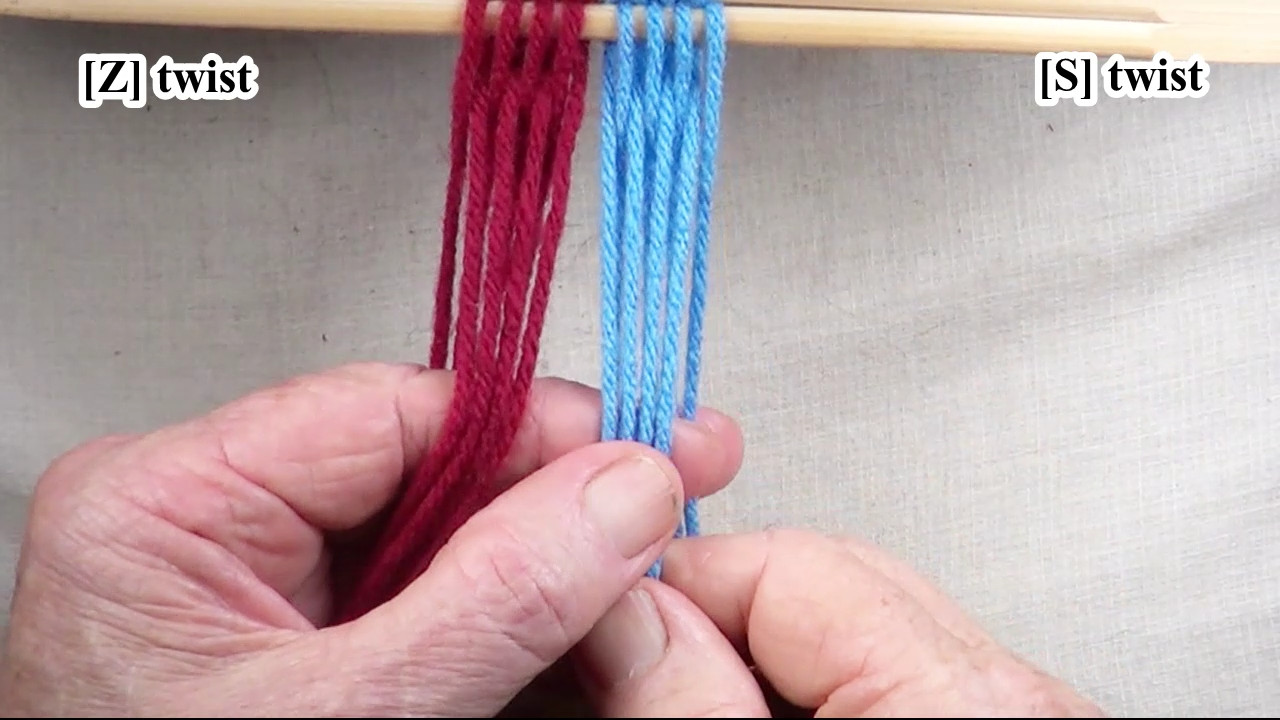
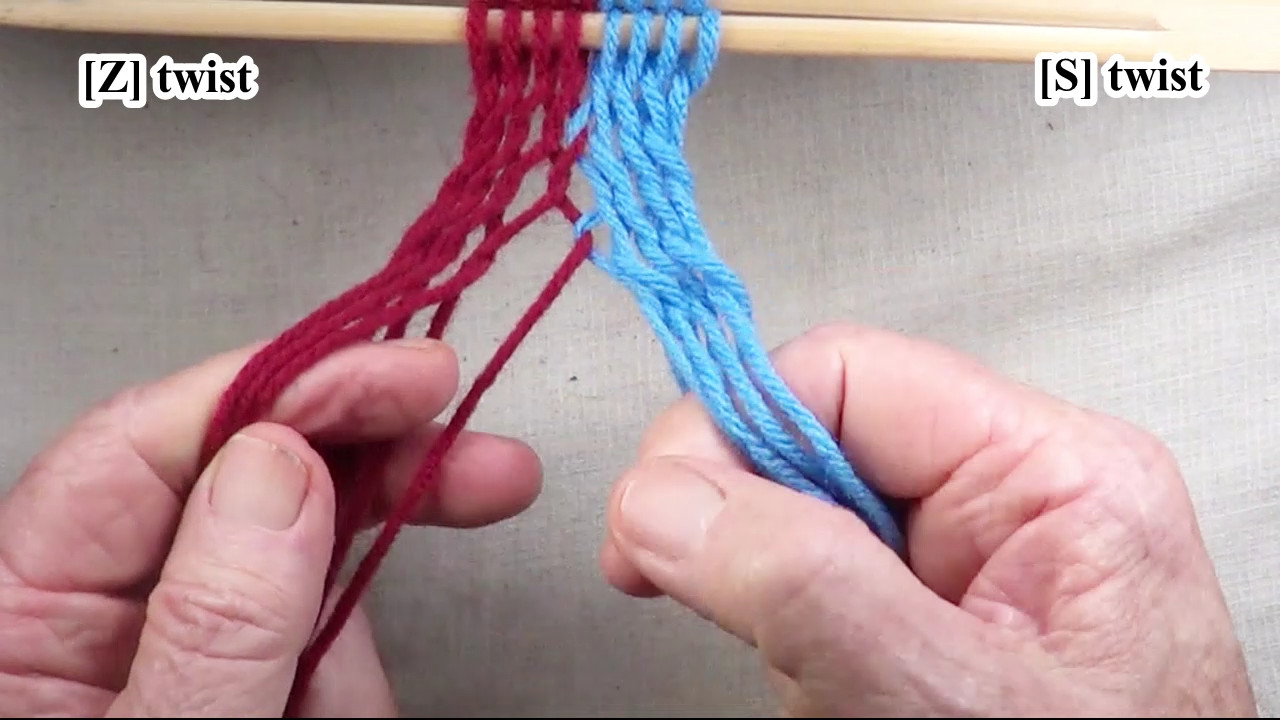
Headstick Set Up This part of the [Z-S] twist interlinked fingerweaving tutorial will be worked from the right hand side of the workpiece to the left hand side of the workpiece. The shed is picked up on the index finger of the left hand. The bottom layer of the shed is under the index finger. The top layer of the shed is over the index finger. The left hand side of the shed will be worked as [Z] twist free end interlinked fingerweaving. The right hand side of the shed will be worked as [S] twist free end interlinked fingerweaving. [NOTE] The headstick is set up so that the first strand on the both the left and right hand side of the workpiece is in the bottom layer of the shed. |
[figure-1]

|
| Go to: Top of page | Next |
|
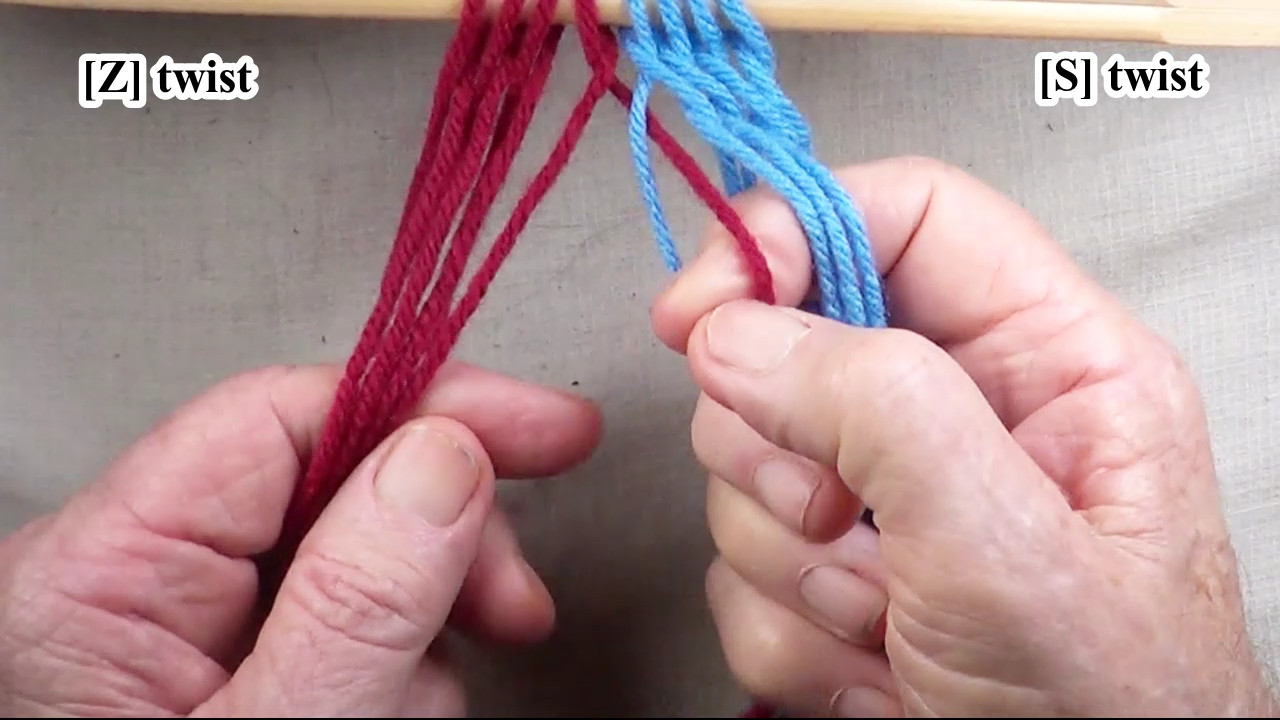
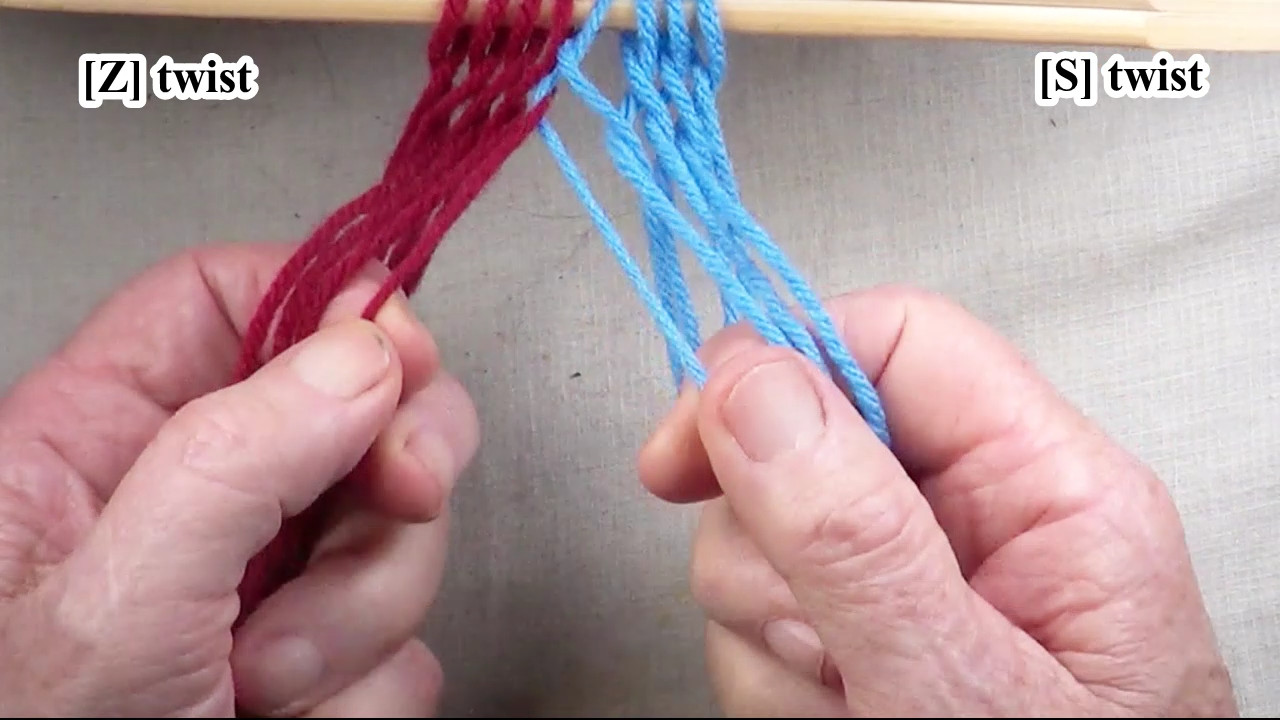
First Pass
Seperate the [Z] and [S] twist strands. [OBSERVE] The last [S] twist and the first [Z] twist strands are in the top shed layer. |
[figure-2]
[click here to see video]
|
| Next |
|
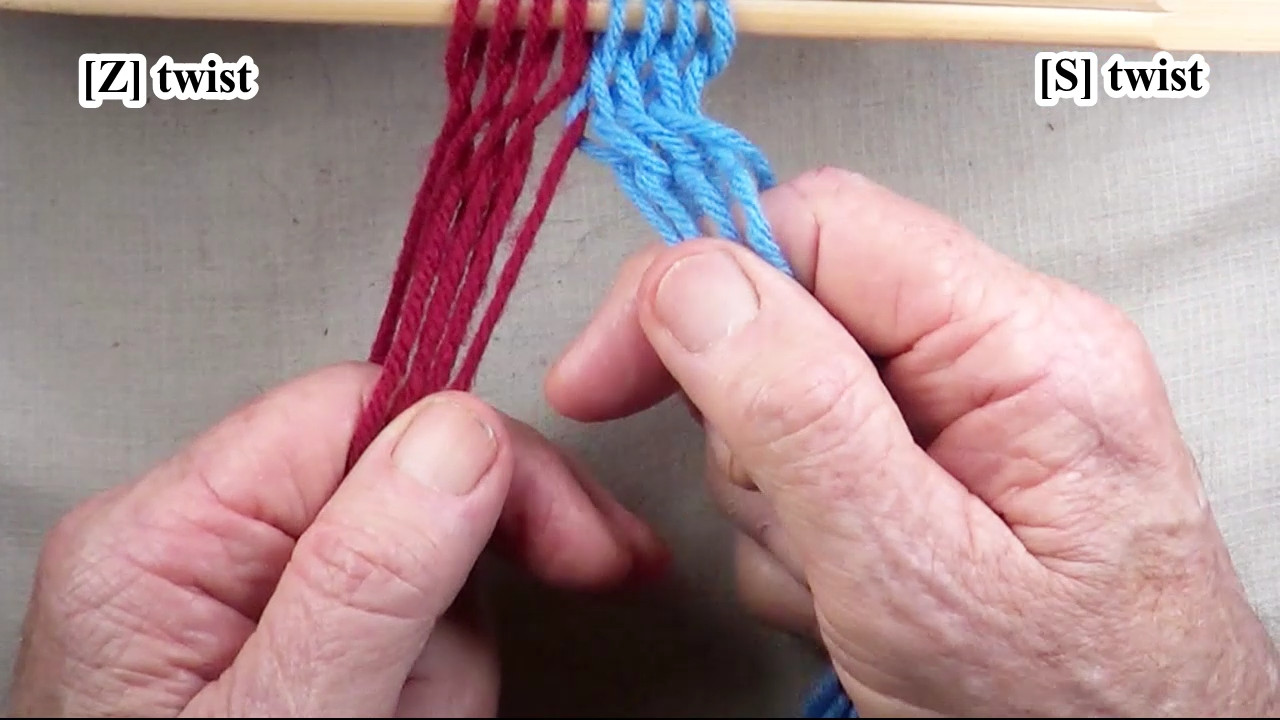
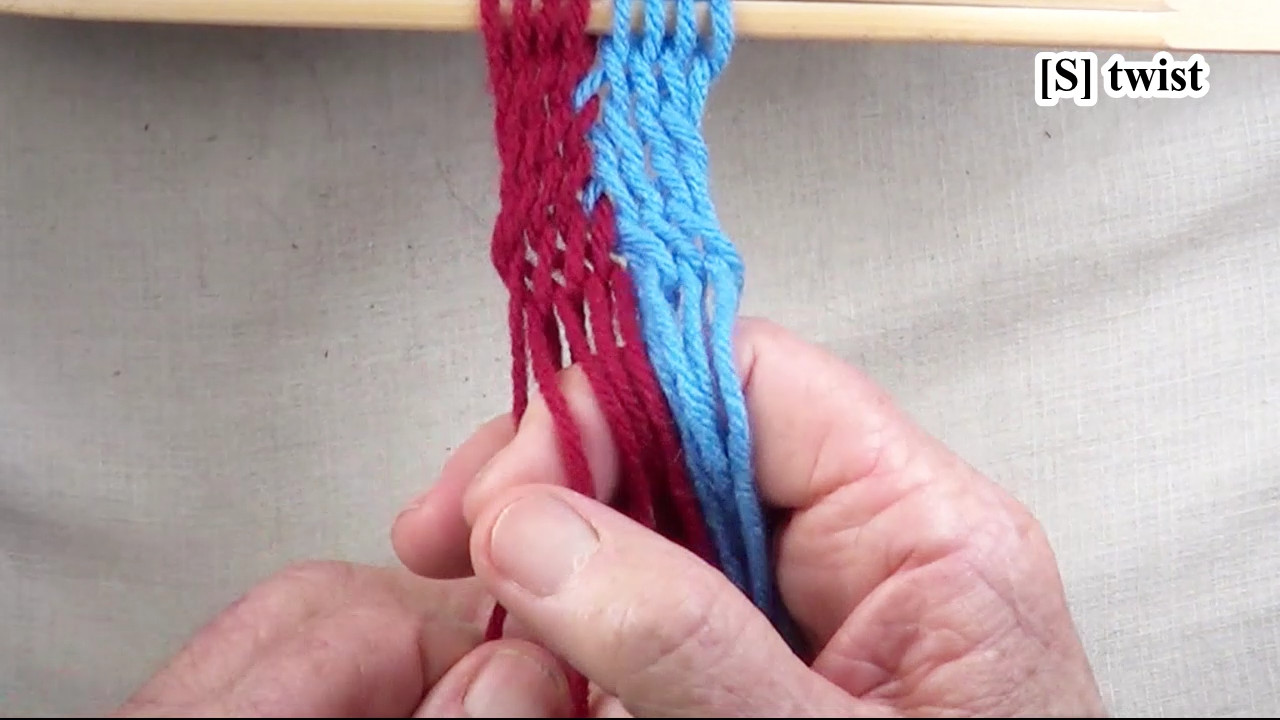
First Pass
Start the weaving [S] twist side. Stop when there is one [S] twist strand remaining. |
[figure-3]
[click here to see video]

|
| Previous | Next |
|
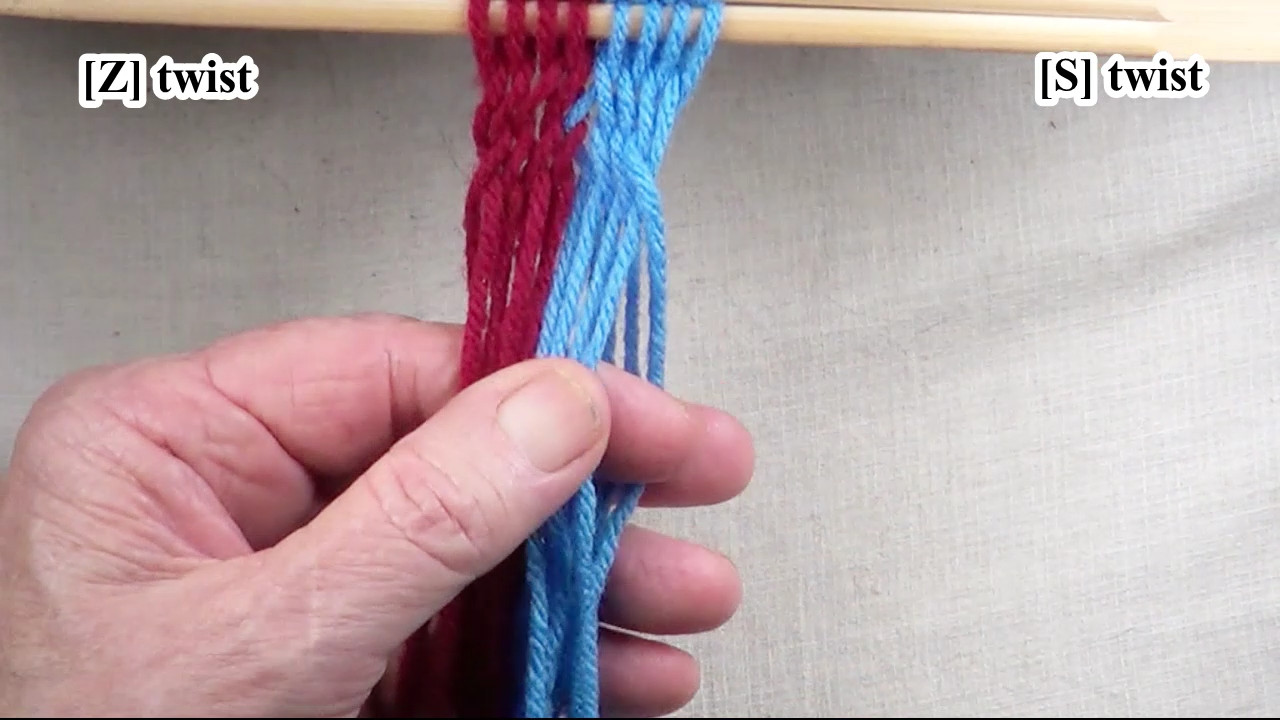
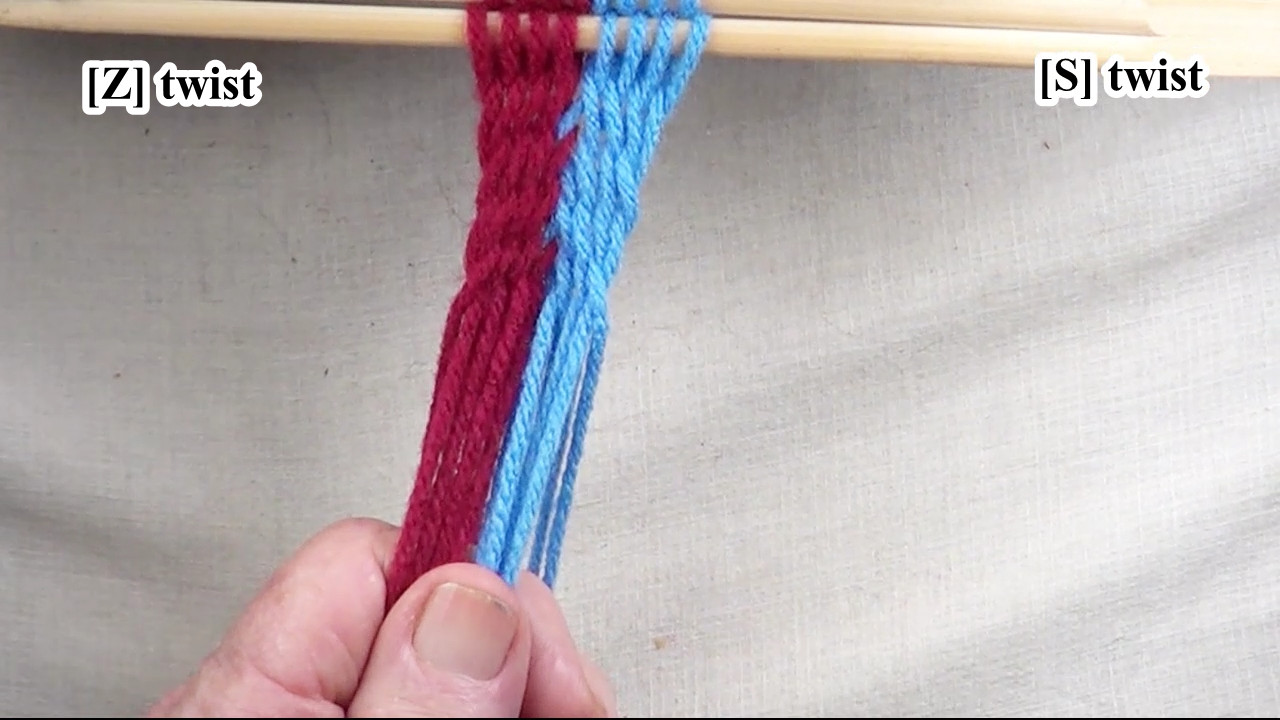
First Pass
Start the [Z] twist side weaving. Place the first bottom shed layer [z] twist under the last [S] twist strand. |
[figure-4]
[click here to see video]
|
| Previous | Next |
|
First Pass
Finish weaving the [Z] twist side. |
[figure-5]
[click here to see video]
|
| Previous | Next |
|
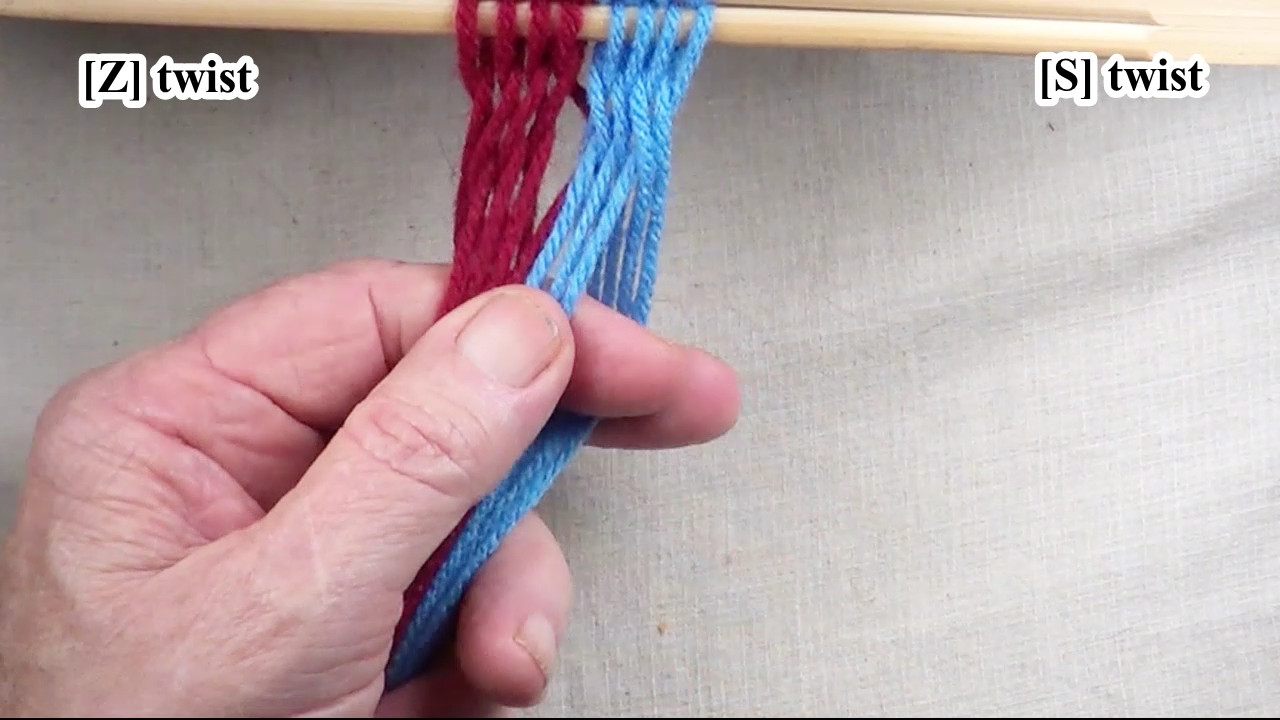
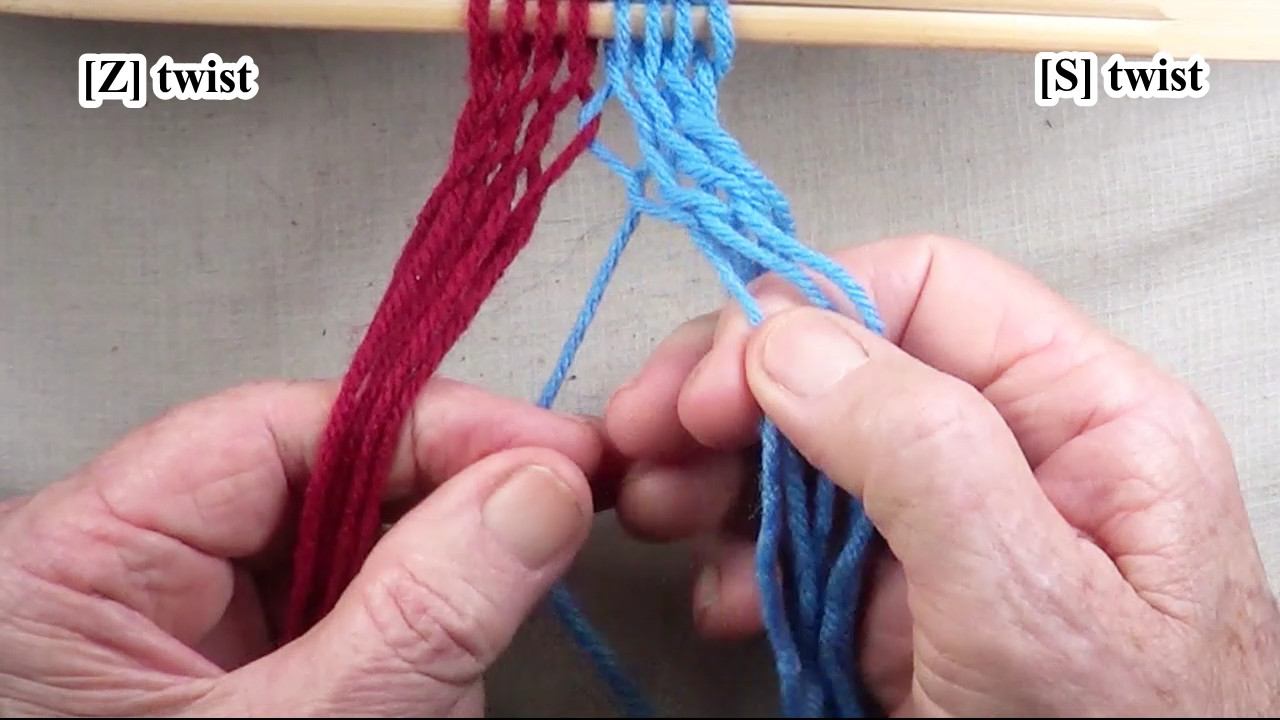
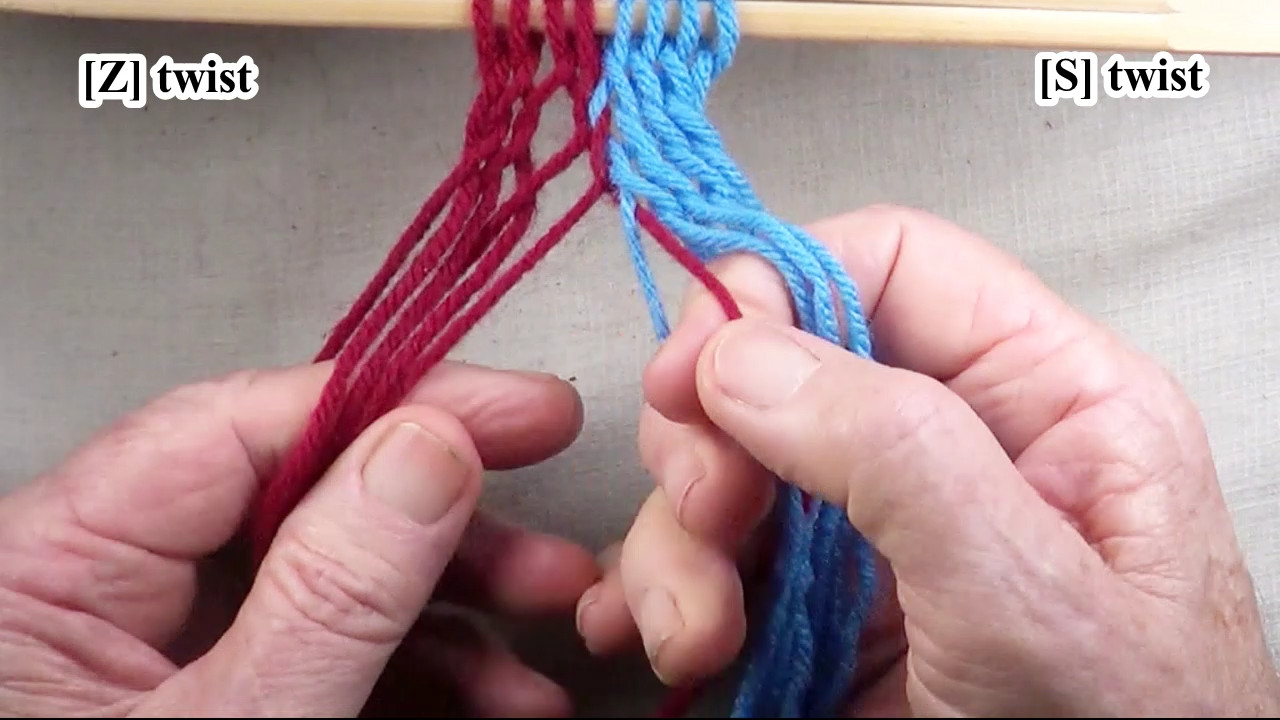
Second Pass
Seperate the [Z] twist and the [S] twist sides. Find the cross point of the first [Z] twist and the last [S] twist. |
[figure-6]
[click here to see video]
|
| Previous | Next |
|
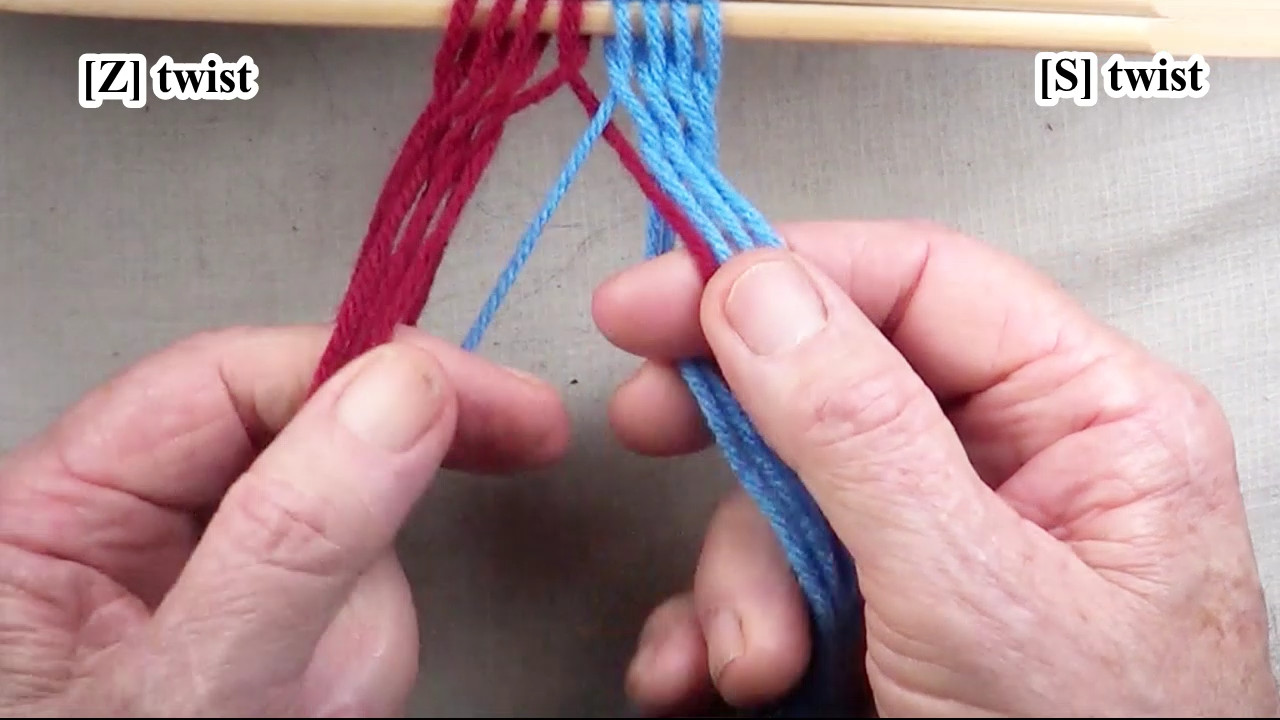
Second Pass
Interlock the first [Z] twist and the last [S] twist. |
[figure-7]
[click here to see video]
|
| Previous | Next |
|
Second Pass
Weave the [S] twist side. |
[figure-8]
[click here to see video]
|
| Previous | Next |
|
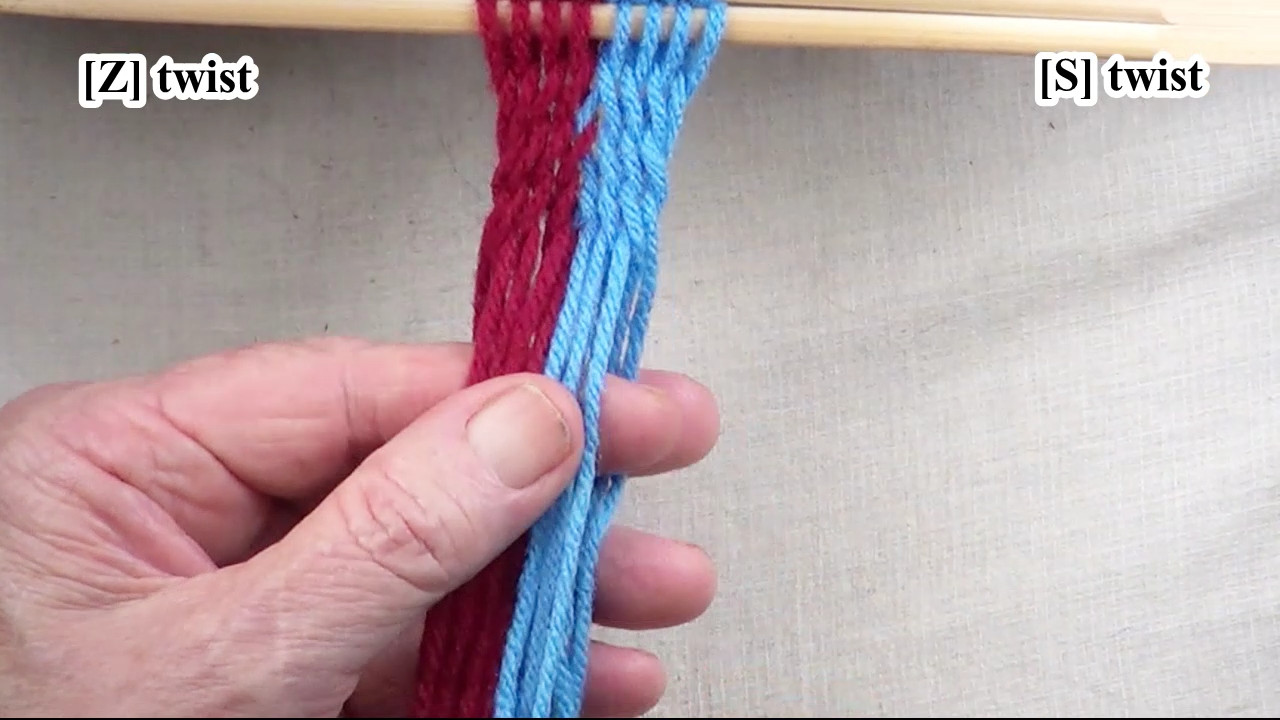
Second Pass
Weave the [Z] twist side. This completes the first set of weaving passes and returns the strand configuration to the headstick configuration. |
[figure-9]
[click here to see video]
|
| Previous | Next |
|
First Pass -- Second Section
Seperate the [Z] and [S] twist strands. [OBSERVE] The last [S] twist and the first [Z] twist strands are in the top shed layer. |
[figure-10]
[click here to see video]

|
| Previous | Next |
|
First Pass -- Second Section
Start the weaving [S] twist side. Stop when there is one [S] twist strand remaining. |
[figure-11]
[click here to see video]
|
| Previous | Next |
|
First Pass -- Second Section
Start the [Z] twist side weaving. Place the first bottom shed layer [z] twist under the last [S] twist strand. |
[figure-12]
[click here to see video]
|
| Previous | Next |
|
First Pass -- Second Section
Finish weaving the [Z] twist side. |
[figure-13]
[click here to see video]
|
| Previous | Next |
|
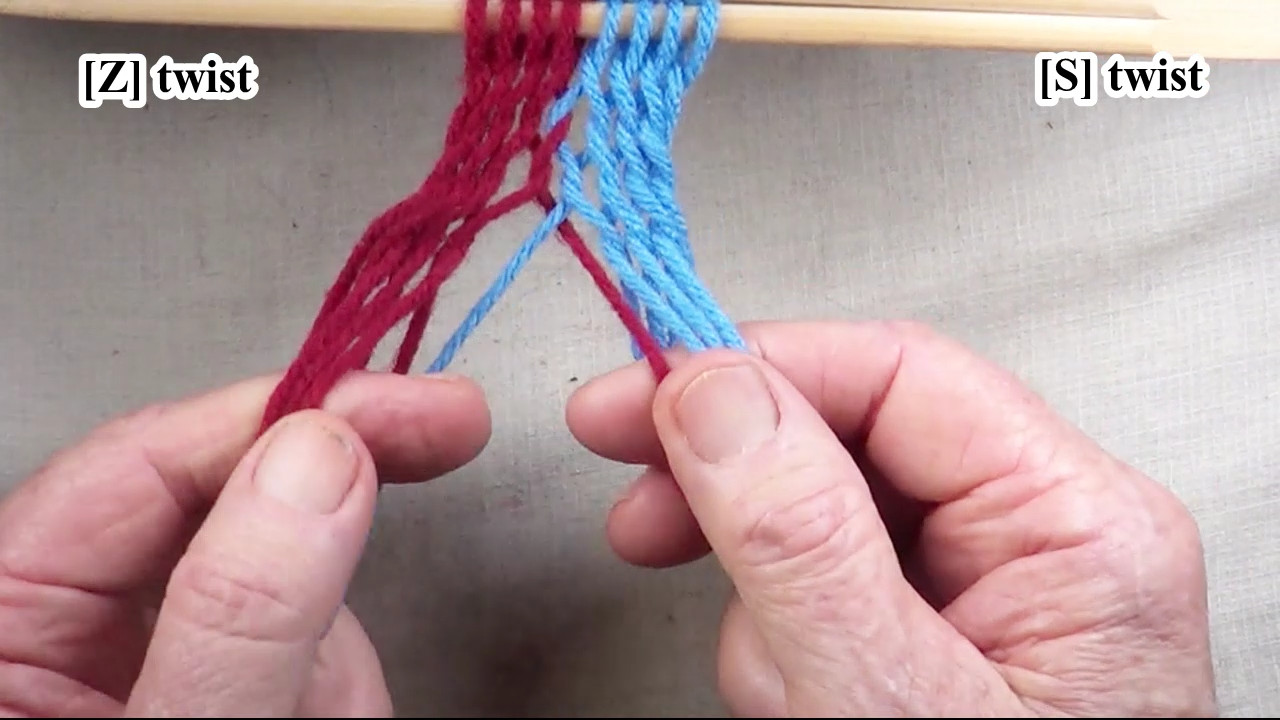
Second Pass -- Second Section
Seperate the [Z] twist and the [S] twist sides. Find the cross point of the first [Z] twist and the last [S] twist. |
[figure-14]
[click here to see video]
|
| Previous | Next |
|
Second Pass -- Second Section
Interlock the first [Z] twist and the last [S] twist. |
[figure-15]
[click here to see video]
|
| Previous | Next |
|
Second Pass -- Second Section
Weave the [S] twist side. |
[figure-16]
[click here to see video]
|
| Previous | Next |
|
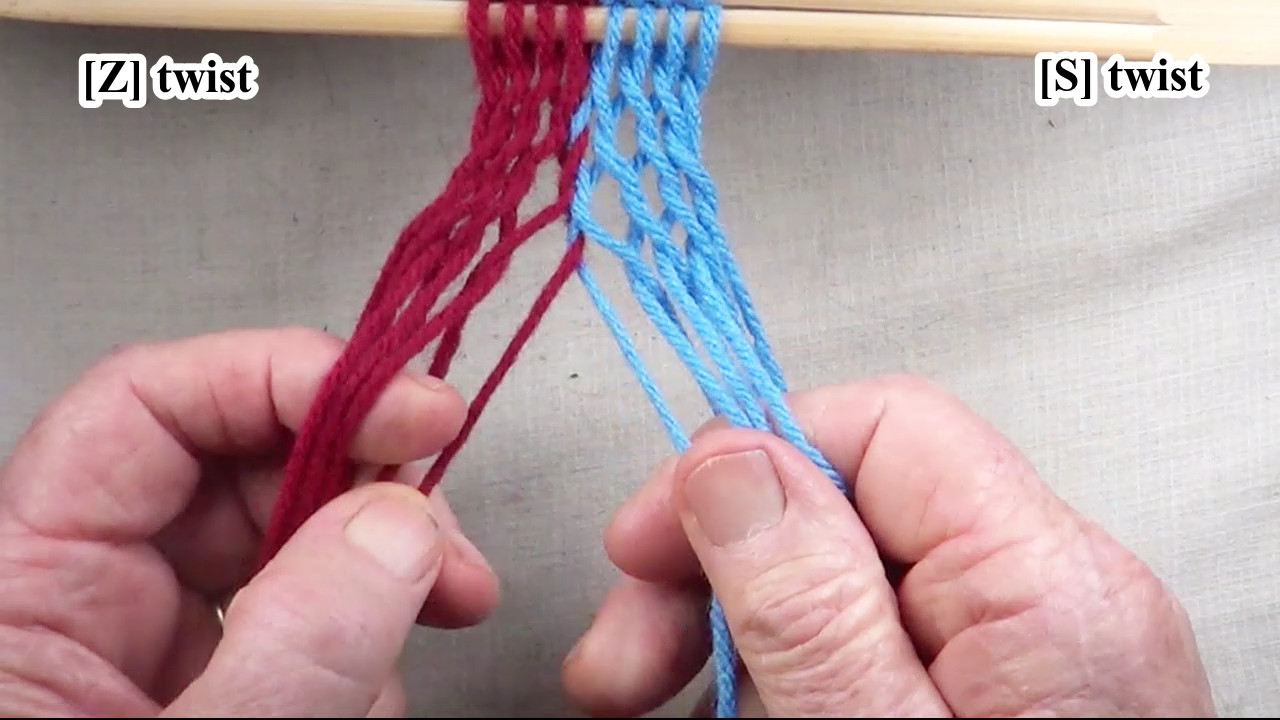
Second Pass -- Second Section
Weave the [Z] twist side. This completes the second set of weaving passes and returns the strand configuration to the headstick configuration. [OBSERVE] The last [S] twist and the first [Z] twist strands are in the top shed layer. |
[figure-17]
[click here to see video]
|
| Previous | Next |
|
Add Sections
Continue adding section until the workpiece is the desired length, |
[figure-18]
[click here to see video]
|
| Previous | Top of page |